Guide
How to Record Discord Audio
Free text and voice communication is one of the many benefits that come with using Discord, which is a wonderful platform that encourages members of different communities to interact with one another. Although Discord does not have a feature that allows you to record these chats, it is feasible to do so by utilizing third-party applications. Here are the steps:
It is important that you are aware, before you get started, that it is against the law in many parts of the world to record other people without first obtaining their permission. Before you utilize any of the approaches described in this article, you need to make sure that you have the authorization of everyone who is taking part in the discussion.
In order for you to communicate with other users of Discord, you will need to ensure that the settings for your microphone have been correctly configured on your computer. If you do not, you will not be able to communicate with the other people on your Discord server (or be able to record yourself chatting with other users).
Read Also: How To Add Rythm Bot To Discord
How to Record Discord Audio
Using the Craig Chat Bot to Record Discord Audio
You can use the Craig chat bot to effortlessly capture audio from your own personal Discord server if you are the administrator of that server. This bot is installed on your server and is waiting to be invited into voice chat rooms so that it can record conversations by following a few simple text commands.
There is also no need to worry about making immoral recordings because Craig will not record if there is not a visible label indicating when it is recording. Not only does it record your chat with other people, but it also records each user as a unique audio track. This makes it significantly simpler to edit the recording or exclude individual speakers if you feel the need to do so.
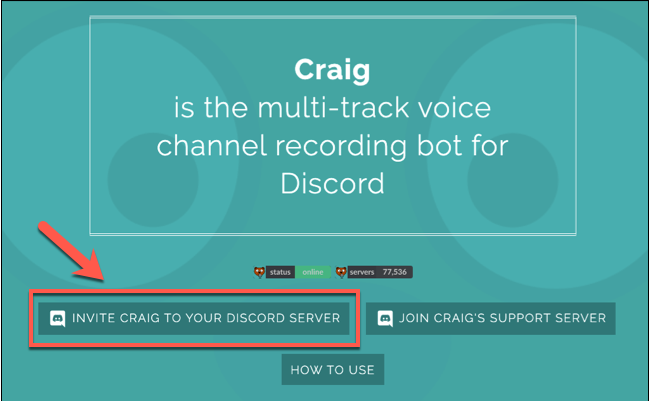
Before you can make use of Craig, you will initially be required to invite the bot to your server. To get started, go to the webpage for Craig and locate the link labelled “Invite Craig To Your Discord Server.” Click on that link.
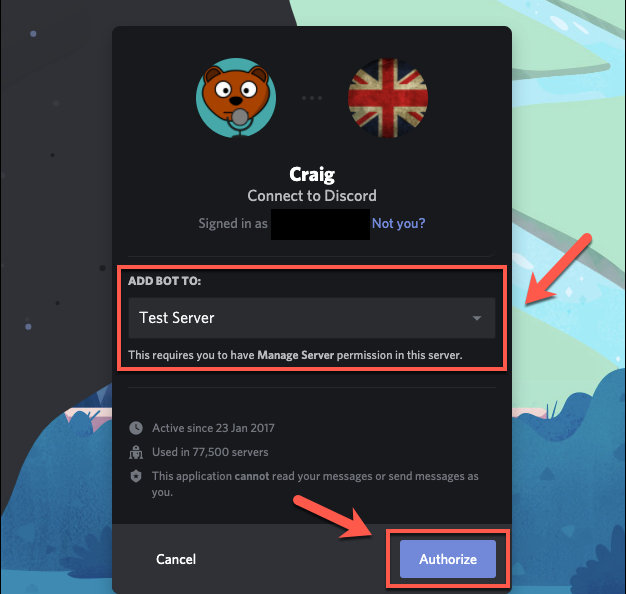
Following this link will take you to the website where you can authorize the Discord server. Before you can start making use of the server, you will first need to grant Craig access to connect to it.
To accomplish this, choose your server from the list labelled “Add Bot To,” and then click the “Authorize” button to grant permission for the bot to join.
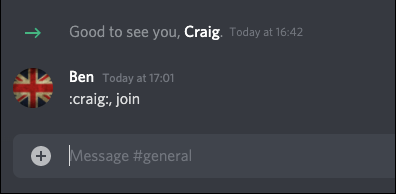
On the event that the procedure is completed without incident, the join message for “Craig” should appear in your server. There is no need for any additional setting at this point; you can immediately start using Craig to start recording your audio channels as it is ready to go.
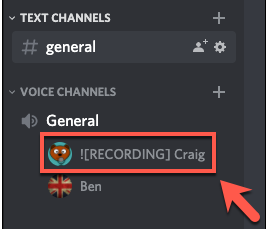
Enter an audio channel and then type “craig:” before clicking the “join to begin” button.
As soon as Craig enters the channel, the recording will get started right away; the username of the bot should be updated to reflect this. In addition, you will receive a verbal confirmation from the bot in the form of an audio alert that says “currently recording.”
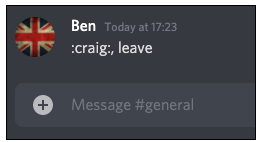
To stop a recording that Craig is making, write “craig:” and then leave the room. This will cause Craig to quit the channel you are now in and cease recording, although recordings in other channels will continue regardless of what you do with this command.
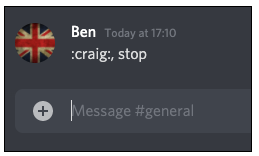
If you want to prevent Craig from recording any further channel activity, you can use the command type:craig:, stop to compel Craig to terminate all recording activity. If you are only recording in a single channel, you can use this as an alternative to the depart command to end a recording that you have been doing with Craig.
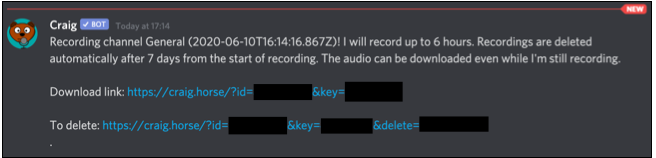
When you begin recording, you will receive a private message from the Craig bot itself. In this message, it will provide you with links to download or delete any conversations that you have already recorded.
Each recording session with Craig might last for up to six hours. You are able to get a copy of the audio up to the point that you download the file in order to check on the progress of a recording at any time up until that point.
You may rapidly access the whole list of Craig commands on the Craig website by entering “craig:, help” inside of a Discord channel. This will take you to the page that lists all of the Craig commands. This will bring up a fast link to the website, where you can learn more about the functionality of the bot and where it can be found.
Using OBS to Record Discord Audio
Even if you don’t own or moderate a Discord server, you can still record audio from the platform on your personal computer by utilizing Open Broadcaster Software (OBS). OBS is a free software application that may be used on Windows, Linux, and Mac computers. It is widely utilized by users who stream video games and other material on Twitch and YouTube.
OBS accomplishes this goal by recording multiple audio and visual channels, such as the audio and display of your desktop as well as your microphone. Together with the input from your microphone, you can utilize this capability to record the audio coming from a Discord channel, which will allow you to save the conversation you were having.
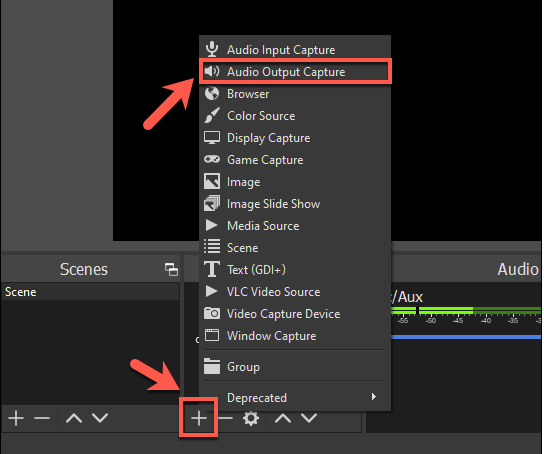
To record audio from Discord using OBS, click the addition sign (+) that is located in the “Sources” section of the OBS window. To capture the sound coming from your computer’s speakers, pick “Audio Output Capture” from the available menu options.
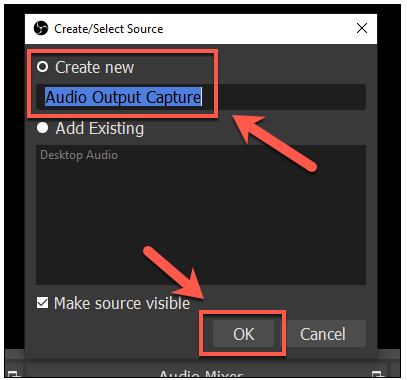
Give the audio source on your desktop a name within the “Create/Select Source” window, and then select “OK” to confirm your selection.
From the “Properties” option, you will have to choose the output device, which may be your speakers or your headphones, for example. Choose the right device from the “Device” drop-down option, and then confirm your selection by clicking the “OK” button.
If you only have one output device, selecting “Default” as your selection here should work just fine for you.

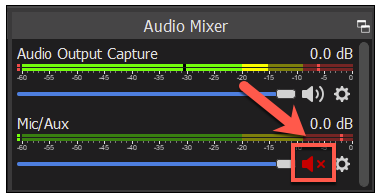
Playing some audio on your personal computer can allow you to determine whether or not the audio is being recorded appropriately. The audio sliders for the “Audio Output Capture” portion of OBS should move to indicate that the audio is being captured and is ready to be recorded. This section is located in the “Audio Mixer” section.
In the event that you need to lower the recording volume, you can do so by using the blue slider that is located underneath. It is recommended that “Mic/Aux” be displayed in the “Audio Mixer” section as the default setting. This will ensure that your own speech, along with the speech of any other participants in the discussion, is captured.
If you want to record the input from your microphone but the option isn’t available, click the addition sign (+) in the “Sources” box and then select “Audio Input Capture” from the drop-down menu that appears. Select the speaker symbol that is located next to the “Mic/Aux” or “Audio Input Capture” slider if you would prefer to prevent recordings from being made using your microphone.
To start a recording, select the “Controls” section in the bottom-right corner of the OBS window, and then click the “Start Recording” button that appears there.
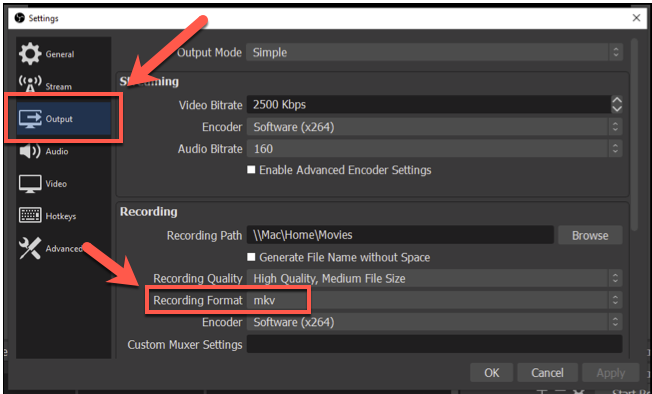
OBS will record the audio as a blank video file in the MKV file format by default (unless you are recording your desktop as an additional capture stream). This is the case even if you choose to record your desktop as an additional capture stream. Every recording that is stored will have a name for the file that includes the time and date that the recording was made.
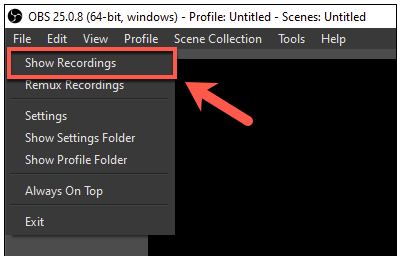
Choose File > Show Recordings from the OBS menu in order to view the files that you have recorded.
If you want to record in a format other than MKV, go to Settings > Output and then use the “Recording Format” drop-down option to choose a format other than MKV.
OBS will save the data as video files, however you may convert videos to MP3 with VLC. This will remove any unnecessary video content and provide you with an audio-only file that you can export and use in other applications.
Video

Vampire Crawlers Coin Farming Guide

Forza Horizon 6 Performance: Why 60 FPS Is Still the Console Standard

Yoshi and the Mysterious Book (2026) – Full Completion Guide, Rewards & Secret Ending

How to Get Free Pets in Adopt Me: A Guide for Players

Roblox Username Generator – Create a Cool & Unique Username in Seconds
How to Get Free Pets in Adopt Me: A Guide for Players
Yoshi and the Mysterious Book (2026) – Full Completion Guide, Rewards & Secret Ending
Forza Horizon 6 Performance: Why 60 FPS Is Still the Console Standard


