Apple
How To Record The Screen With OBS on Mac And Windows
OBS Studio is a sophisticated screen and streaming application that is easy to use. Beyond live streaming material, the open-source software may also be used to capture computer displays and record voice without any interruptions. The user-friendly interface has a wealth of customization options for high-quality films, all of which are simple to use.
It will be demonstrated in this tutorial how to record your screen as well as your audio using OBS Studio and save the file to your hard disc. Because the programme is compatible with a variety of operating systems, we have given step-by-step instructions for each of them in the documentation. Continue reading to find out more about this amazing free tool and the different screen capturing options it offers.
Read Also: How to Disable or Enable Windows 10’s Xbox Game Bar
How to Record the Screen With OBS
Because it is open-source software, OBS Studio is completely free to use and to download. As previously stated, the application is compatible with a variety of operating systems, including Windows, Linux, and the Mac OS X operating system. It’s a sophisticated tool with a large range of customizable choices to choose from. Additionally, OBS stores the recorded files in a folder of your choosing after they are finished.
However, the programme does not operate with all devices, which is the one significant drawback. If you wish to utilize OBS Studio for screen recording, you’ll be confined to your computer for the foreseeable future. Currently, there is no mobile version accessible for either iOS or Android smartphones, which is unfortunate. There is, nonetheless, a technique to get around these restrictions; however, more on that later.
Recording the Screen with OBS on Windows 10
If your computer is compatible with Windows 8 (including 8.1) or Windows 10, you’re fine to go. It is possible to obtain the relevant software version by visiting the company’s website. Keep in mind that you’ll be asked whether you’ll be using OBS for broadcasting or screen recording throughout the installation process, so be prepared to answer that question.
Once you’ve downloaded it to your computer, you’ll need to follow these steps to record your screen:
1. Open the OBS Studio application. Typically, when the app is first used, it will automatically create a Scene. If this is the case, click on the Add symbol in the Scenes box in the bottom-left corner of the screen.
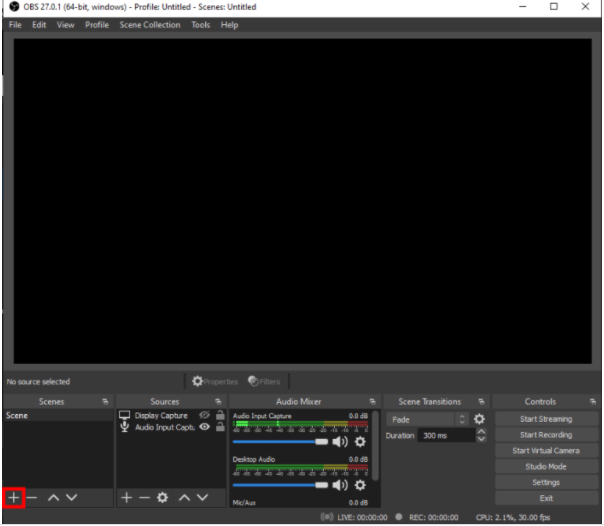
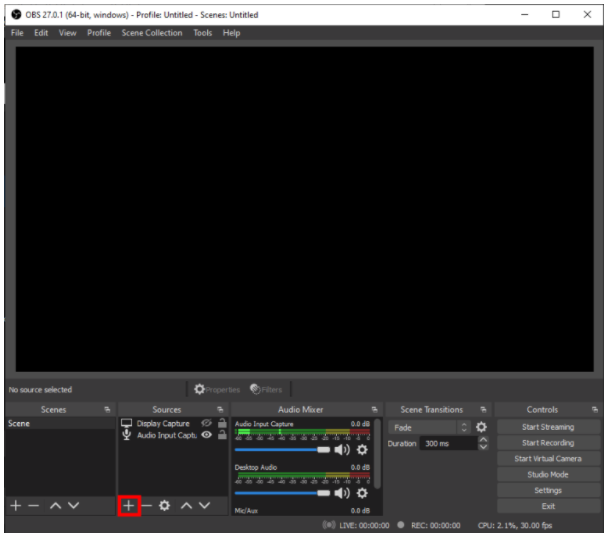
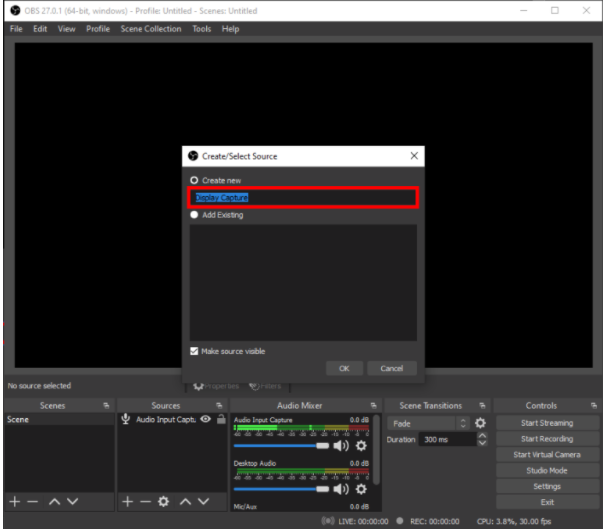
2. Navigate to the Sources box, which is directly adjacent to the Scenes box, and click the Plus icon at the bottom of the panel to add more sources.
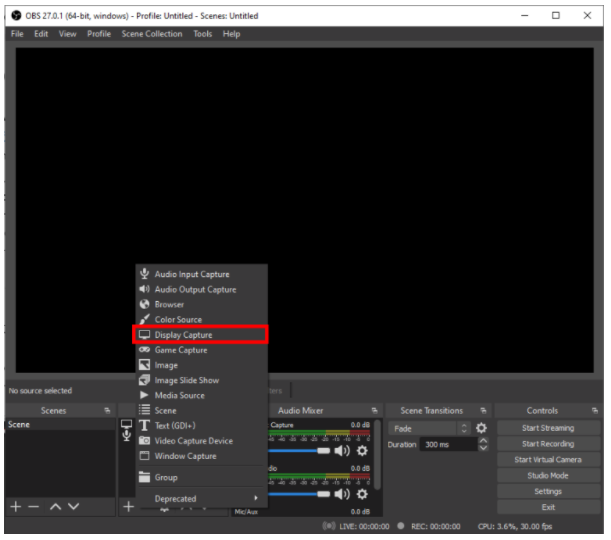
3. Select Display Capture from the settings menu at this point.
4. A tiny pop-up box will open; fill up the blanks with a title and then click OK.
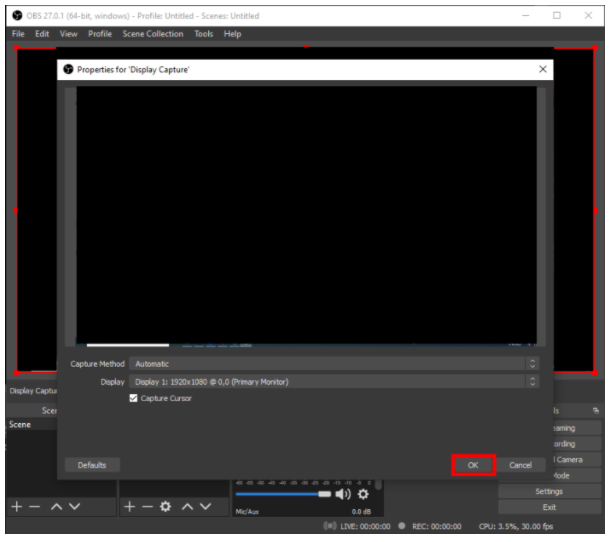
5. A new pop-up window will emerge. If you have more than one monitor, you may access a drop-down list by clicking on the small downward arrow. Select the display you’d like to capture and press the OK button.
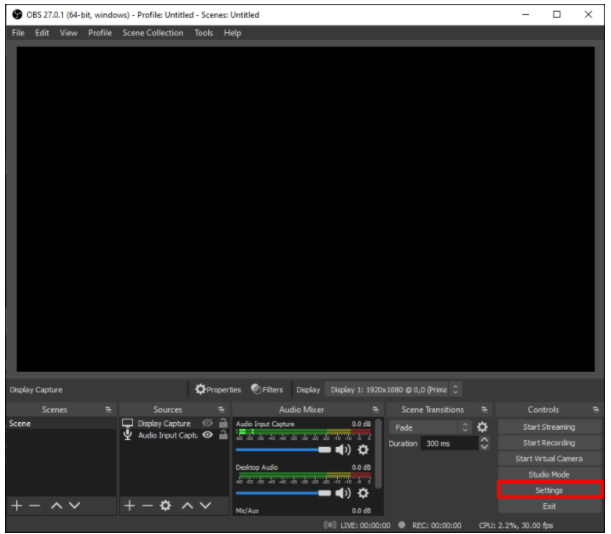
6. To access the Settings menu, go to the bottom-right corner of the screen and choose it.
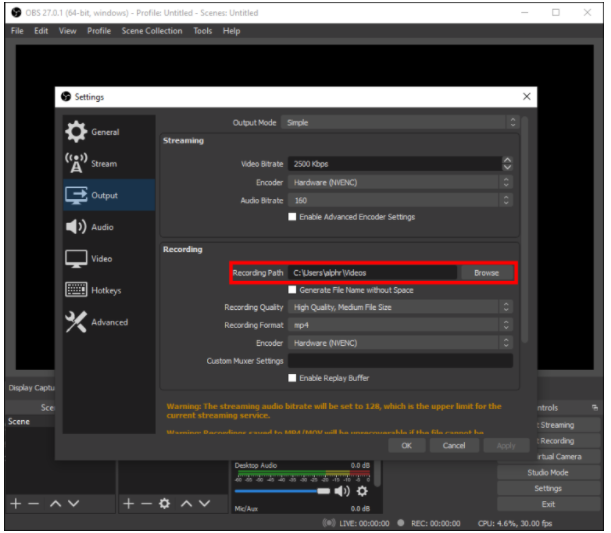
7. A new window will appear—select Output from the sidebar on the left-hand side.
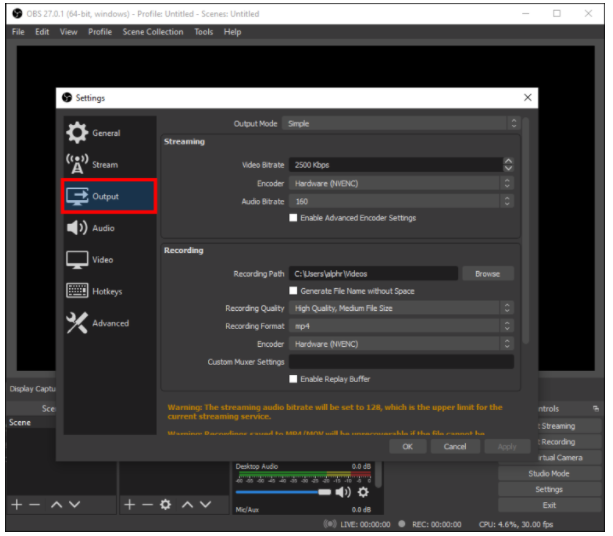
8. Under Recording Path, choose a destination for your file.
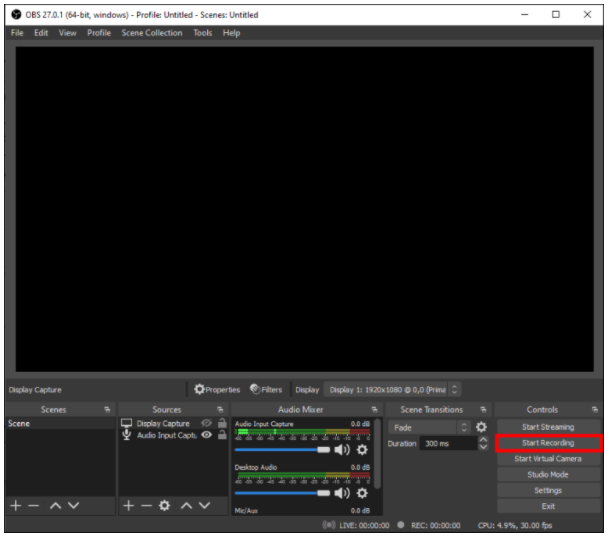
9. Once you’re done, click the blue Start Recording button in the lower-right corner of the screen.
Recording a Screen with OBS on Mac
Because macOS 10.13 is the most recent version of the operating system that supports OBS, check sure your Mac satisfies the requirements before installing the programme. When it comes to screen recording, you can just copy and paste the instructions from Windows 10 because they are nearly identical. Here’s a basic rundown of what happened:
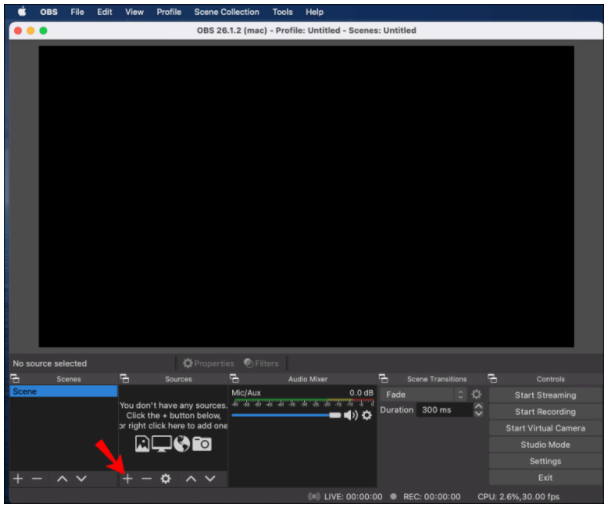
1. To begin, select the Plus icon from the Sources drop-down menu.
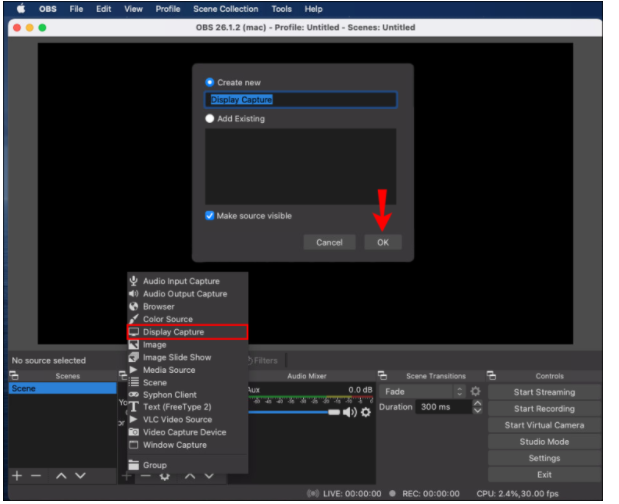
2. When prompted, select Display Capture from the drop-down menu and press OK to confirm.
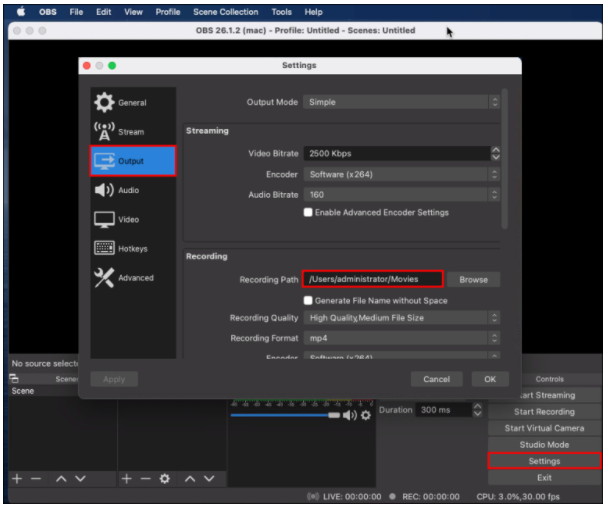
3. The recording path may be found in the Settings menu under Output. Select Recording Path to specify where the file will be saved.
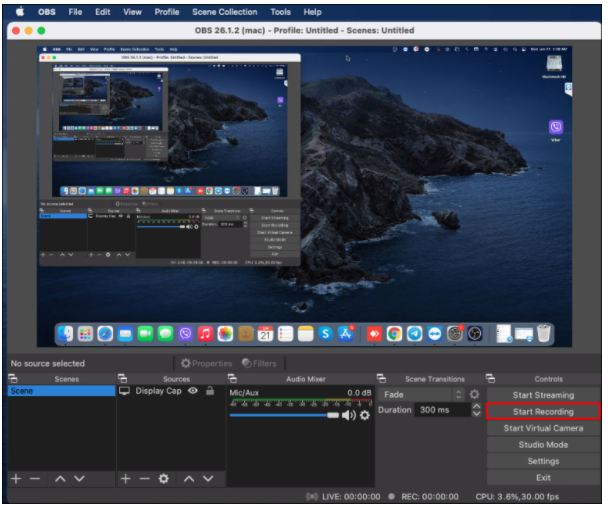
4. Hit the blue Start Recording button at the lower-right corner of the screen.
Video

Vampire Crawlers Coin Farming Guide

Forza Horizon 6 Performance: Why 60 FPS Is Still the Console Standard

Yoshi and the Mysterious Book (2026) – Full Completion Guide, Rewards & Secret Ending

How to Get Free Pets in Adopt Me: A Guide for Players

Roblox Username Generator – Create a Cool & Unique Username in Seconds
How to Get Free Pets in Adopt Me: A Guide for Players
Yoshi and the Mysterious Book (2026) – Full Completion Guide, Rewards & Secret Ending
Forza Horizon 6 Performance: Why 60 FPS Is Still the Console Standard


