Guide
How to Remove Background from a Picture in PowerPoint

If you crop an image to remove a background that is distracting, your audience will be better able to focus on the subject matter that is being presented. Microsoft PowerPoint has a set of core editing tools for photos, one of which is a tool that enables you to remove an image’s background. This tool is included in the standard Microsoft PowerPoint installation.
Read Also: How to Take a Screenshot With Microsoft PowerPoint
How to Remove Background from a Picture in PowerPoint
Launch PowerPoint, then go to the Insert menu and select Picture to add a picture to your presentation that contains the background you want to delete.
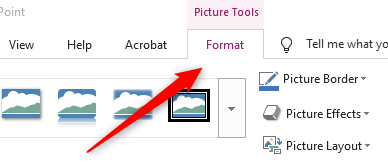
Once that, you need to select the “Format” tab that comes up after the image has been imported.
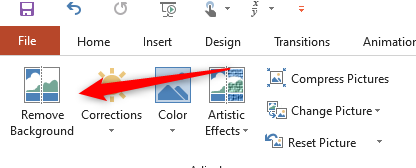
Choose the “Remove Background” option that is located inside the “Adjust” group.
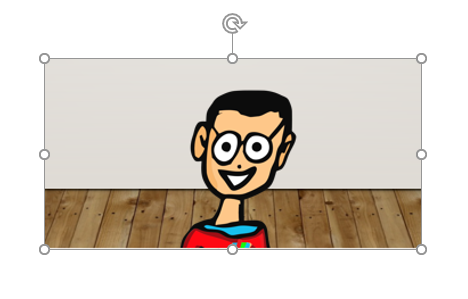
As soon as you make your selection, the magenta colour will be applied to the image’s backdrop, while the foreground will remain unchanged. The area that needs to be cropped out of the picture is shown by the magenta colouring on that piece of the picture.
PowerPoint is generally pretty good at accurately highlighting the correct areas you’d expect to be removed from an image, but as you can see from the screenshot below, it is not always accurate one hundred percent of the time. This can be seen in PowerPoint’s ability to highlight the correct areas you’d expect to be removed from an image.

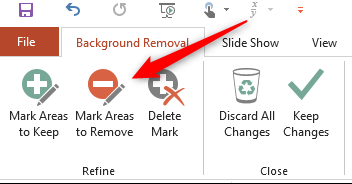
We are in luck since we have the ability to manually mark areas of the image that we would like to remove or maintain by selecting “Mark Areas to Remove” or “Mark Areas to Keep” from the “Refine” group, depending on which option we would prefer.
In this demonstration, we will use the “Mark Areas to Remove” tool to get rid of the remaining portion of the wooden background that is in our image.
As soon as you make your selection, the cursor will transform into a drawing pencil. Simply click and drag the pointer around the parts you no longer want to see to accomplish this (or keep). After you have finished, once you click anywhere outside of the image, the modifications will be reflected immediately.

Be sure to save your presentation (File > Save), so you don’t lose your changes.
FAQs
What steps do I need to take in order to make a photograph translucent in PowerPoint?
To make a photo in PowerPoint transparent, first select the picture you wish to work with, and then navigate to the Picture Format menu, where you will find an option labelled “Transparency.” Use the drop-down box to select a preset transparency choice, or click Picture Transparency Possibilities to access further customization options.
What are the steps of cropping an image in PowerPoint?
You can crop a photo in PowerPoint by double-clicking the image to get the Picture Format tab and selecting the Crop tool from the drop-down menu. To crop an image to a specific form, aspect ratio, or according to any other criteria, use the Crop option from this menu. You can also resize the image by grabbing the image’s black frame handles and dragging them to the area of the screen that you want them to be in. This option is available to you.

Vampire Crawlers Coin Farming Guide

Forza Horizon 6 Performance: Why 60 FPS Is Still the Console Standard

Yoshi and the Mysterious Book (2026) – Full Completion Guide, Rewards & Secret Ending

How to Get Free Pets in Adopt Me: A Guide for Players

Roblox Username Generator – Create a Cool & Unique Username in Seconds
How to Get Free Pets in Adopt Me: A Guide for Players

Grow a Garden Recipes in Roblox: Guide to Cook (Donuts, Sushi, Pie, Pizza & More!)
Roblox Username Generator – Create a Cool & Unique Username in Seconds
Yoshi and the Mysterious Book (2026) – Full Completion Guide, Rewards & Secret Ending


