Guide
How to Screenshot on an HP Laptop
If you know how to capture a screenshot on Windows 10, you can do it on an HP laptop as well because they often use the same operating system as the desktop computer. Find out how to take a screenshot on your laptop and an HP tablet in this tutorial.
Read Also: How To Find hp Laptop Serial Number
How to Take a Screenshot on an HP Laptop
There are three primary methods for taking a screenshot: One makes use of the keyboard, while the other two make use of software.
How to Use the Keyboard to Take a Screenshot
The “Print Screen” button on your keyboard is the quickest way to snap a screenshot of your screen. When the screen you wish to capture is visible, press Prt Sc on your keyboard. It’s located on the far right of your keyboard’s top row, next to the Insert and Delete buttons, on the far right of your keyboard.
It is likely that you will not see any evidence that the snapshot “took” if you use this approach. Use the key combination Windows + Prt Sc to get a more visible indication. When you utilize this shortcut, your screen will go black for a brief period of time to check that the capture was successful. Finally, you may grab the currently active window by pressing Alt + Prt Sc.
How to Use Snip & Sketch to Take a Screenshot
In addition to software solutions for taking screenshots, Windows 10 provides various built-in alternatives. One such software is the Snip & Sketch app. Here’s how to put it to use.
1. When the window or screen you wish to capture is open, go to the Start menu and select Capture.
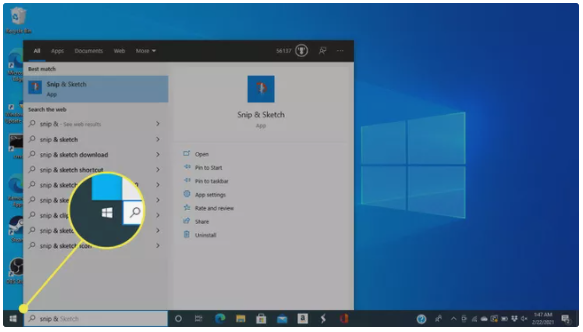
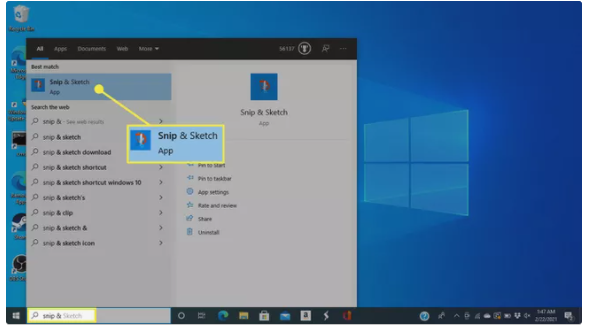
2. Snip & Sketch may be found by searching for it in the search box and selecting it from the results.
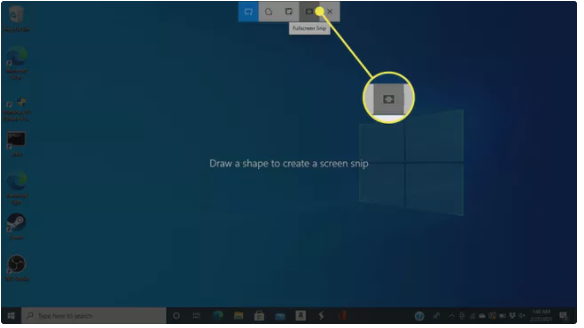
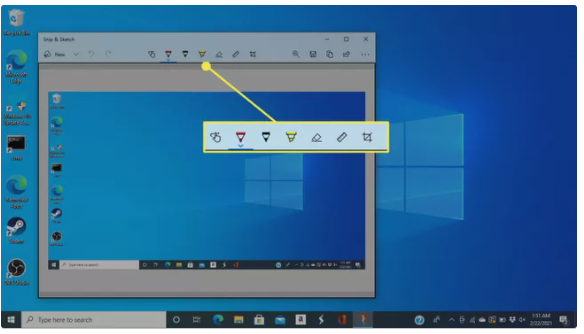
3. At the top of the screen, you’ll see a menu with several options. To capture the entire image, select the fourth option, which appears as a rectangle with a mark in each of the four corners.
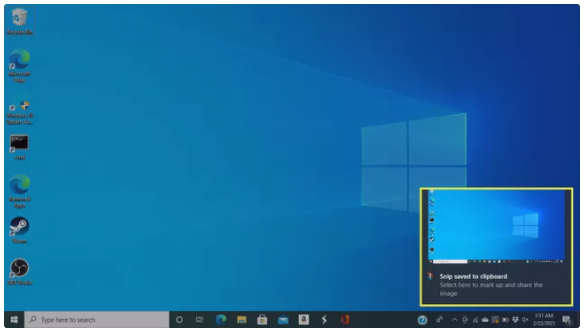
4. In either case, Windows will copy the screen to the clipboard and save it to a specified folder, and a message will appear to confirm the action. When you receive the notice (which includes a thumbnail of the screen you just captured), you may choose to launch a customization window.
5. In this window, you may make annotations and highlights on the image while also cropping it with tools located at the top of the screen.
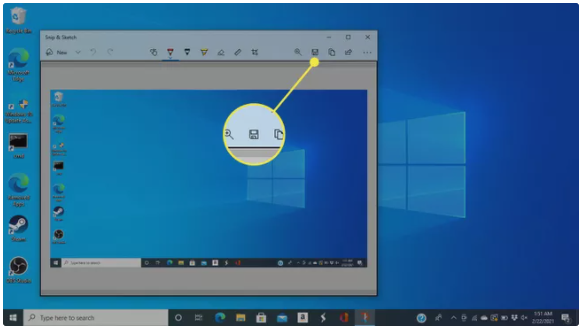
6. To save the screenshot, select the Save icon from the toolbar.
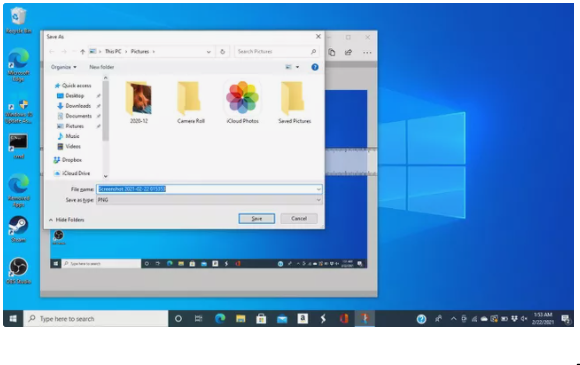
7. Specify the file name, file type, and location for your saved screenshot in the next box that appears.
How to Take a Screenshot with the Snipping Tool
The Snipping Tool is another software solution that Microsoft is gradually phasing away in future Windows upgrades, according to the company. Here’s how to put it to use.
1. Navigate to the window you wish to capture, and then select Start from the menu bar to begin the process.
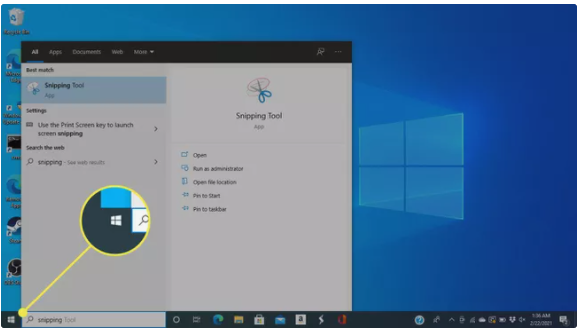
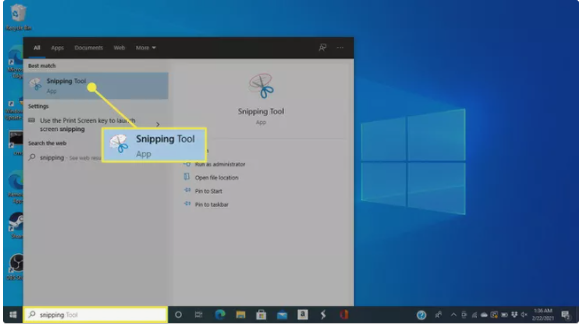
2. Make a search for “Snipping tool” in the search box and then choose it from the list of results.
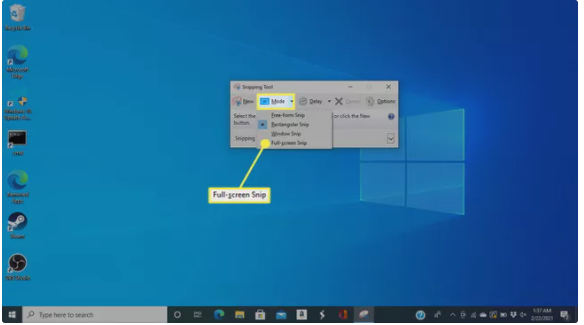
3. The sort of option you want to employ may be found under the Mode drop-down menu. If you want to capture the full screen, select Full-screen Snip; however, you may also choose to capture a rectangular area of the screen, a single window, or design your own unique shape.
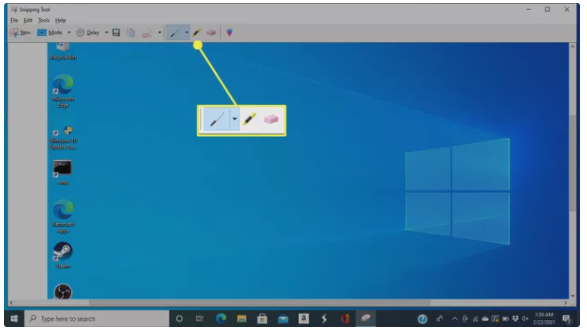
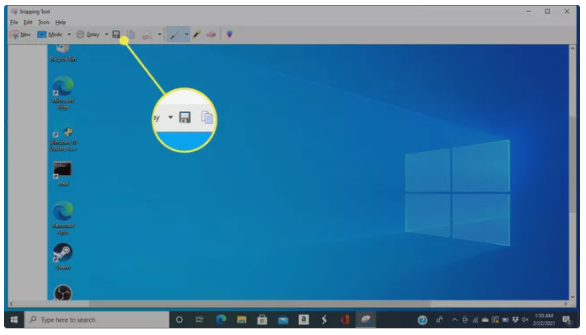
4. The Snipping Tool will open the screenshot in a new window, where you may utilize the tools at the top of the window to write notes and highlight important parts of the screenshot before saving the image.
5. To save your work, click on the icon that resembles a floppy disc.
6. A save box will appear, allowing you to give your image a name, choose a file type, and specify where you want to store it.

Video

Vampire Crawlers Coin Farming Guide

Forza Horizon 6 Performance: Why 60 FPS Is Still the Console Standard

Yoshi and the Mysterious Book (2026) – Full Completion Guide, Rewards & Secret Ending

How to Get Free Pets in Adopt Me: A Guide for Players

Roblox Username Generator – Create a Cool & Unique Username in Seconds
How to Get Free Pets in Adopt Me: A Guide for Players
Yoshi and the Mysterious Book (2026) – Full Completion Guide, Rewards & Secret Ending
Vampire Crawlers Coin Farming Guide


