Apple
How to Set Up AirMessage Server on Your Mac

There are a few different scenarios in which it could be beneficial for you to use iMessage on an Android device. It’s possible that some of your friends have iPhones, and you don’t want your messages to appear as green bubbles on their devices. It’s also feasible that you use an iPhone as your primary phone but switch to an Android device when the occasion calls for it.
It is quite unlikely that Apple would port iMessage over to Android, but the good news is that you do not have to wait for this to occur in order to use it. If you want to use Apple’s service on Android, you can do so with AirMessage; but, in order to do so, you will need to run its server software on a Mac. What you need to know and how to put it to use is detailed below.
Read Also : How to Install PIP on a Mac
How to Set Up AirMessage Server on Your Mac
Going to the AirMessage website and downloading the AirMessage Server for macOS is the first step in getting started. The software is compatible with OS X versions 10.10 and beyond, as well as the most recent version of macOS. To extract the AirMessage application using Finder, double-click the file to open it, and then drag the file into the Applications folder using the list on the left.
After doing so, navigate to the Applications folder and open AirMessage by doing a double-click on its icon. There is a good chance that you will get a message informing you that the application cannot be opened because it was developed by an unknown developer. Therefore, you will need to launch the app from a different location.
Launch System Preferences, then navigate to the section labelled “Security & Privacy.” You’ll find a notification quite similar to this one at the bottom of the window when you select the General tab. To begin using the application, select the Open Anyway option from the menu. You will receive a message informing you that there is a configuration adjustment that needs to be made before you can run it.
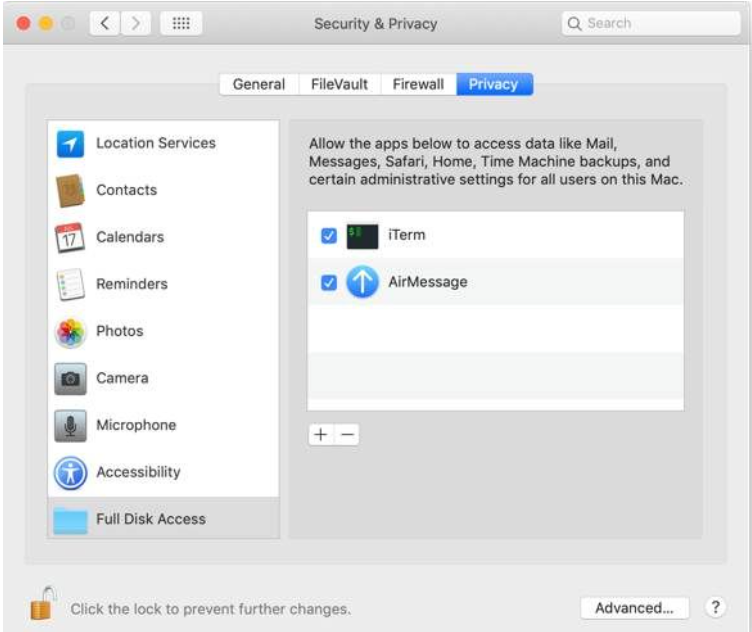
You need to navigate back to the menu labelled “Security & Privacy,” but this time you should select the “Privacy” tab. Scroll all the way down until you reach the section labelled Full Disk Access, click the lock symbol, and then enter your admin password. Now, select AirMessage from the list of applications by clicking the addition button that is located towards the middle of the window. Before continuing, you need to double confirm that the box has been checked.
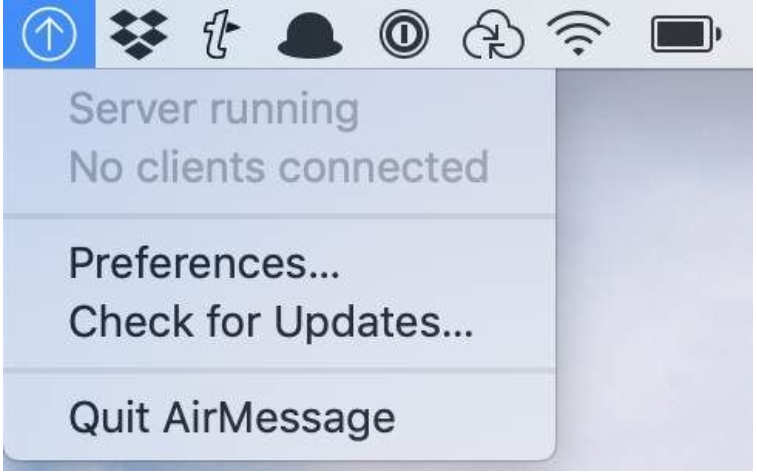
Now, all that is required to get the server up and running is to launch AirMessage one more time. Check that the pull-down option in the menu bar has a selection that reads “Server Running.” If you are concerned about your account’s safety, you should also alter the password from its factory settings.
Set Up Port Forwarding
Following this, you will need to configure your router to allow port forwarding. In order for AirMessage to be able to communicate with the server software running on your Mac over the internet, you will need to do this. Because of this, you will be able to use AirMessage regardless of where you are, provided that your computer is active at home.
Port forwarding might be configured differently depending on the type of router you have, but the manufacturer should provide instructions on how to do so. We will go over the fundamental processes, but the specific actions that are required of you may vary slightly.
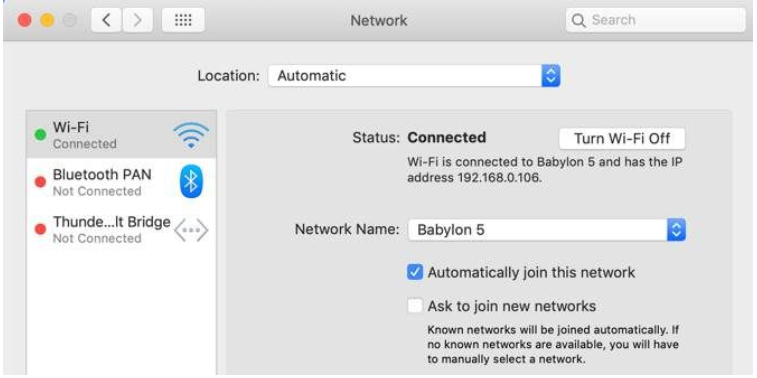
To begin, you will need to make a note of the IP address that is assigned to your computer. Launch Preferences, then navigate to the Network section. You can tell which network you’re connected to by looking for a message that appears towards the top of the window. This page also includes a listing of your IP address.
Now head over to the settings page for your router. In most cases, you may accomplish this goal by pointing your web browser to the addresses 192.168.0.1 or 192.168.1.1. If neither of these IP addresses works, select the Advanced tab in the Wi-Fi window that you used to check your computer’s IP address. This button is located in the bottom-right corner of the window. When you select the TCP/IP tab, the address will be displayed next to the word Router.
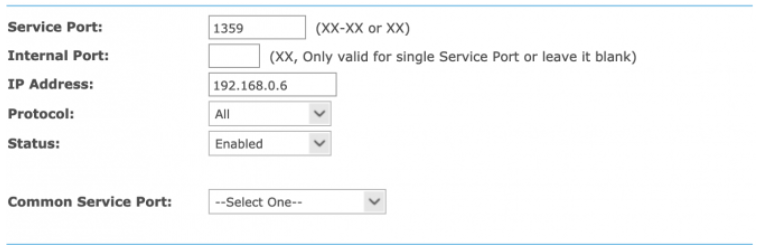
Locate the options for port forwarding inside the configuration panel of your router. It’s possible that this is listed under an Advancedheader. Make a new record in the logbook using the IP address of your computer and the port number that is used by AirMessage. This value is set to 1359 by default. TCP should be chosen as the protocol. When you’re finished with this, you’ll probably need to restart your router.
Video

Roblox Username Generator – Create a Cool & Unique Username in Seconds

Grow a Garden Recipes in Roblox: Guide to Cook (Donuts, Sushi, Pie, Pizza & More!)

Job Opportunities in Dubai – 2026

Mr Bit at the SBC Awards Europe 2025: The Bulgarian Brand Setting New Standards in the European Gaming Industry

Dennis Rodman Net Worth 2026 – Everything You Need to Know

Bloxburg Neighborhood Codes 2026
Grow a Garden Recipes in Roblox: Guide to Cook (Donuts, Sushi, Pie, Pizza & More!)
Job Opportunities in Dubai – 2026
Dennis Rodman Net Worth 2026 – Everything You Need to Know


