Guide
How to Set Up Dual Monitors on Your Windows PC or Mac

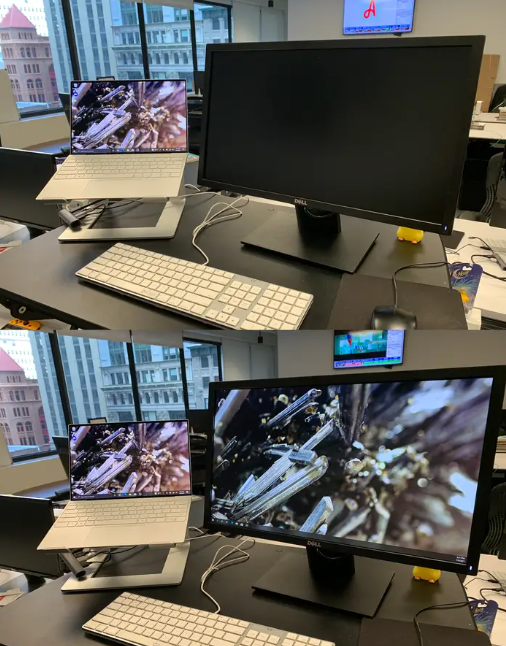
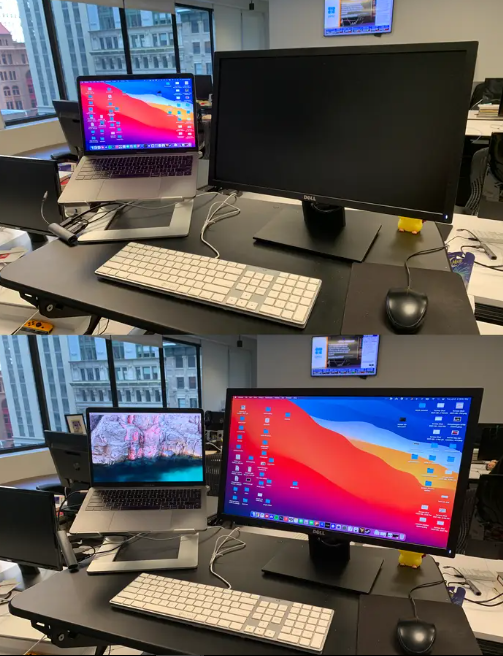
In an office, it’s usual to see employees working on many computers at the same time, utilizing multiple displays. It’s a terrific method to maximize your workspace while simultaneously using a variety of different programmes.
Dual monitors, on the other hand, aren’t exclusively for pros. Setting up multiple displays on your PC and Mac is a simple process. All that is required are the monitors and the cords to connect them.
Read Also: How to Completely Wipe a PC
How to Set Up Dual Monitors on a Windows 10 computer
1. Set up your computer tower or laptop by connecting both monitors to it and making sure both of them are switched on. You’ll need a VGA, HDMI, or USB cable, depending on your monitor and your computer’s specifications. It is possible that you will require a combination of various wires in some situations.
Your computer should be able to identify the new display almost immediately. Both screens will go dark and may flicker a little as a result of this.
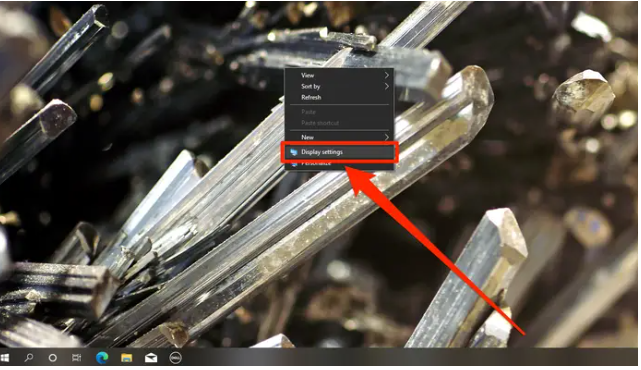
2. When the screen returns to normal, right-click on an empty area of your computer’s desktop and a drop-down menu will appear. Select Display options from the drop-down menu.
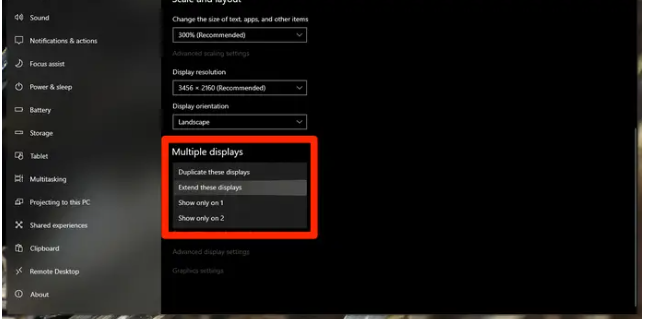
3. Scroll down to the Multiple Displays option, open the drop-down menu, and choose how you want the dual monitors to work. Here are your options:
- Extend these displays: You can set your screens up so that they display different things and your mouse cursor can move between them.
- Duplicate these displays: This option will show the same image on both screens, which can be useful for PowerPoint presentations and lectures.
- Show only on 1: Select this if you only want to use the primary monitor.
- Show only on 2: Select this if you only want to use the secondary monitor.
4. Once you’ve picked an option, click Keep changes.
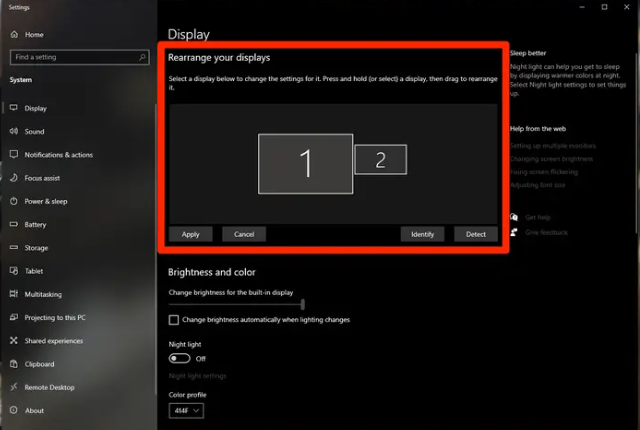
5. If you selected the Extend these displays option, return to the Rearrange your displays section by scrolling back up. Your primary monitor will be designated as “1,” while your secondary monitor will be designated as “2.” Click and drag them about until they are in the same position as they are in real life, then click Apply.
Video
How to Set Up Dual monitors on a Mac
1. To begin, use an HDMI cable to connect your second display device to your MacBook, iMac, or Mac Mini. If your Mac device does not have an HDMI port, you will need to connect the HDMI cable to a USB cable or hub, and then connect the USB cable or hub to the Mac device. Alternatively, you may link the HDMI cable directly to the Mac device.
Your computer should be able to identify the new display almost immediately. Both screens will go dark and may flicker a little as a result of this.
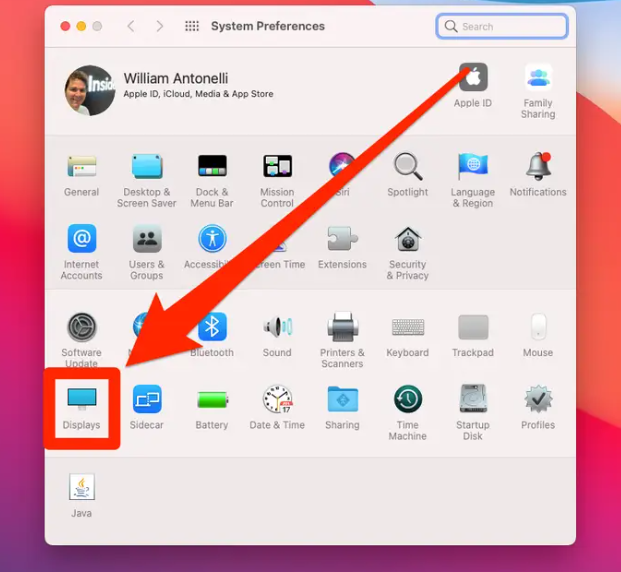
2. Alternatively, you may click the Apple logo in the top-right corner of your screen to access the System Preferences software directly from there. Select Displays from the System Preferences menu after the display has returned.
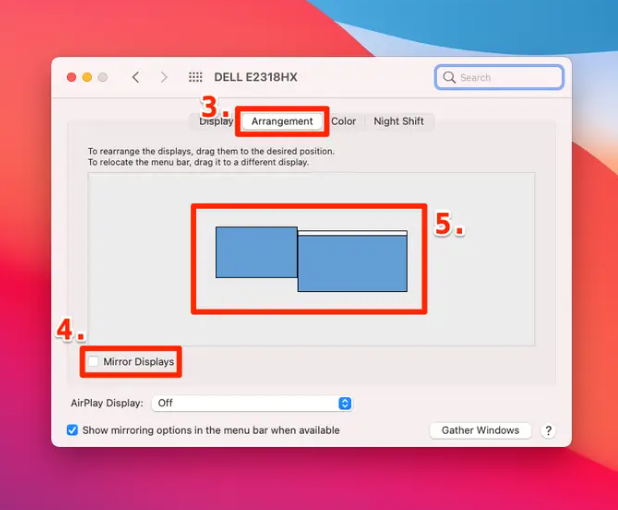
3. Two windows will appear, one on each display, one on the left and one on the right. More choices will be available in the window on your primary display; use this window and select Arrangement at the top of the window.
4. Select Mirror Displays from the Display menu if you want both displays to display the same image. Uncheck it if you want them to function independently of one another.
5. Use your mouse to drag and drop the blue boxes to make the arrangement of your displays resemble the one you have in real life. You can alternatively click and drag simply the white bar to select which monitor has the Dock – this will be the monitor that serves as your primary display.
Video

Vampire Crawlers Coin Farming Guide

Forza Horizon 6 Performance: Why 60 FPS Is Still the Console Standard

Yoshi and the Mysterious Book (2026) – Full Completion Guide, Rewards & Secret Ending

How to Get Free Pets in Adopt Me: A Guide for Players

Roblox Username Generator – Create a Cool & Unique Username in Seconds
How to Get Free Pets in Adopt Me: A Guide for Players
Yoshi and the Mysterious Book (2026) – Full Completion Guide, Rewards & Secret Ending
Vampire Crawlers Coin Farming Guide


