Guide
How to Set Up Your Roku Device and Connect It to Your TV
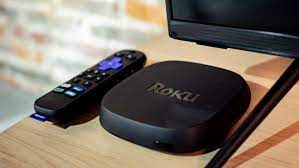
Roku media players are among the most popular streaming devices because of its user-friendly interface, straightforward remote control, and extensive catalogue of applications for streaming services.
It doesn’t really matter whether model of Roku device you have because the setup process is virtually identical across the board. The manner in which you connect it to the television is typically the source of any variances. For instance, some players link to the television through an HDMI cable, some versions of Streaming Sticks connect directly to the HDMI port on the television.
Read Also: How to Change the Language on Your Roku
How to Set Up Your Roku Device and Connect It to Your TV
1: Connect Roku device to your TV
- Plug an HDMI cable into the Roku device, and then into a TV with an HDMI input. The Roku Streaming Stick eliminates the requirement for an HDMI connection when watching videos on an HDTV. Simply plug the Streaming Stick into your TV’s HDMI input.
- Connect the Roku to an electrical outlet using the power wire. This power plug will either be a tiny round connector or a micro-USB connector, depending on the model you have. Connect the AC adapter to an electrical outlet, then plug the other end of the cable into a USB port on the TV.
- Input the Roku player into the correct TV and make sure the TV is on. Once the Roku has finished booting up, you will be greeted by its home screen.
2: Pair your Roku remote
- First, install the batteries by opening the battery cover on the remote’s underside. Replace the remote’s cover.
- If you have an advanced remote and need to pair it with your player, you’ll see a prompt on the screen that instructs you to hit the reset button (often found in the remote’s battery compartment) for three to five seconds. No pairing is required if your Roku comes with a basic controller.

- The Roku should now be operable through the remote. If you’re using a basic remote, make sure it’s aimed directly at the Roku device.
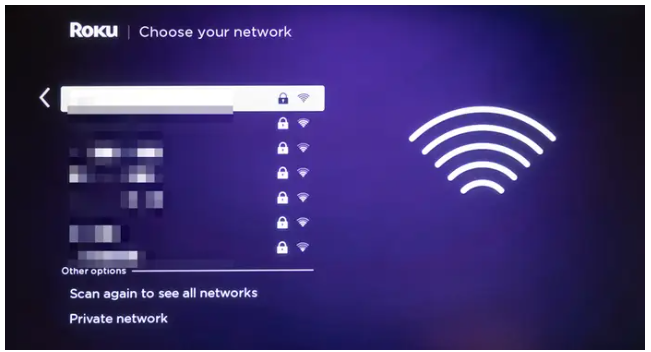
3: On-screen set-up and connect to WiFi
Once the Roku screen has loaded (you should be on the language settings page) and the remote is operational, you can continue with the setup.
Just do what it says on the screen. You may use the remote’s five-way control button to navigate the screen, and the OK button located in the remote’s centre may be used to choose options and advance through the menus.
1. First, select your preferred language; next, after entering your password for your home WiFi network, select that network. In other words, make sure you’re using the highest possible frequency. As an illustration, if your router supports both 2.4 and 5GHz frequencies, select the 5GHz band for superior video streaming performance.
2. You should keep going with the setup procedures. Once the Roku is connected to your home WiFi network, it will most likely check for and install any available software updates.
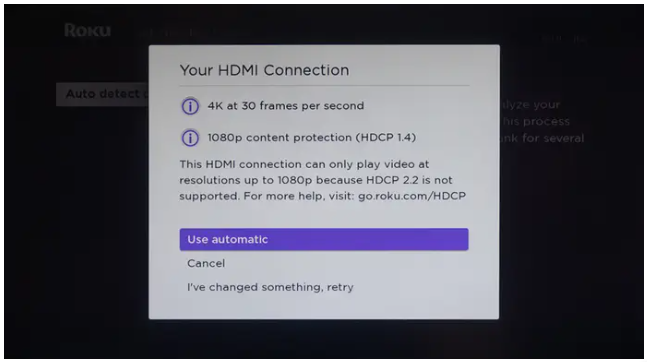
3. Roku may need your assistance in choosing optimal TV settings. Allow it to automatically recognise your TV’s format; in most cases, you can do this automatically, but you can also specify manual settings if you like.
4. Almost all Roku players have a voice-activated remote that can also be used to adjust the volume and turn the TV on and off. At this point, the Roku setup should configure the remote; follow the on-screen instructions to teach the Roku remote how to access your TV’s remote controls.
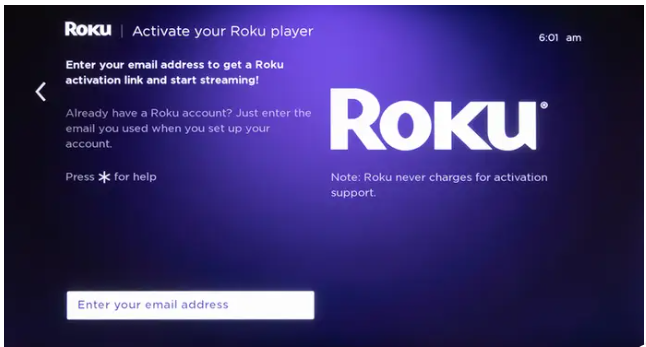
4: Activate your Roku device
You can now turn on your Roku player.
1. Create a new Roku account by entering an email address and following the on-screen instructions. You will need a Roku account (it’s free) in order to activate the device. Use the email address connected with your existing account, such as from a previous Roku device.
2. Second, an email to activate your account will be sent to you within a few minutes. For the Roku website, please use the link provided in the email. There, you can either finish creating a new Roku account or sign in to a current one.
3. Third, the Roku website now allows you to complete setup, including selecting your preferred streaming channels. You may personalise your Roku experience by selecting and logging into the channels you wish to watch, such as Netflix, Hulu, HBO Max, and others. The Roku player’s channel store will always be there for you to browse and add channels later on.
FAQs
Why is my Roku not connecting to my TV?
Make sure that the video wire is securely attached to the back of your Roku player as well as the HDMI or composite connector on your television. If you have a Roku Streaming Stick, check to be that it is securely attached to the HDMI connector that is located on your television.
Why won’t my Roku TV connect to my wireless network?
You can attempt reconnecting to the internet after restarting your router if you are unable to connect to the internet. Strengthen the signal strength of your wireless connection. If restarting your router does not enhance your Internet connection, then the problem may be with the intensity of the wireless signal. Your wireless connection will get increasingly degraded as the distance between your Roku device and your network increases.
Do you need Wi-Fi for Roku?
If you do not have access to the internet through your home’s Wi-Fi network, you will not be able to use Roku channels. Their material is not saved on the Roku device , but rather on the internet where it can be accessed remotely. Your remote will continue to function normally, but if it is having trouble pairing devices or its light is blinking, you should consider replacing the batteries and buying a new remote if the difficulties persist.

Vampire Crawlers Coin Farming Guide

Forza Horizon 6 Performance: Why 60 FPS Is Still the Console Standard

Yoshi and the Mysterious Book (2026) – Full Completion Guide, Rewards & Secret Ending

How to Get Free Pets in Adopt Me: A Guide for Players

Roblox Username Generator – Create a Cool & Unique Username in Seconds
How to Get Free Pets in Adopt Me: A Guide for Players
Roblox Username Generator – Create a Cool & Unique Username in Seconds
Yoshi and the Mysterious Book (2026) – Full Completion Guide, Rewards & Secret Ending
Forza Horizon 6 Performance: Why 60 FPS Is Still the Console Standard


