Guide
How to Turn On or Enable Hyper-V on Windows 11
You can construct virtual machines on the system using a feature in Windows known as Hardware Virtualization, which is also known as Hyper-V. This function does not require any additional hardware or software support. In the event that you operate on various operating systems, you have the ability to build many virtual machines, each of which has its own OS. An individual virtual machine can contain a variety of virtual components, such as hard discs, switches, and other things. This post will guide you through the process of activating hyper v in Windows 11. So let’s get started:
Read Also: How to Clear the Location Cache in Your Windows 11
How to Turn On or Enable Hyper-V on Windows 11
From Control Panel:
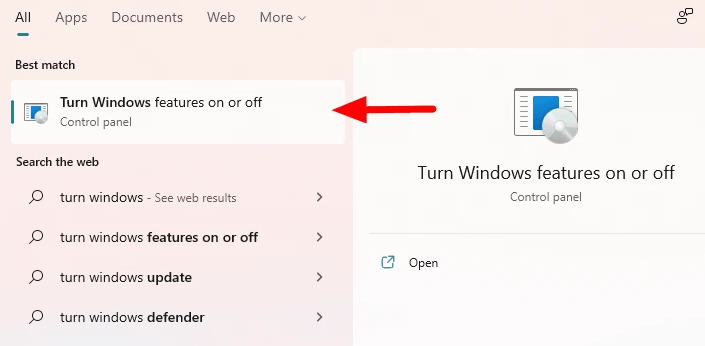
To launch the Control Panel and enable Hyper-V, search the Start menu for “Switch Windows features on or off,” and then click on the result that corresponds to your query. This will open the Control Panel.
Find the ‘Hyper-V’ option in the ‘Windows Features’ box. To expand it and explore the many options that are available under it, either click on the + icon that is located before the option or double-click on the option itself.
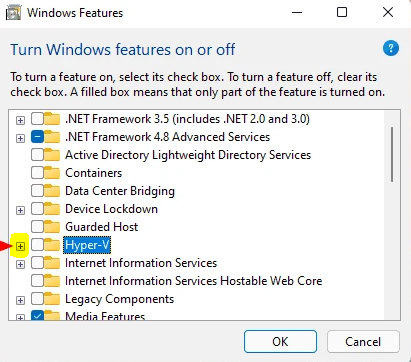
Now, select “Hyper-V” from the drop-down menu, and check the boxes next to both of the available options. After you have selected both, go to the bottom of the page and click on the “OK” button to preserve your choices.

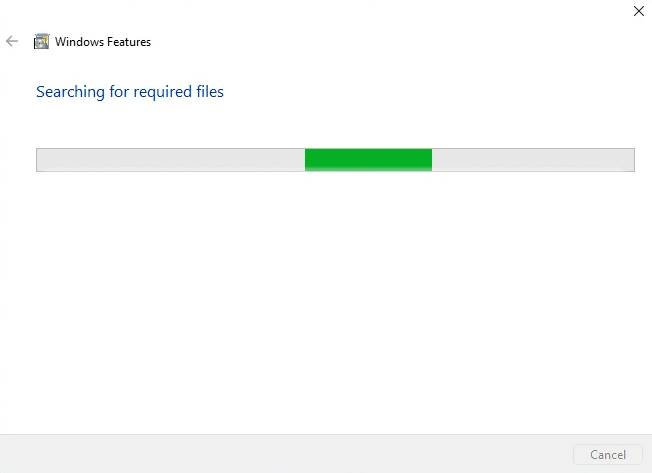
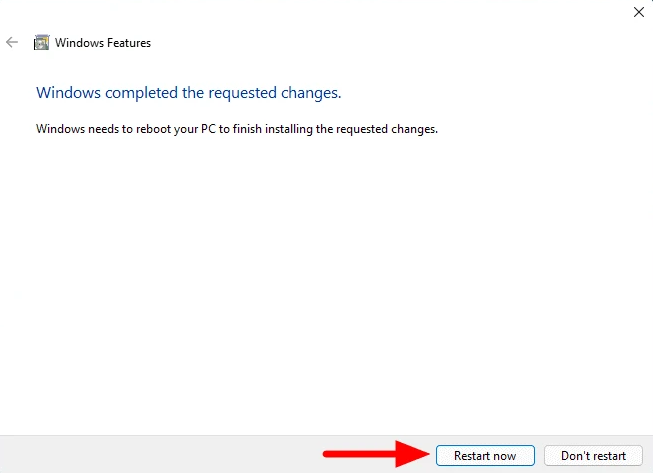
Windows will now apply the modifications, and a progress bar will be displayed on the screen to show how far along the process it is. It’s possible that the process will take a few minutes.
When Windows has finished making the necessary adjustments, you will be prompted to restart the computer. To accomplish the same thing, scroll down and select the “Restart now” option.
When the computer is restarted, the Hyper-V capability will become active, and you will be able to access it without any difficulty.
FAQs
Does Windows 11 have Hyper-V?
For Windows 11 Pro, Enterprise, and Education, you have the option to add on the Hyper-V virtualization technology. To determine the version of Windows you are using, navigate to Settings > System > About.
Should I enable Hyper-V?
On a server, Hyper-V should be the sole role that is active in the roles menu. This recommended procedure helps ensure that the host operating system does not have any roles, features, or programmes that are unnecessary for the operation of Hyper-V.
Do I have Hyper-V installed?
Simply open the Windows Start menu, put cmd into the search bar, right click the cmd entry, and select the option to Run as administrator. Start up systeminfo and look to see if Hyper-V is already installed.
What happens if Hyper-V is disabled?
If Hyper-V is disabled, all that will be displayed is a list of the technologies that are necessary for Hyper-V to run, together with an indication of whether or not the system contains those technologies. In this scenario, Hyper-V has been turned off, and there is nothing else that needs to be done on your end. If, on the other hand, you notice that it says “A hypervisor has been discovered.
Does Hyper-V hurt performance?
It is recommended that Hyper-V be installed on the primary partition. Running additional server roles on a computer that is also running Hyper-V can have a negative impact on the performance of the virtualization server, particularly if the additional server roles need a large amount of the computer’s processing power, memory, or input/output bandwidth.

Vampire Crawlers Coin Farming Guide

Forza Horizon 6 Performance: Why 60 FPS Is Still the Console Standard

Yoshi and the Mysterious Book (2026) – Full Completion Guide, Rewards & Secret Ending

How to Get Free Pets in Adopt Me: A Guide for Players

Roblox Username Generator – Create a Cool & Unique Username in Seconds
How to Get Free Pets in Adopt Me: A Guide for Players

Grow a Garden Recipes in Roblox: Guide to Cook (Donuts, Sushi, Pie, Pizza & More!)
Roblox Username Generator – Create a Cool & Unique Username in Seconds
Yoshi and the Mysterious Book (2026) – Full Completion Guide, Rewards & Secret Ending


