Guide
How to Vectorize an Image in Photoshop

Photoshop is a raster graphics application; yet, it supports vector pictures through the use of a wide variety of tools and techniques. It is able to vectorize raster images, which is one of its most impressive abilities. This is a tip that every artist and designer ought to get familiar with because it may be of great use to them. For instance, if you have an image with a poor resolution or a logo that you want to scale without it becoming blurry, you can vectorize the image in Photoshop so that you have more control over how large you want to make it.
In this short tutorial, we’ll walk you through the process of vectorizing an image in Photoshop step by step. You’ll quickly notice that this is a straightforward approach.
Read Also: How To Photoshop Someone into Picture Photo Editing
Why Vectorize Images?
The fact that vector images are made up of paths, which makes it much simpler to resize and modify them, is the primary distinction between vector and raster formats. raster images are made up of pixels, on the other hand.
When you resize or scale a raster picture, it will degrade the quality of the image, causing it to appear pixelated or fuzzy depending on the size that you choose. Scaling vector pictures does not degrade their visual quality and can be done at any size. You will be able to simply enlarge an image without sacrificing too much of its quality if you convert a raster image to a vector format first.
How to Vectorize an Image in Photoshop
This technique uses a very straightforward approach to vectorizing straightforward images. Bear in mind that this strategy is most successful when applied to graphical elements like as logos, symbols, and shapes. It is also possible that it will not perform very well with images that are more complicated and contain more colours, such as photographs.
Let’s get started.
Step 1: Prepare the Image
To begin, the image must be prepared to be vectorized before you can proceed.
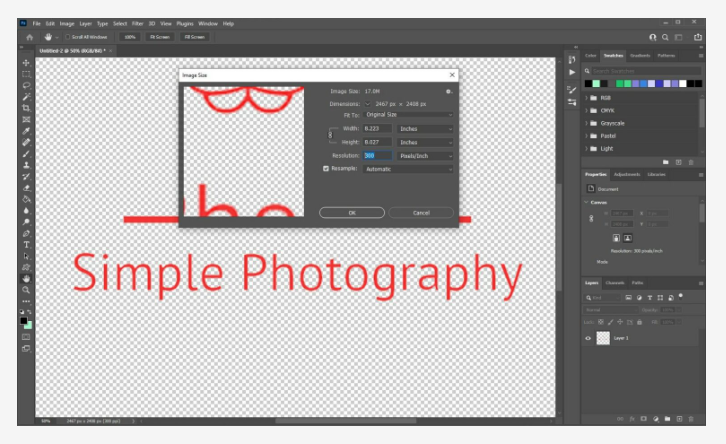
By simultaneously pressing the Control, Alt, and I buttons on your keyboard, you will be able to launch the Image Size window on your computer. The resolution should then be changed to 300.
After that, isolate the portion of the picture that you want to convert into a vector while preserving the original background. After making a selection, copy it and paste it onto a new layer on the appropriate spot. Another option is to do away with the background.
Step 2: Make Work Path
After you have extracted the image from its background, move on to the next step by holding down the Control key on your computer and clicking on the layer icon located in the Layers panel. This will take you to the following stage.
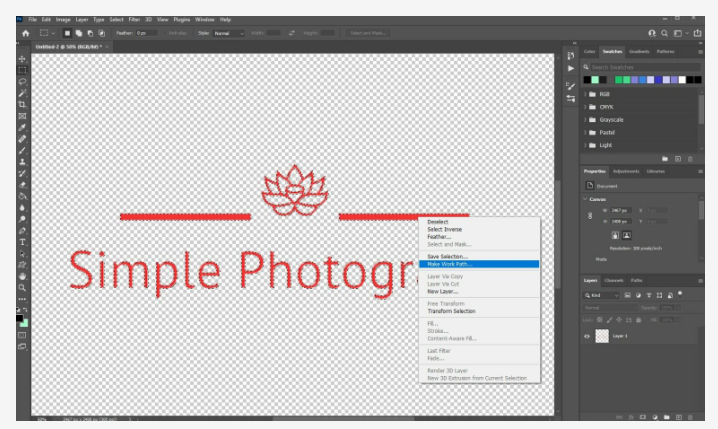
A selection of the image will be produced as a result of your actions here. Now, from the tool palette, select the Marquee Tool (or hit the letter M), then bring the pointer to the selection and right-click on it.
The next step is to make a work path by selecting the option to do so from the menu.
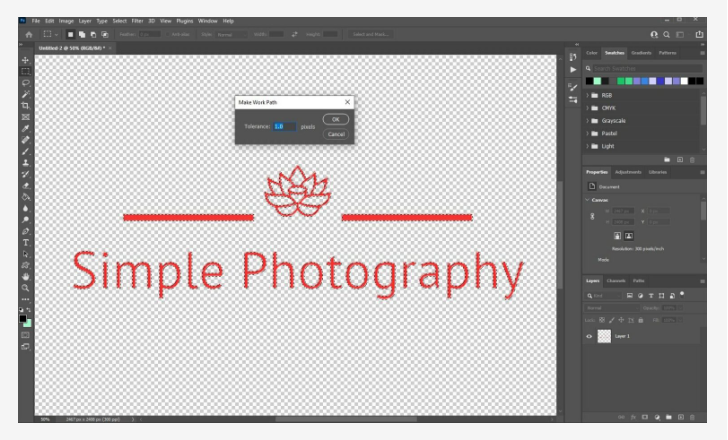
Keep the Tolerance setting at 1.0 at all times.
Step 3: Create a Vector Mask
Now, select the Direct Selection tool by using the letter A on your keyboard, and right-click once more anywhere on the image.
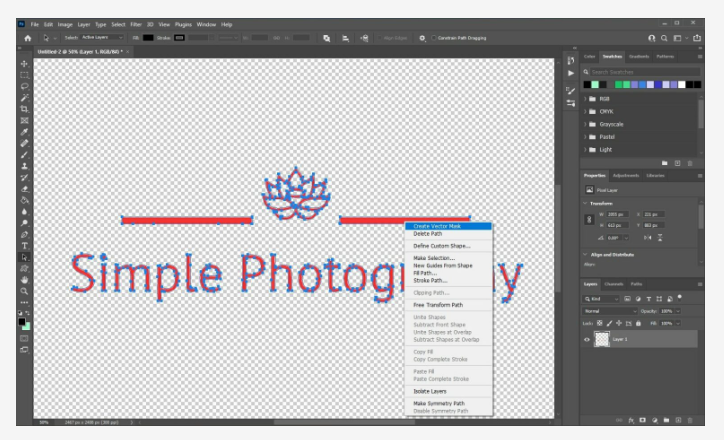
After that, select the Create Vector Mask option. This will produce a vector mask on top of the layer, which can be found in the Layers panel after it has been created.
Step 4: Export as a Vector File
Your vectorized image needs to be saved as a vector file, which is the only thing left for you to do at this point.
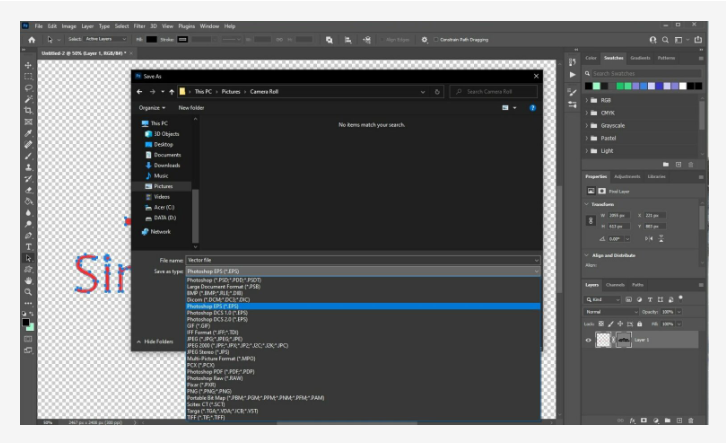
Select “Photoshop EPS file format” from the drop-down menu that appears after selecting “File” >> “Save As” in the menu bar. To save the vectorized image, click the Save button.
You may now open the EPS file in Illustrator to resize the image in a straightforward manner without degrading the image’s quality.
Video

Roblox Username Generator – Create a Cool & Unique Username in Seconds

Grow a Garden Recipes in Roblox: Guide to Cook (Donuts, Sushi, Pie, Pizza & More!)

Job Opportunities in Dubai – 2026

Mr Bit at the SBC Awards Europe 2025: The Bulgarian Brand Setting New Standards in the European Gaming Industry

Dennis Rodman Net Worth 2026 – Everything You Need to Know

Bloxburg Neighborhood Codes 2026
Grow a Garden Recipes in Roblox: Guide to Cook (Donuts, Sushi, Pie, Pizza & More!)
Job Opportunities in Dubai – 2026
Dennis Rodman Net Worth 2026 – Everything You Need to Know


