Guide
How to Wrap Text in Microsoft Excel

When you wrap text around data in an Excel cell, it makes it easier to see all of the information included within that cell. While typing into a wrapped cell, it expands to provide enough room for whatever you enter into it at any one time.
Although the ability to wrap text in Microsoft Excel is not a default feature, it is a simple choice to enable or disable in the programme. There are two alternatives if you wish to automatically wrap text in Microsoft Excel: either change the settings to have the text wrapped automatically, or manually enter line breaks. It is important to remember, however, that you may need to adjust the row height in order to guarantee that all of your material is visible.
Read Also: How to Add Error Bars in Excel
How to Wrap text in Excel Automatically
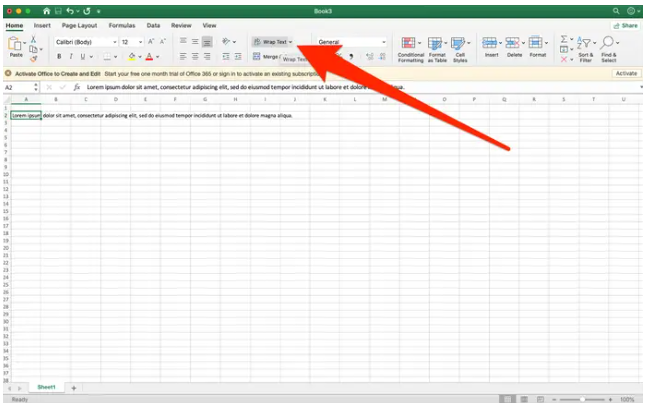
1. To begin, open Microsoft Excel on your Mac or PC and pick the cells that you wish to format.
2. The “Home” tab should be selected first, followed by the “Wrap Text” icon, which should be clicked.
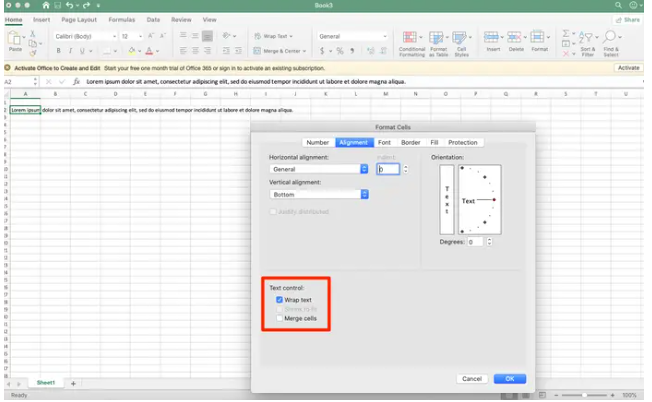
3. Alternatively, you can pick “Format” from the menu at the top of the screen, then “Cells,” and then “Wrap Text” from the “Alignment” option.
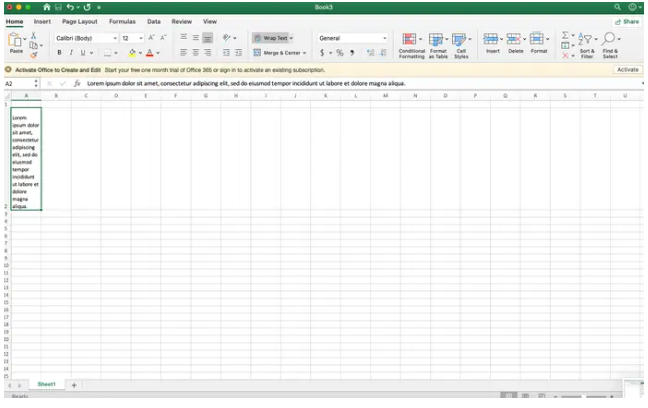
4. Keep in mind that the size of the cell has an impact on the text that appears. In the example above, if you modify the width of the cell, the data wrapping will automatically adjust to accommodate the new space available.
This could be because the row has been set to a specified height that cannot fit the amount of wrapped text, or it could be because the wrapped text is contained within a range of cells that has been merged.
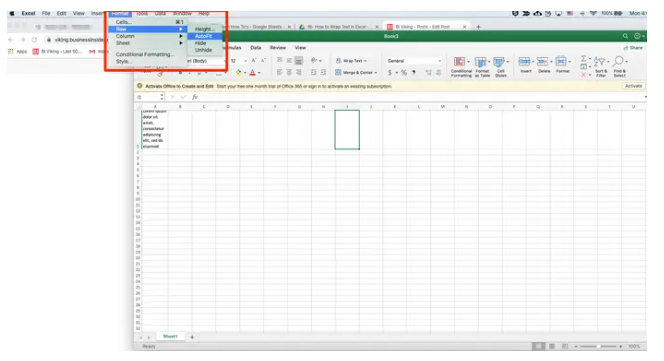
The following is an example of how to change the height of a cell:
1. Select the cell or cells that you want to change the row height of by clicking on them once.
2. Select “Height” from the “Format” drop-down menu.
3. From there, you have two options:
- Select “AutoFit Row Height” to have the row height automatically adjusted to accommodate your text.
- By selecting “Row Height” and entering the height (in pixels) into the box, you may precisely define the height of a row in your document.
How to Wrap text in Excel manually with line Breaks
1. Manual line breaks are created by first double-clicking on the cell where you wish the text to be broken up, and then dragging it to a new position on the following line.
2. To place a line break in a cell, first type the cell’s contents, and then hit “Alt + Enter” at the proper point on the keyboard. As a result of this, the text will be pushed down one line on the page.
3. If you click outside of the cell, the text will automatically wrap around the outside of the cell.
Removing Wrap Text Formatting Is Also Easy
Knowing how to wrap text in Excel is one thing; knowing how to remove the wrap text formatting in Excel is another entirely different ballgame. It’s simple to undo the wrap text effect by selecting it from the Alignment area of the Home tab and pressing the Undo Wrap Text function.
You can also undo the text wrapping that you’ve done by pressing the Alt + H + W keyboard keys. In reality, you may remove the formatting by employing the identical instructions that you used to enclose the text.
Video

Roblox Username Generator – Create a Cool & Unique Username in Seconds

Grow a Garden Recipes in Roblox: Guide to Cook (Donuts, Sushi, Pie, Pizza & More!)

Job Opportunities in Dubai – 2026

Mr Bit at the SBC Awards Europe 2025: The Bulgarian Brand Setting New Standards in the European Gaming Industry

Dennis Rodman Net Worth 2026 – Everything You Need to Know

Bloxburg Neighborhood Codes 2026
Grow a Garden Recipes in Roblox: Guide to Cook (Donuts, Sushi, Pie, Pizza & More!)
Job Opportunities in Dubai – 2026
Dennis Rodman Net Worth 2026 – Everything You Need to Know


