Guide
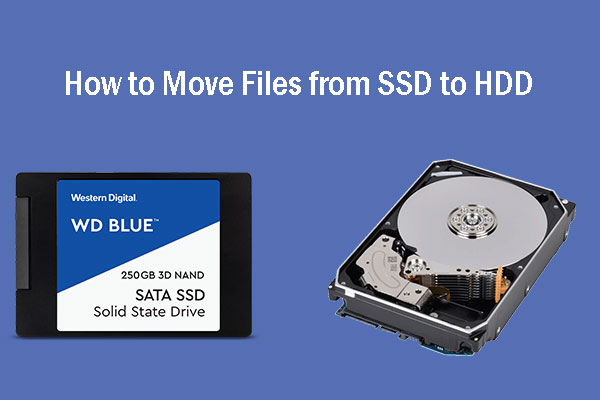
How to Transfer Files from SSD to HDD in Windows
SSDs are becoming increasingly popular as a result of its quicker reading and writing speeds, increased shock tolerance, lack of noise, and lightweight characteristics. Many people prefer to install their operating system and games on solid state drives (SSDs) in order to have a better experience.
However, after a lengthy period of usage, the SSD may get clogged with too many applications and files, resulting in a shortage of storage capacity. Many customers consider shifting data from their SSD to their hard drive in order to troubleshoot, which is the issue we’ll cover in this article.
Read Also: How To Install Bash On Windows 10
Why transfer files from SSD to HDD?
It is recommended that you install the operating system on a Solid State Drive (SSD) and then add a Solid State Drive to your computer since an SSD disc may significantly improve the performance of your computer. Furthermore, the performance of the programmes that have been put on it is superb. However, because of its expensive price, many customers would likely choose for a smaller model, such as 128GB, 256GB, or 512GB, and the disc space available will be significantly decreased if you install numerous programmes or add a large number of data, which may be far less than you anticipated.
You have the option of either uninstalling your favourite applications from the SSD and re-installing them on another hard drive, or simply transferring files from the SSD to another hard drive. The former is undoubtedly more time-consuming, since its operation will have an impact on the overall performance of the programme. The ideal solution is to store data on the HDD that has been freed up and use the SSD to fill the remaining disc space.
How to transfer files from SSD to HDD in Windows 11/10/8/7
There are two possible approaches to answering this question and successfully moving data from SSD to HDD. Method 1 is the quickest and most direct, but it has restrictions in terms of what can be sent and how secure the data is. Method 2 is recommended if you wish to move a large number of files in a secure manner, or if you want to schedule data migrations on a regular basis.
Method 1: Move files from SSD to HDD with “Copy and Paste”
Users may initially consider using the built-in utility to move data from SSD to HDD in Windows 11/10/8/7, just as they would when transferring information from C drive to D drive in the same way. Yes, that is a typical feature request that Windows has previously provided.
Pitch on the items you wish to transfer, right-click them, then select Copy from the list of alternatives that appears. Then navigate to the directory where you want to save the files, right-click a blank spot, and select Paste. That procedure may also be accomplished individually by pressing the Ctrl + C and Ctrl +V key combinations on the keyboard.

Nonetheless, Copy and Paste is intended for use with modest numbers of files, and it is more convenient if all of the files are in the same directory. For example, you may quickly move the files in My Documents, Videos, Music, and Pictures folders, among other places.
It will take a long time if you wish to transfer a big number of files that are situated in separate directories at the same time. It is also possible that you may need to address the permissions problem throughout the data migrating procedure.
Method 2: Transfer files from SSD to HDD with AOMEI Backupper
In the form of file backup or sync, this approach allows you to move files or folders to multiple locations in a short period of time, which is very beneficial for moving large amounts of data to a new hard drive. Apart from that, there are several more useful features provided by AOMEI Backupper Standard.
How to transfer files from SSD to HDD with freeware:
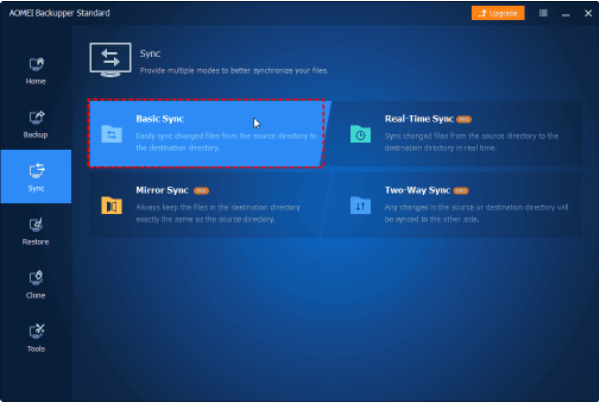
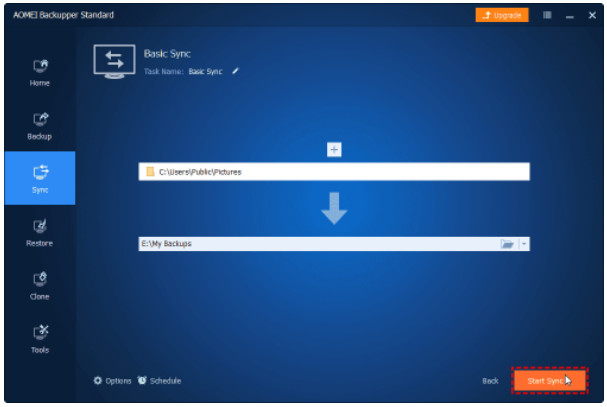
Step 1: First, download and install AOMEI Backupper Standard. Then, run the programme. Select Basic Sync from the Sync drop-down menu.
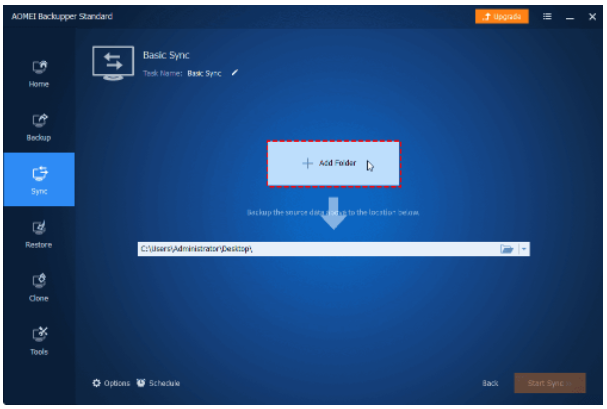
Step 2: Select the files and folders you wish to move from SSD to HDD from the drop-down menu and click Add Folder.
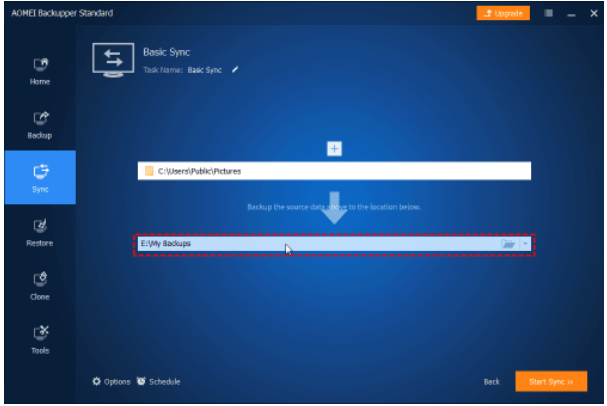
Step 3: Select the new HDD as the destination route for your data by clicking on the folder-shaped button and selecting it from the drop-down menu.
Step 4: To sync files on a regular basis, pick Daily, Weekly, or Monthly from the Schedule drop-down menu. Optionally, you can add a note to the task or activate email notification for it by selecting it from the drop-down menu. After you’ve finished configuring your options, click Start Sync.
Video

Vampire Crawlers Coin Farming Guide

Forza Horizon 6 Performance: Why 60 FPS Is Still the Console Standard

Yoshi and the Mysterious Book (2026) – Full Completion Guide, Rewards & Secret Ending

How to Get Free Pets in Adopt Me: A Guide for Players

Roblox Username Generator – Create a Cool & Unique Username in Seconds
How to Get Free Pets in Adopt Me: A Guide for Players
Yoshi and the Mysterious Book (2026) – Full Completion Guide, Rewards & Secret Ending
Vampire Crawlers Coin Farming Guide


