How to Enable JavaScript in Chrome on Desktop PC

JavaScript is responsible for controlling both the responsiveness of the browser as well as any activities that are planned. If you use Google Chrome as your web browser and you consistently experience problems with websites not working properly, the issue is most likely caused by the lack of JavaScript. When you make a request for web pages, the browser, which is a type of client application, is the one that brings the pages to your computer. Always keep in mind that the channel through which you communicate with a website is your browser. Enabling JavaScript in the desktop version of Chrome can be done with the help of this article, which will provide step-by-step instructions. So let’s get started:
Read Also: How to Change Refresh Rate on Chromebook
How to Enable JavaScript in Chrome on Desktop PC
Now that you understand the fundamentals of enabling JavaScript on the browser, the following will walk you through the process of enabling JavaScript on the Google Chrome browser that is installed on your computer:
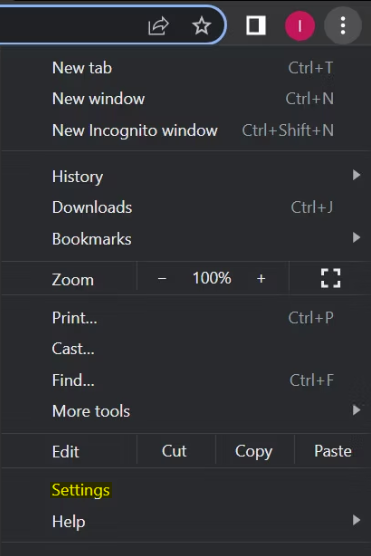
1. To access the menu, select the icon that looks like three vertical dots to the right of the icon that represents your profile. Then navigate to the Settings menu.
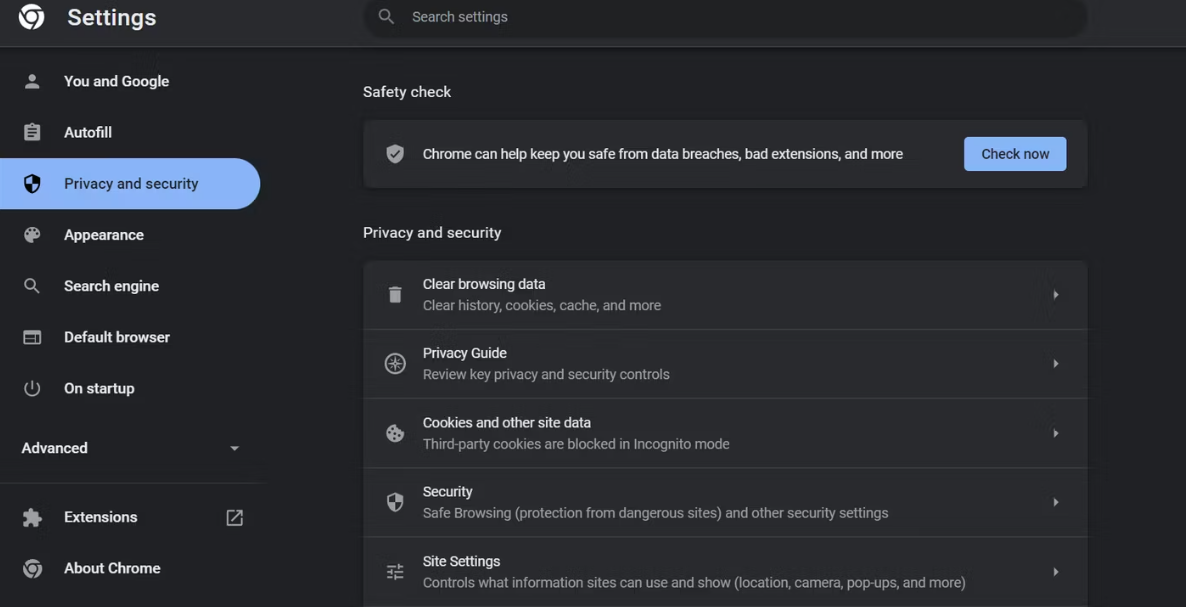
2. You can access the privacy guide menu by going to the sidebar and clicking on the Privacy and security link.
3. Proceed to Site Settings by going to the Privacy and Security menu option.
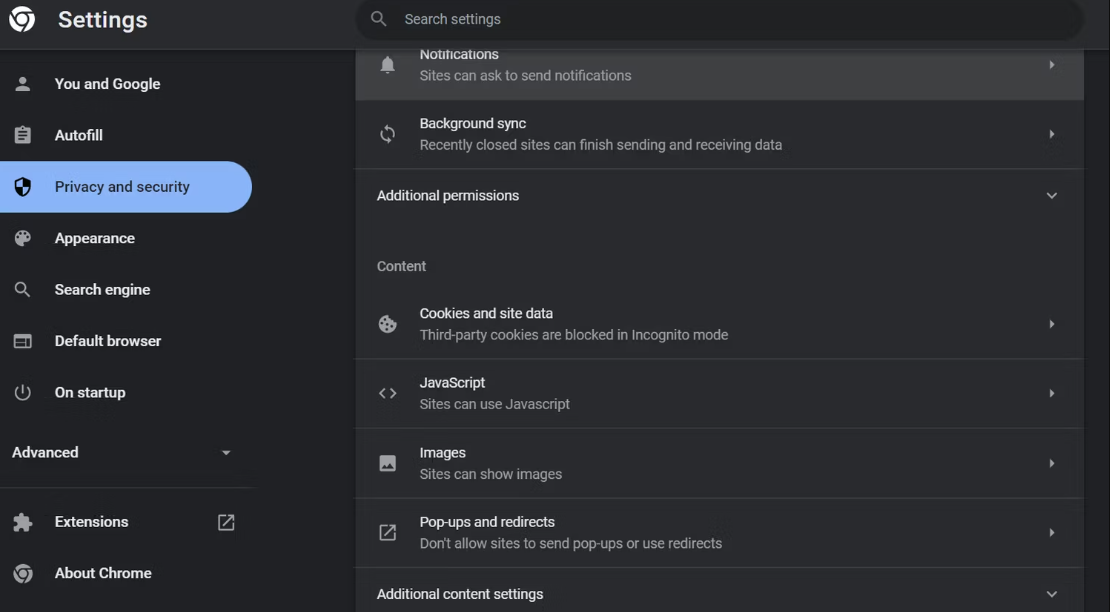
4. To access JavaScript, scroll down until you reach the Content area and click there.
5. Make sure the checkmark is on the box that says Sites can use JavaScript. If not, simply place a tick next to it, and that will be the end of it.
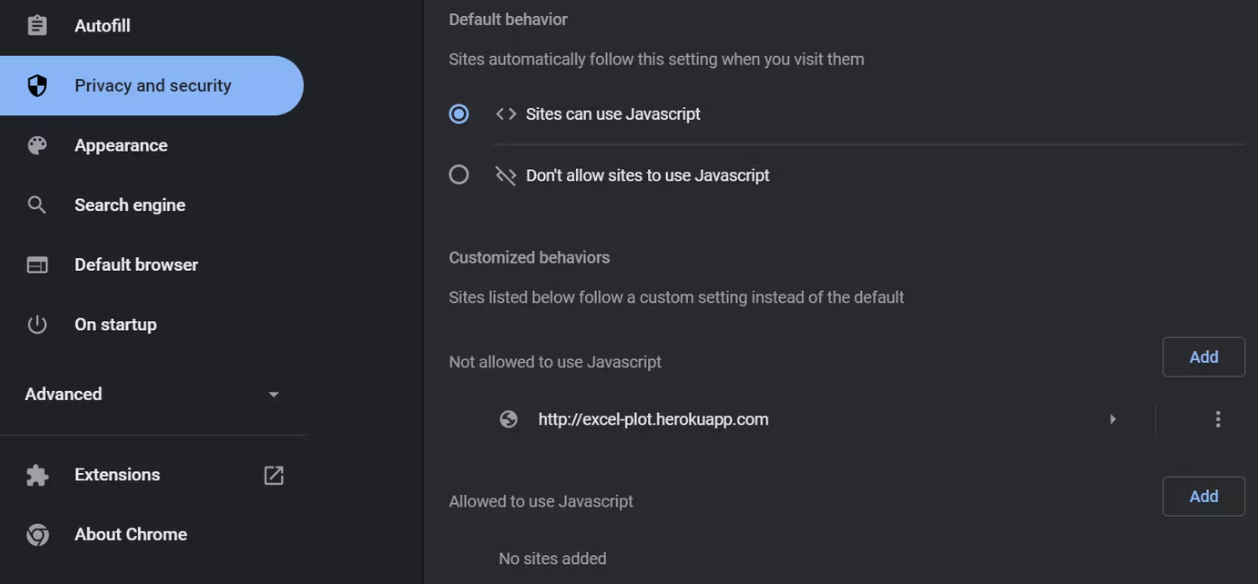
If you have preferences for certain websites, you could also choose to deactivate or enable JavaScript for those websites. Therefore, to adjust the settings described above for certain websites, you can remove the checkmark from the box that says “Don’t allow sites to use JavaScript.” After that, using the same menu as the previous steps (Settings > Privacy & Security > Site Settings), you need to change some of your site’s settings. You will notice that there are two Add buttons located within the Customized behaviors section.
1. To allow JavaScript, select it from the drop-down menu and then click the Add button.
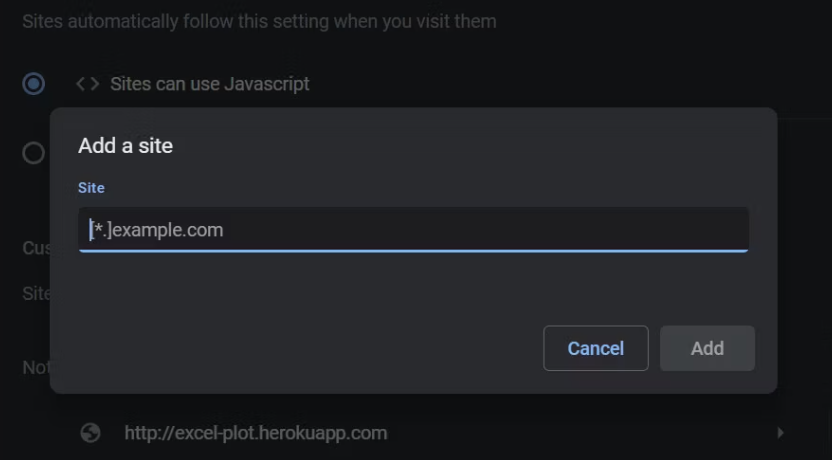
2. In the box that is provided, type the URL of the website that you want to enable JavaScript for. After that, select the Add button.
FAQs
Why is JavaScript not working in Chrome?
Go to the very top of the browser, then click on the icon that looks like three little dots, and then navigate to the “Settings” options within that. Click the “Site Settings” button after you have navigated to the “Privacy & Security” tab. To access the “Javascript” bar, first navigate to the “Content” section of the menu. To enable JavaScript in Chrome, go to the Tools menu and select the “Sites Can Use Javascript” radio button.
Is JavaScript enabled on browser?
Support for JavaScript is incorporated into all of today’s browsers, so there’s no excuse not to use it. It is likely that you may need to manually enable or stop this feature on a regular basis. This chapter will instruct you on how to enable and disable support for JavaScript in the following browsers: Internet Explorer, Firefox, Chrome, and Opera.
Do I have JavaScript enabled Chrome?
JavaScript is enabled by default on Google Chrome; however, you may check to see if it is functioning properly using the Settings menu. Simply clicking on the three little black dots that are located in the top-right corner of your Chrome window will bring up the Settings menu.
What JavaScript does Chrome use?
The JavaScript engine that drives Google Chrome is known as V8, and it was developed by Google. While we browse with Chrome, it is this component that is responsible for putting our JavaScript into action. V8 is the runtime environment that JavaScript utilizes in order to carry out its tasks. The browser is responsible for providing the DOM as well as the other APIs for the Web Platform.


