Guide
How To Delete Screenshots On Mac
Because Macs don’t have a Print Screen command like Windows, many Mac newcomers aren’t aware of the keyboard shortcuts that may be used to capture a snapshot of their screen. This work is really pretty straightforward, and there are various approaches that may be used to do it. But first, let’s take a look at what each symbol and key represents.
⇧ – Shift
⌘ – Command
^ – Control
⌥ – Option (Alt in Windows)
⇥ – Tab
⌫ – Delete ⌤ – Enter
⎋ – Escape
←↑→↓ – Arrow Keys
fn – Function key
⏎ – Return
⇪ – Caps Lock
Keyboard shortcuts for taking screenshots on a Mac
Hotkeys are provided by macOS to allow users to perform specific operations and system activities. When you utilise hotkeys, you will notice a substantial boost in the speed of your job. If you want to capture a screenshot of your Mac screen, use one of the instructions listed below:
- The shortcut keys Shift + Command + 3 are used to snap a screenshot of the whole Desktop screen.
- With Shift + Command + 4, you may snap a screenshot of a specific region of your Desktop screen (select the area with the mouse).
- Take a snapshot of a certain window on the computer by pressing Shift + Command + 4 + Space.Desktop. Also, this shortcut can be used to take a website screenshot on your Mac.
If you need to copy the screenshot to the clipboard for further insertion into any graphics or text editor, use the following hotkeys:
- Shift + Command +3 + Control – save a screenshot of the full Desktop to the Clipboard.
- Shift + Command + 4 + Control – save a screenshot of a certain area (select with the mouse) to the Clipboard.
- Shift + Command + 4 + Space + Control – save a screenshot of a certain Window to the Clipboard.
Then press Command + V to put the image into your document. You may also accomplish this by selecting Edit > Paste from the menu bar.
Take screenshots on a Mac with Grab (for macOS High Sierra)
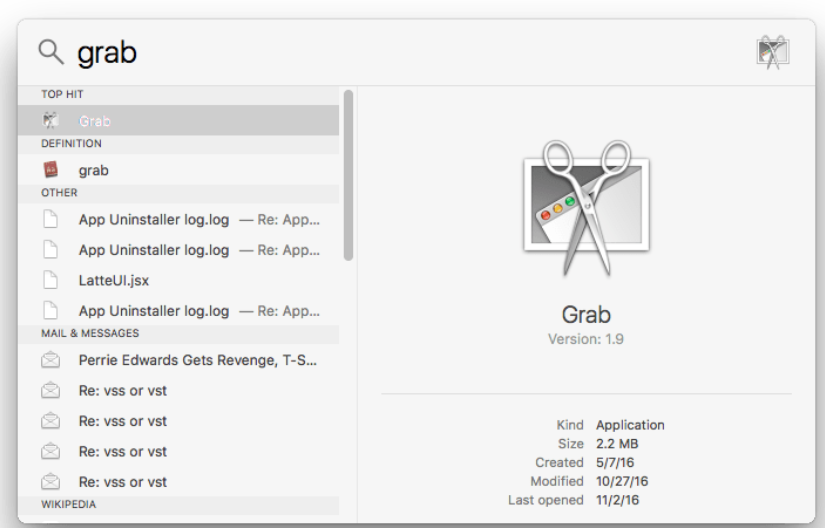
If you are used to executing activities with a mouse and would like not to memorise keyboard shortcuts, you may make use of the Grab utility software, which is included with Mac OS X. For Mac OS X High Sierra, the Grab application is accessible and may be accessed using Spotlight or the Launchpad. Skip to the third step if you’re looking for the similar utility software on a more recent macOS version.
Grab is extremely simple to use, and has a wide range of functions. Here are the main ones.
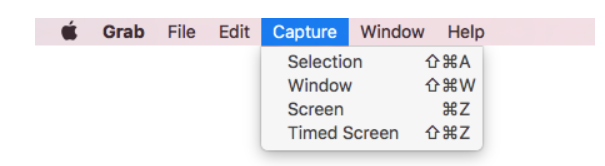
As you can see, it’s simple. There are four modes of “shooting,” each of which provides shortcuts:
- Using Shift + Command + A, you may make a selection (take a screenshot of the selected area)
- Window is accessed by pressing Shift + Command + W. (take a screenshot of any of the currently open windows)
- Command + Z – Bring up the screen (take an entire desktop screenshot)
- Timed Screen is accessed by pressing Shift + Command + Z. (take a screenshot of the full screen timer)
Following the capture of a screenshot, the Grab window will popup, displaying the captured picture. After that, you may store it in the appropriate folder.
It should also be mentioned that Grab may show many screenshots; it is also possible to snap multiple screenshots and then compare them in order to pick the best one to display. Grab also allows you to copy photos to the clipboard by hitting the Command + C keyboard shortcut.
Take screen pictures on a Mac with Screenshot (for macOS Mojave, 10.14, and above)
The Screenshot utility programme on macOS Mojave or macOS Catalina is the counterpart of the Grab app on previous versions of the operating system. Screenshot allows you to snap screenshots of your desktop and also record your workflow on the computer screen.
This application may be found in the Utilities folder under Applications, or it can be searched for using Spotlight or Launchpad.
To take a shot of your screen using the macOS Screenshot app, complete the following steps:
- Launch the Screenshot app.
- In the next moment, you will see a small toolbar of the app.

Take a snapshot of one of the three parts on the left by selecting it from the list:
- Select Capture Entire Screen from the drop-down menu and then click Capture or use the control key.
- Select Capture Selected Window from the menu bar and drag the pointer, which looks like a camera camera, to the specific window you want to screenshot. Then click Capture or use the control key. You may also capture a screenshot of the whole web page in your web browser.
- Control-click to catch and move the targeted area; drag its boundaries to narrow or broaden it; then click Capture. Select Capture Selected Portion from the menu bar.
Additionally, you may snap a screenshot at a later time. Click on Options in the Timer area, choose 5 seconds or 10 seconds and then click Capture to save the image. In the next instant, a little countdown timer will display on the screen of the computer. The screenshot will be created automatically after that.
How to take a video screenshot
If you want to take a video screenshot on your Mac, complete the next steps:
- Launch the Screenshot tool.
- Select one of the two sections in the middle of the app’s window:
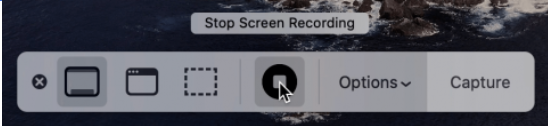
Select Record Entire Screen from the drop-down menu. Record the full screen by clicking Record or using the control key. Following that, you will notice a record icon in the Status menu of the Menu bar. Click on it to open it. To stop recording, either click the record icon at the top of the screen, or run the Screenshot app and choose Stop Screen Recording from the program’s toolbar on the left-hand side.
Select Record Selected Portion from the drop-down menu. chosen region will be captured and moved by control-clicking on it; drag the boundaries of the selected area to narrow or broaden it; and then click on the Record button. Clicking on the record icon in the Status bar or selecting Stop Screen Recording from the Screenshot app’s toolbar are both effective ways to end the recording session.
How to change screenshot location on a Mac
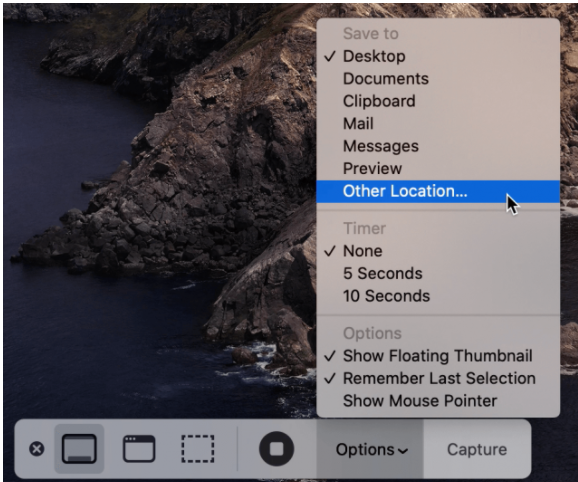
By default, all of your screenshots are stored to your computer’s hard drive. If you wish to store screenshots to a different place, open the Screenshot app and choose Options from the drop-down menu. There will be a selection of recommended Save To places, such as the Clipboard, Mail, Messages, and Other Location, to choose from. Once you’ve chosen a place, all of your screenshots will be saved to the location you choose.
If you use macOS High Sierra or earlier, there is another option to change the screenshot location. You can change the location for storing the screenshots via Terminal. Go to and use the following command:
How to delete screenshots on a Mac
It is possible that the screenshot files will use more than 1 MB of RAM. Even if each individual file is just a few megabytes in size, the sum of all of them may consume several gigabytes of your hard drive space. As a result, it is preferable to frequently uninstall them from your Mac.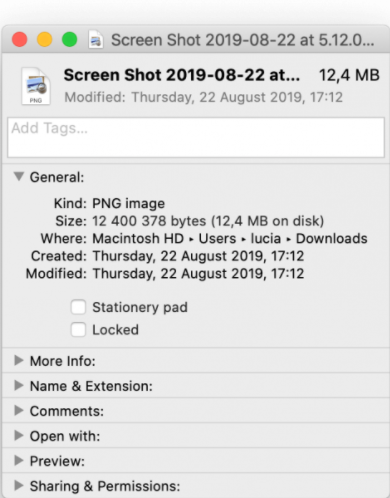
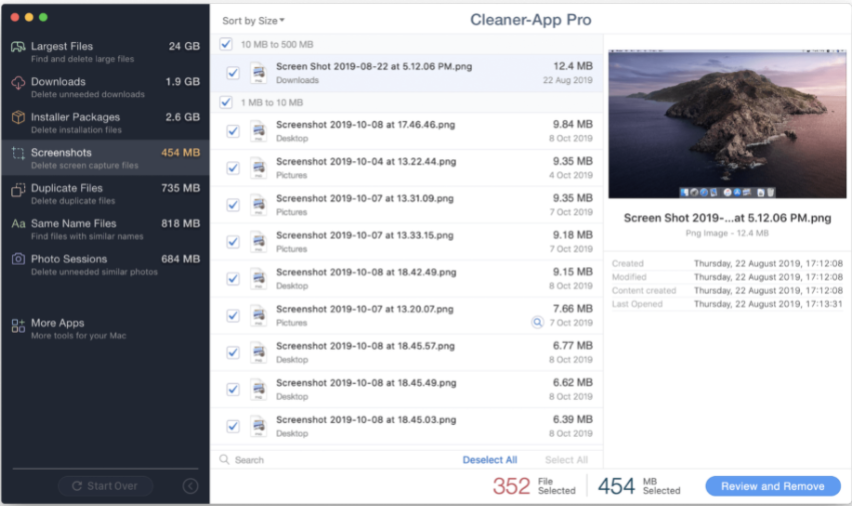
Also, storing screenshots in different locations makes it difficult to find and delete them. Therefore, to remove screenshots from your Mac, we recommend using the Cleaner-App software tool.
To get rid of useless screenshots, complete the next steps:
- Launch .
- Select the section. Sort files by size, name or date for your convenience. Choose some unnecessary files or click Select All. Then, click the button.
- Skim the files you are going to delete and click .
- Empty the trash bin to free up space on your Mac.
Conclusion
That’s all there is to it! We hope you have been able to find all of the information you needed to capture screenshots on your Mac using the system tools that are already installed. Additionally, there are other excellent third-party tools available for this purpose; nonetheless, the majority of Mac users are content with the techniques outlined above.
If you wish to swiftly remove screenshots from your computer’s hard drive, you may do it by using the Cleaner-App for free. You may effortlessly clean up your Mac with this software programme, which removes huge files, downloads, installers, duplicative files, files with the same name as another file, picture sessions, and screenshots from your hard drive.

Vampire Crawlers Coin Farming Guide

Forza Horizon 6 Performance: Why 60 FPS Is Still the Console Standard

Yoshi and the Mysterious Book (2026) – Full Completion Guide, Rewards & Secret Ending

How to Get Free Pets in Adopt Me: A Guide for Players

Roblox Username Generator – Create a Cool & Unique Username in Seconds
How to Get Free Pets in Adopt Me: A Guide for Players

Grow a Garden Recipes in Roblox: Guide to Cook (Donuts, Sushi, Pie, Pizza & More!)
Roblox Username Generator – Create a Cool & Unique Username in Seconds
Yoshi and the Mysterious Book (2026) – Full Completion Guide, Rewards & Secret Ending


