Apple
How to Empty Trash on Your Mac
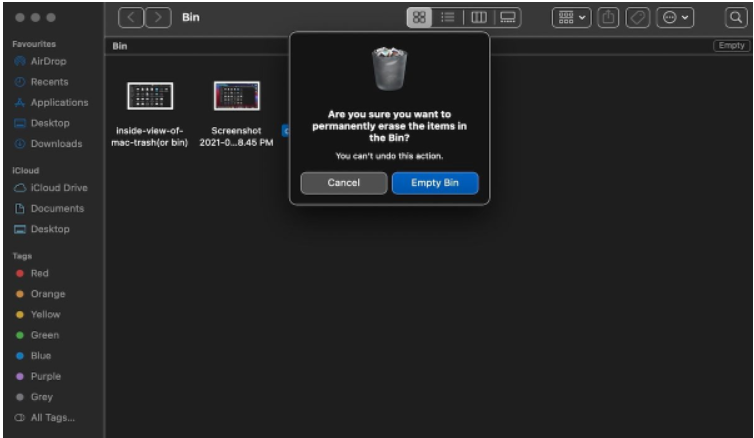
The process of emptying the Trash folder—which, depending on where you are, can be referred to as the Bin—takes very little time on average. After opening the folder, you navigate to the top-right hand corner and select the Delete All button. That’s all that has to be done. Nevertheless, there are some instances in which the Trash will not permit you to permanently delete some files.
The best way to handle situations like this is detailed in this handbook. It demonstrates how to determine whether files are being used and whether they are locked. In the event that a disc issue prevents you from emptying the trash, we will also go over how to make disc repairs on your own. In addition to that, we will go over the steps necessary to empty the Trash by utilizing the Terminal.
Read Also: How to Fix AirPods Issues with Zoom on Mac
How to Empty Trash on Your Mac
1. Restart Your Mac
When you exit an application or a file, the programme or file should, ideally, free up the space in the central processing unit (CPU) memory that it was using to execute itself. However, in the extremely unlikely event that this does not take place and the software continues to use the memory space available on your computer, it may cause a variety of issues.
Before moving on to more involved solutions, let’s give a simple restart a try to rule out the possibility that the issue is caused by something else. Therefore, restart your Mac, and then try removing anything from the Trash another shot. Proceed to the following step if the previous one does not work.
2. How to Empty the Trash on Mac When Files Are in Use

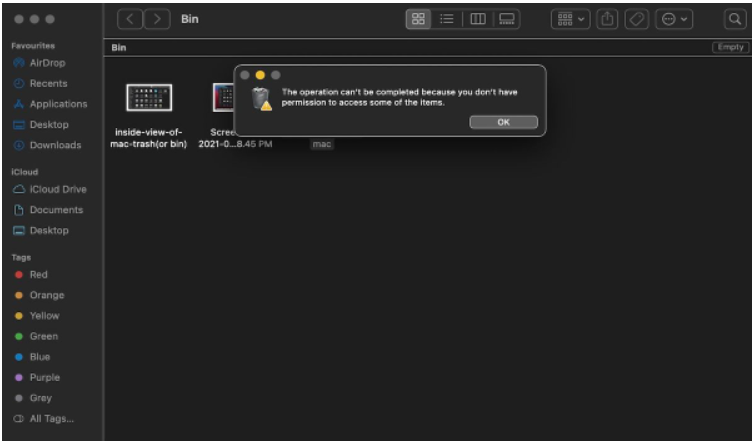
Sometimes the Trash folder on your Mac won’t empty because some of the files included within it are still being used. It’s possible that they’re being used by another programme or some kind of background procedure that’s running in the background. In either scenario, you will be able to tell that this is the situation because a popup will say something to the effect of: “The operation can’t be performed because the item is in use.”
This indicates that the file must be closed before the deletion of the file may be made permanent. For instance, if the item is a Word document, you will be required to exit Word in order to dismiss the document. In the event that it is an application, you will be required to exit that application. And this goes on.
There can be times when you won’t be able to pinpoint exactly where the file is open on your computer. In situations like these, it’s possible that it’s being used by a background process. Pressing Option + Cmd + Esc will open the Force Quit window, which you can use to determine whether or not this is the case. Now quit any extra applications that you believe may be preventing you from emptying the trash can on your Mac.
Advanced File Usage Troubleshooting
Another possibility is that the file in issue is being used by a component of the login or starting process. By setting up your Mac in Safe Mode, you will be able to avoid this problem. Certain software will no longer start up automatically as a result of this change.
To start up your Mac in Safe Mode and clear out the Trash, do the following:
- Put your Mac into sleep mode.
- After turning on your Mac, start holding down the Shift key immediately.
- After you have successfully booted into Safe Mode, go ahead and open the Trash.
- Simply select the “Empty” button (in the top-right corner).
If the file was being used by a startup app, it will be deleted as a result of this action. If that doesn’t work, you always have the option of using Terminal to determine which programme is responsible for locking the file. This is how you go about doing that:
- Throw trash out.
- Launch Spotlight by pressing the Command key and the space bar.
- After typing Terminal, hit the Return key.
- After typing lsof, hit the Space bar. This command displays a list of files that are now being used together with the programmes that opened them and meaning “list open files.”
- You will need to return to the Trash in order to remove the file you wish to delete from the Terminal.
- To execute the command, press the Return key.
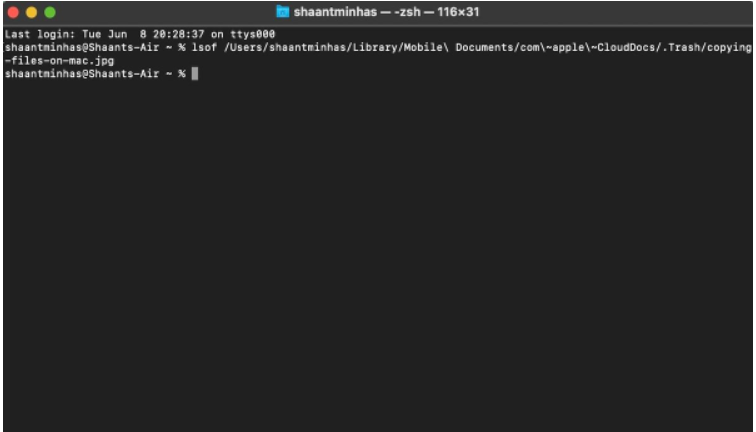
When you do this, a list of the applications that are using the file will be displayed. Because the file is not being used by any other software, it does not behave in this manner for us.
However, if you are seeing a list, you will need to exit all of the apps that are now open. However, keep in mind that Terminal may not display the complete names of the applications. Therefore, you might need to try closing a few different applications.
3. How to Empty the Trash When Files Are Locked
There is also the possibility that the files you are attempting to erase are locked. You may quickly fix this problem by heading to the Trash and unlocking the associated files there. The following is what you are need to do:
- Turn on the trash can.
- To delete a file, you need to control-click it first.
- Click Get Info.
- Remove the checkmark from the box labelled Locked.
This will allow you to delete the file and unlock it so that you can do so. You can accomplish this once more by selecting the option labelled “Empty.” You also have the option to right-click the file, select Control-click, and then select Delete Immediately.
4. How to Empty Trash When Your Disk Needs Repairing
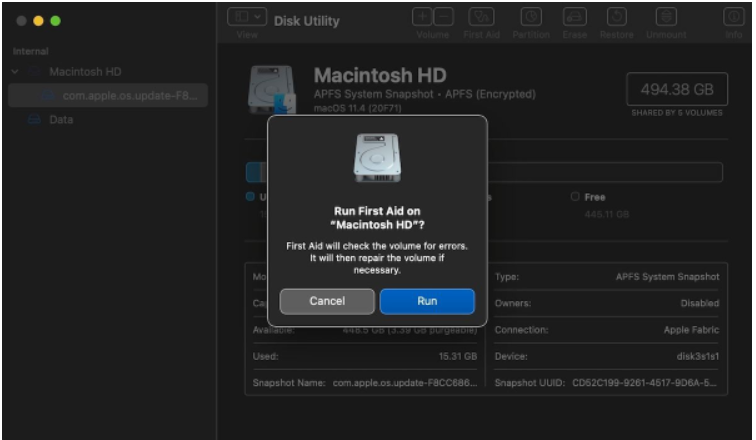
It’s conceivable that a problem with your hard disc is preventing your Trash from being emptied. Launching Disk Utility and utilizing its First Aid function will allow you to conduct a test to see whether or not this is the case.
In order to finish the process, please follow these instructions:
- Launch Spotlight by pressing the Command key and the space bar.
- After typing Disk Utility, press the Return key.
- Make a selection for the name of your hard disc. Check to see if it is the one that contains the file you wish to delete from your computer.
- After clicking First Aid, select the Jog option.
The First Aid feature will notify you if it discovers any mistakes, but it will not be able to address any issues that it identifies on your primary drive while it is operating. In order to correct disc errors on your startup drive, you will need to restart your Mac while in Recovery Mode.
If you are having issues with your Mac, and earlier troubleshooting methods have not been successful, you might try fixing the disc on your Mac. A disc repair should, in almost all circumstances, enable you to permanently delete items from the Trash. It’s possible that you’ll need to empty the trash manually, even if there isn’t a problem with the disc that’s causing your issues.
5. How to Force the Trash to Empty
There are a few different approaches one may use in order to force empty the Trash.
If a file is locked and you are unable to unlock it, you have the option of attempting to delete the file while holding down the Option key. Try to click the Empty button while simultaneously holding down the Option key. Holding down the Option key while using your Mac can allow you to get around any file locks. If you are unable to unlock any files on your Mac, this can be of great assistance.
To empty the Trash in a more immediate fashion, you might use run a command in the Terminal. This deletes files that are currently being used and overrides any locks that may be on your files. In addition to this, it corrects any additional problems that can prevent the trash can from being emptied.
As such, it is an effective method for removing files in a manner that is irreversible. On the other hand, it’s possible that macOS has a perfectly valid explanation for why it won’t allow you delete files. It’s possible that you deleted anything from the Trash by accident that was necessary for a certain software to function properly.
Because of this, you need to act with extreme caution if you want to use the nuclear procedure detailed below:
- To open Spotlight, press the Command key and the space bar.
- To launch Terminal, type its name followed by Return on your keyboard.
- After typing sudo rm -R, push the Space bar. This is the command to delete files in an unrecoverable manner.
- You will need to return to the Trash in order to delete the files you desire, and then drag them into the Terminal window.
- Hit the return key.
- To validate the command, you will need to enter the administrator password for your Mac. Because of the security measures in place, this won’t show up as you type it.
- To confirm and carry out the command, press the Return key.
The files that you dragged into the Terminal window will be deleted instantly once you do this. You can now take some much-needed rest easy knowing that the trash has been removed from your Mac.
This Is How You Empty the Trash on Mac
Emptying your trash can on a regular basis is a great method to keep your Mac tidy and free of clutter. It helps preserve space on your drive, which in turn makes your Mac perform more smoothly. We hope that reading this post was helpful in clearing out the trash on your Mac.
Even though it has a reputation for having extremely reliable software and hardware design, your Mac may nevertheless experience problems on rare instances. These problems may range from an inoperable mouse to additional Trash issues, as was the case with us.
Video

Roblox Username Generator – Create a Cool & Unique Username in Seconds

Grow a Garden Recipes in Roblox: Guide to Cook (Donuts, Sushi, Pie, Pizza & More!)

Job Opportunities in Dubai – 2026

Mr Bit at the SBC Awards Europe 2025: The Bulgarian Brand Setting New Standards in the European Gaming Industry

Dennis Rodman Net Worth 2026 – Everything You Need to Know

Bloxburg Neighborhood Codes 2026
Grow a Garden Recipes in Roblox: Guide to Cook (Donuts, Sushi, Pie, Pizza & More!)
Job Opportunities in Dubai – 2026
Dennis Rodman Net Worth 2026 – Everything You Need to Know


