Guide
How to Enable Waiting Room for Zoom Meetings

When the Zoom app is used, members of the meeting’s participants are given the option to wait in the event that the meeting has not yet begun. This is a feature that is both quite distinctive and really beneficial. This location within Zoom is referred to as the waiting room. This function also provides the host with the ability to manage the times at which the attendees can join the meeting. Additionally, the host has the ability to delay the arrival of the new members. In addition to this, after everything is ready, the host may simply press a button to let all of the members in. The person who is hosting the meeting ought to be familiar with the process required to permit a waiting room for zoom meetings.
Read Also: How to Use AirPods With a Zoom Meeting
How to Enable Waiting Room for Zoom Meetings
Step 1: Open the Zoom Web Site The first step, which is also one of the most fundamental steps, is to open the Zoom web portal. This is only the first step for beginners.

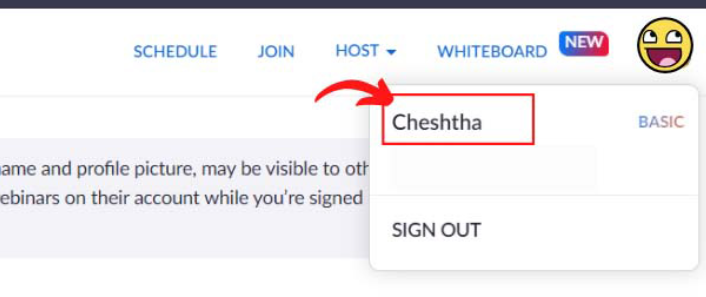
Step 2: After that, you are required to click on the profile photo that you have uploaded to your zoom account, which is the photo that appears next to your name when you sign in (if any). You are able to quickly identify your profile picture. Additionally, it can be accessed on the right-hand side of the window that is displayed when using a web browser.

Step 3: Simply navigate to your account here: You will now see two alternatives, the first of which is the name of your Zoom account, and the second is an option to log out. Choose your name from those two selections by clicking on it (the first option).

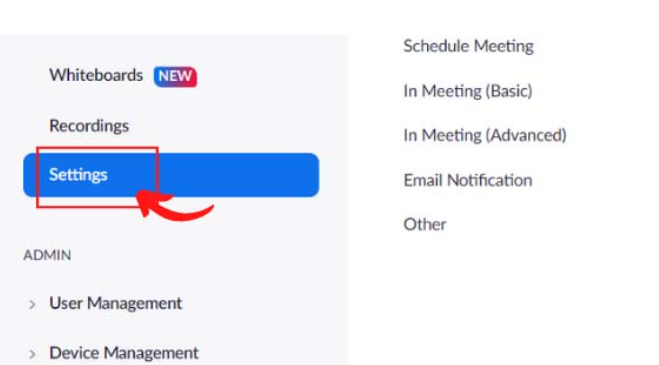
Step 4: After selecting the ‘Settings’ option, a menu of available customizations will appear before you. Locate the “Settings” item in the drop-down menu, and then click on it.

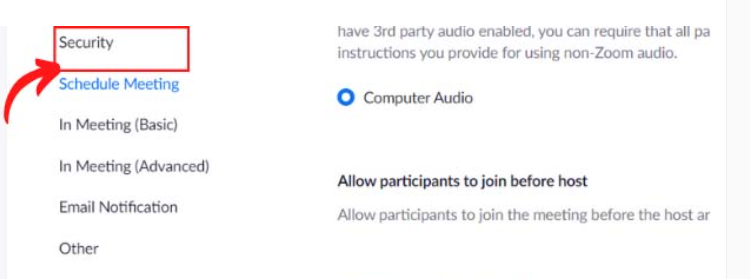
Step 5: Simply select the Security tab: Go to the ‘Settings’ menu and then tap on the ‘Security’ option when you get there. This option provides access to all of the relevant features and configurations that are necessary to protect the confidentiality of your account.

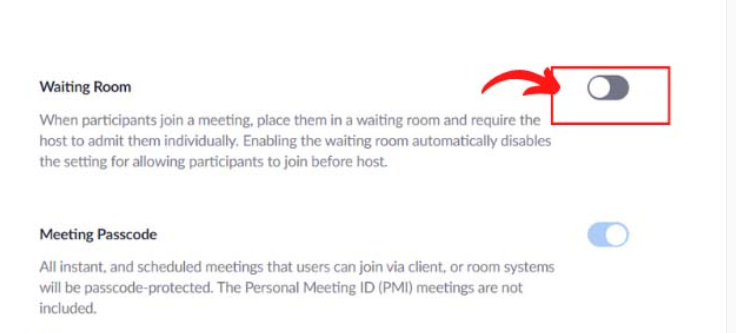
Step 6: Activate the ‘Waiting Room’ option in Step 6: At this point, you should see an option with the title ‘Waiting Room.’ Next to this button is another button that acts as a toggle. To make this option active, you need to repeatedly tap on the toggle until it changes colour to blue. You have successfully activated the waiting room function in your Zoom app as a result of this action.

FAQs
Why can’t i enable waiting room in zoom?
Instant meetings and Zoom Phone calls that have been upgraded to a meeting do not make use of the Waiting Room because it is disabled by default. You will need to go to the Security menu of your in-meeting controls in order to activate the Waiting Room feature for these meetings.
What happens if you don’t enable waiting room in zoom?
Join Before Host will not function for your meetings if you have Waiting Room enabled in the meeting settings, unless you have Waiting Room configured to allow select people to circumvent the queue. In order for the meeting to be recorded even if the host is unable to attend, you will need to make sure that the automatic cloud recording feature is turned on for the meeting.
Can co-hosts manage waiting room?
Make one of the other attendees into a co-host. Begin the waiting room (co-hosts have the ability to admit or remove participants from the waiting room and can also place participants in the waiting room).


