Gaming
How To Farm Sha of Anger For The Mount – [2021 Detailed Guide]
The Sha of Anger is one of the seven prime sha found in Kun-Lai Summit. With an attack power around 40 level 85 players, this terrifying creature was finally beaten down after a long battle from many adventurers who had been waiting for its arrival with baited breath.
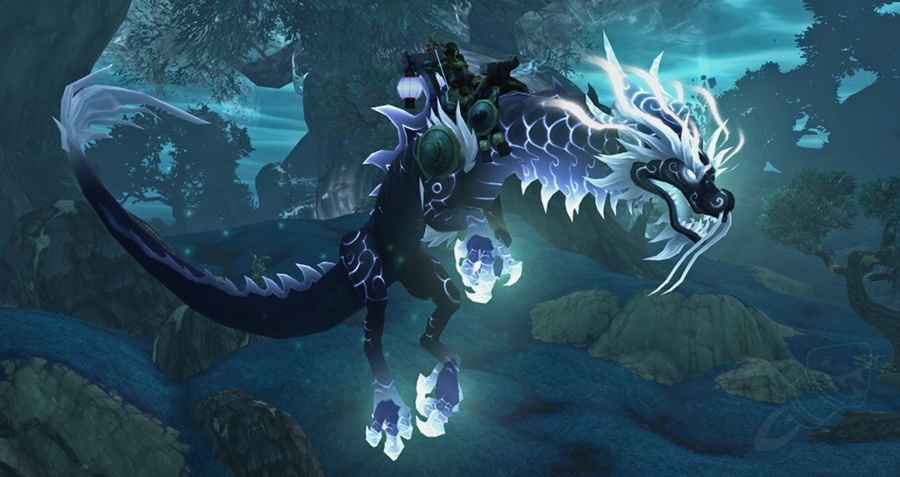
The Sha of Anger is a World Boss from the Moment extension pack and has been cultivated for its opportunity to drop what most people believe to be one of the best mounts in-game. The boss can easily be solo’d by any level 100+ character who wants an easy kill, without being hindered by other players or having their progress delayed.
Loot
The Sha of Anger has been so angry that it has created a portal to the past. Now, you can get your hands on Tier 14 gear from before World of Warcraft: Battle for Azeroth launched!
The world was changing with the release of Battle for Azeroth and its newest expansion challenging players in new ways than ever before. But some things never change, like how boss fights provide a chance at loot upgrades as they did back then in Legion’s first raid tier…
Spawn Locations and Nearby Mobs
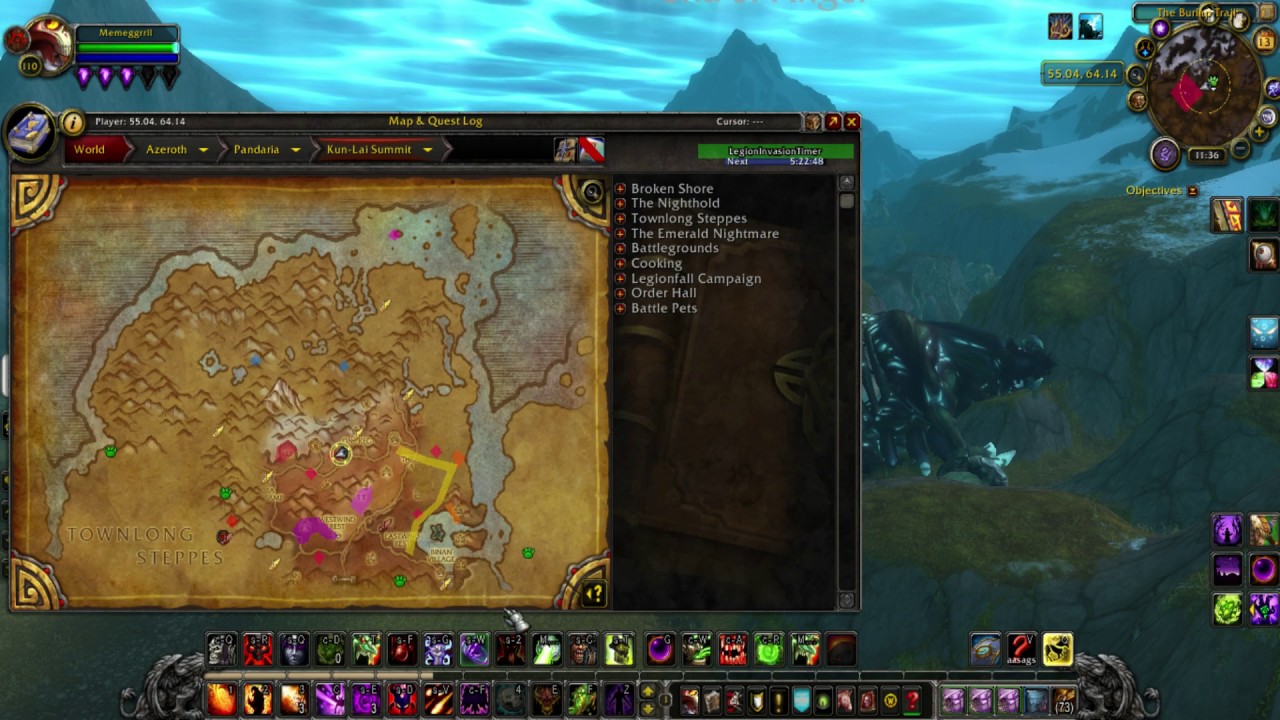
- The Sha of Anger will spawn in one of the following 3 locations.
- in the south of Kun-Lai Summit, between the Gate of August Celestials and the Shado-Pan Retreat;
- on the Burlap Trail, east of Kota Basecamp;
south of One Keg.
The Farm Sha of Anger just brings forth in the huge Sha of Anger for the Moment that you find in the previously mentioned zones, as represented by the screen capture beneath (in which the Sha is going to produce).
The Sha of Anger has a low respawn clock of around 15 minutes.
Furthermore, the Sha of Anger changes the zone’s local hordes into its own (first class) rubbish. You should slaughter this waste prior to endeavoring to discard the chief.
Overview of the Fight
The experience against the Sha of Anger comprises of two stages that substitute all through the battle, which we will allude to as Phase One: Growing Anger and Phase Two: Unleashed Wrath. The stages are controlled by the condition of the manager’s anger bar, which increments and diminishes in a consistent and unsurprising way. During each stage, the supervisor utilizes a capacity explicit to that stage, just as two capacities basic to the two stages.
Common Abilities
Despite the condition of his fury bar (and, consequently, the period of battle), the supervisor will utilize two capacities.
- Fume Icon Seethe rebuffs the attack if no player is inside skirmish scope of the chief. In the event that this occurs, the supervisor will bargain a lot of Shadow harm to his primary aggro focus, simultaneously expanding the amount of Shadow harm that that target takes.
- Unending Rage Icon Endless Rage is a capacity that the Sha of Anger utilizes generally at regular intervals. The capacity focuses on the areas of a few players, and, a couple of moments later arrangements 100,000 Shadow harm to players inside 3 yards of the area. Also, the capacity calls two things at the area where it lands:
- Rage, a little add that sits idle yet scuffle its most noteworthy aggro target.
- Unpleasant Thoughts Icon Bitter Thoughts, a hurtful cloud which forestalls players who are inside it from projecting any spells or playing out any activities with the exception of moving.
- Managing Seethe is extremely simple, and it basically includes ensuring that the tank is inside skirmish scope of the supervisor consistently.
- Managing Endless Rage is similarly simple, if a touch more unpredictable.
- Players should move away from the areas where Endless Rage will land (they are pre-motioned by a graphical impact).
- Players should move out of any Bitter Thoughts they may wind up in.
- The off-tank(s) should tank the Ires, while your strike AoEs them. As we will see underneath, it is likewise plausible to kite the Ires.
Read Also: Pathfinder: Kingmaker Walkthrough
Phase One: Growing Anger
The manager’s fierceness bar Sha of Anger for the Moment unfilled, and increments to full limit over a time of 50 seconds. During this time, the supervisor is in Phase One. When the anger bar is full, the stage closes.
Abilities
During Phase One, the manager utilizes a solitary capacity (notwithstanding the regular capacities recorded previously).
Farm Sha of Anger, also known as the Angry Spirit or Farm Boss is a harsh and vengeful spirit. She will get her revenge on anyone who dares cross paths with them by setting up an angry curse to punish those that have wronged her in life for 6 seconds before they become “hers” until she can take it no more – 30 seconds after which point their health and damage increase by 200%.
Strategy
The technique for Phase One rotates around dealing with the brain control most proficiently. The initial step is to guarantee that the brain control doesn’t influence more than the 3 debuffed players. This implies that when Growing Anger is projected, the influenced attack individuals should move out of the strike.
Afterwards, you have two options.
- You can harm the influenced players until they arrive at half wellbeing, what breaks the brain control.
- You can swarm control them and hang tight for the brain control to lapse following 30 seconds.
It’s all about anticipation. For example, if the Sha of Anger is projected to grow into its next stage then it is best for a healer or two to have access and utilize their AoE fears just before that happens in order to prevent any mind-control spells from taking effect while individuals are low on health and without mana pools filled up yet – which can be an issue when there are so many mobs around.
Raid Composition
Given the way that this is a world chief, you can use a strike gathering of up to 40 individuals to overcome it. This represents the issue of the number of assault individuals are really expected to overcome the Sha of Anger. We would offer the accompanying remarks:
- Tanks: You will require 1 tank for the Sha of Anger for the Moment, and at any rate one tank for the adds. You can use two off-tanks on the off chance that you want.
- Healers: Raid harm can turn out to be very severe, and the more healers your attack has, the better. Subsequently, we would instruct a base with respect to 6 healers, and upwards of 9, contingent upon your attack size and stuff level.
- DPS: The experience requires a sensibly high measure of DPS for a few reasons (killing the includes time, breaking the brain control), so the more DPS players you have, the simpler the battle becomes. We suggest in any event 15 DPS players.
Corpse Running/Avoiding Wipes
When you revive an individual, they can return to the area where they died and restore their soul. You should wait 2 minutes before restoring again if it’s your second time reviving someone in a row.
You know when something bad happens and you just want to get back on your feet? Well, it’s the same with WoW. When you die in battle, not only do you lose half of your health points but also all those precious items that are so hard to find in game! But by gathering together after a wipe (a term used for players who died), fellow adventurers can help revive their fallen comrades while conserving time.

Roblox Username Generator – Create a Cool & Unique Username in Seconds

Grow a Garden Recipes in Roblox: Guide to Cook (Donuts, Sushi, Pie, Pizza & More!)

Job Opportunities in Dubai – 2026

Mr Bit at the SBC Awards Europe 2025: The Bulgarian Brand Setting New Standards in the European Gaming Industry

Dennis Rodman Net Worth 2026 – Everything You Need to Know

Bloxburg Neighborhood Codes 2026
Grow a Garden Recipes in Roblox: Guide to Cook (Donuts, Sushi, Pie, Pizza & More!)
Job Opportunities in Dubai – 2026
Dennis Rodman Net Worth 2026 – Everything You Need to Know


