Guide
How to Lock a Microsoft Word Document
It is possible to add varying levels of protection to a document that was created using Microsoft Word and then saved. You have the power to decide a variety of things, such as whether or not other people can open the files or update them. Documents can be safeguarded in this way by requiring the entry of a password and ensuring that the protection settings are adjusted in accordance with the preferences of the user. Continue reading this article if you are interested in learning how to secure a document that was created in Word.
Read Also: How to Download Microsoft Word on your Chromebook
How to Lock a Microsoft Word Document
In Windows
If you want to protect your document with a password using the power that is included in Microsoft Word, you may do so by following the instructions that are provided here. If you want to protect your document with a password, you can use the feature that is included in Microsoft Word.
1. Start up Microsoft Word and navigate to the file that you want to keep to yourself.
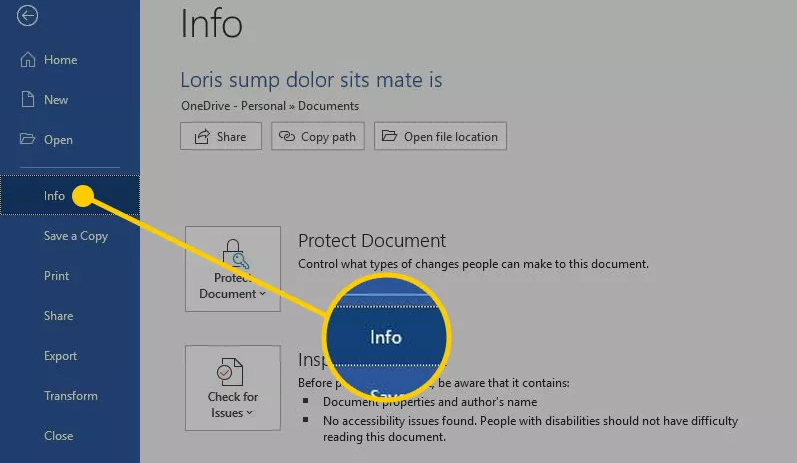
2. You may view the information about the file by selecting the File tab in the upper left corner of the screen after selecting Info from the menu that is located on the left side of the screen.
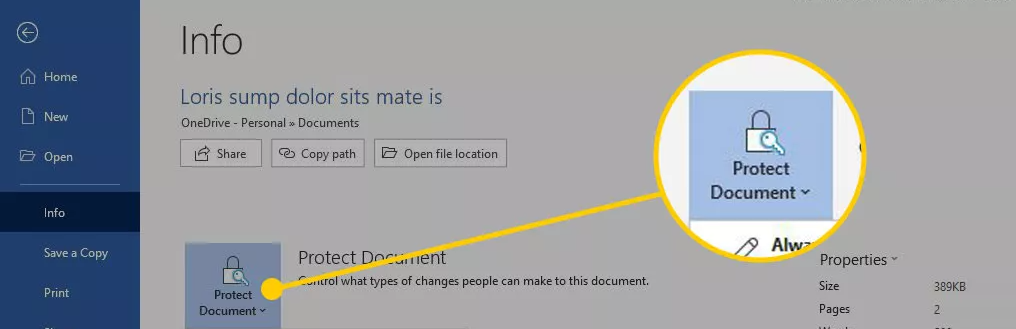
3. Select Protect Document. Suddenly, a pull-down menu that has a multitude of possibilities and provides the user with a selection of various alternatives appears.
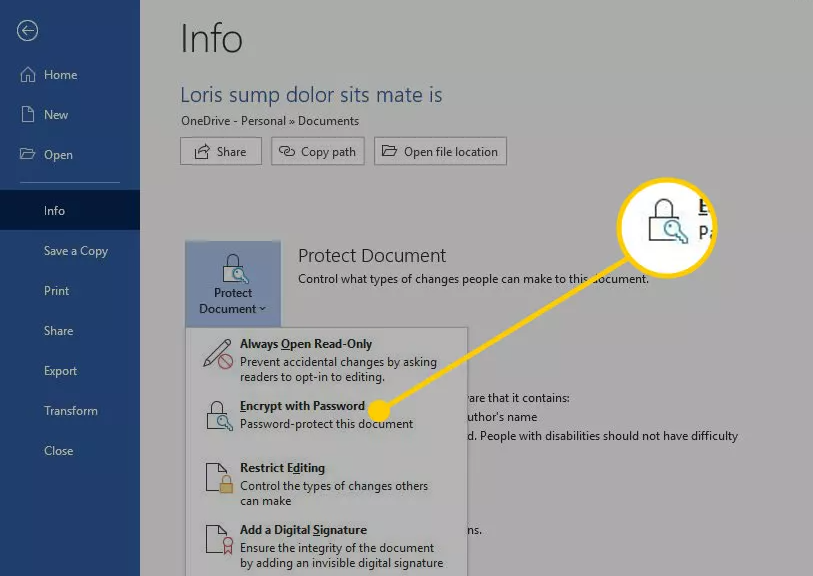
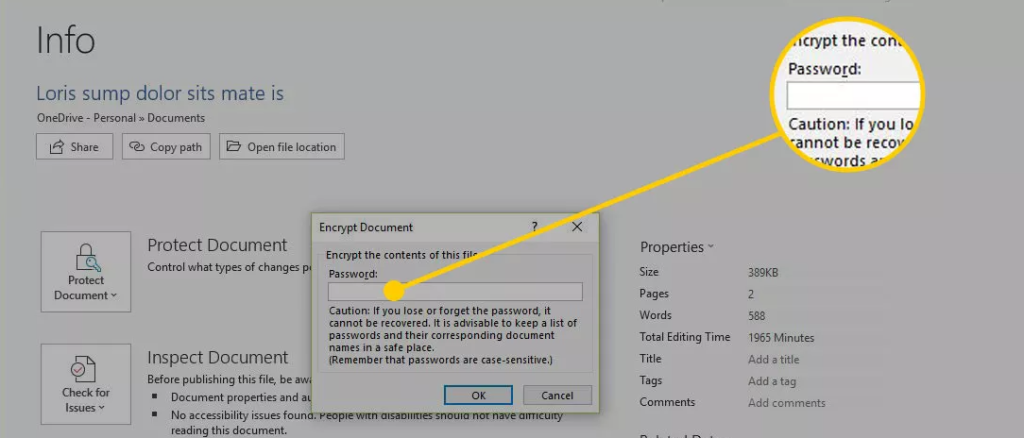
4. From the list of possible options, choose the one that says “Encrypt with Password.”
5. Put the password you want to use to encrypt the document into the text box that’s labelled “Encrypt Document.”
6. When you click the OK button, be sure to pay attention.
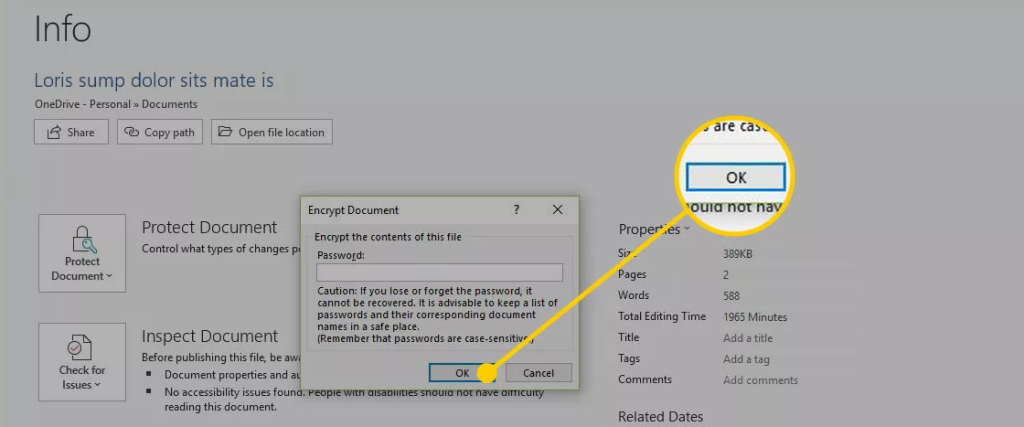
7. To proceed, you will need to retype the password that you just typed when prompted, and then click the OK button. It is essential to provide a password in order to access the document, as stated in the message that is displayed in the box that is labelled “Protect Document.” In order to do so, one must first provide their credentials.
In macOS
You will need to follow the instructions that are offered further down on this page in order to encrypt your document using the function that is available in macOS to demand a password. You can do this by clicking the link that is located further down on this page.
1. Start up Microsoft Word and navigate to the file that you want to keep to yourself.
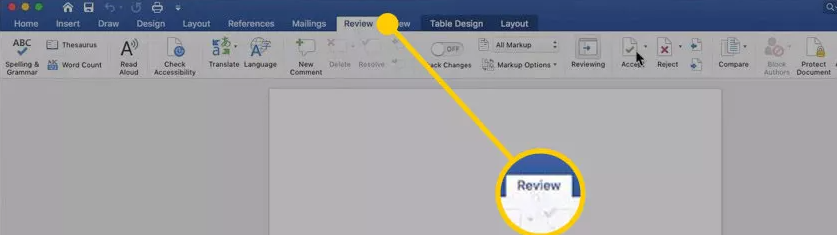
2. To review your work, select the Review tab that can be found in the upper-right hand corner of the Word user interface. You can access this tab by going to the Review menu in the main navigation.
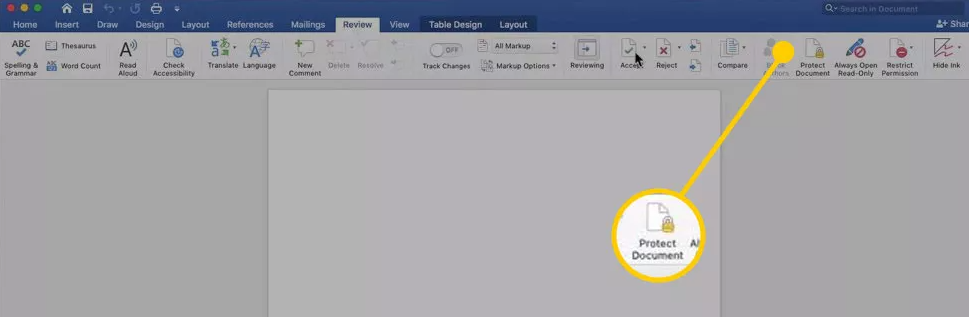
3. Select Protect Document.
4. Within the dialogue box that is labelled “Password Protect,” locate the text box that is marked “Set a password to open this document,” and then type a password into that box. The document will now require a password to be opened. The name “Password Protect” is printed on the lid of the box.
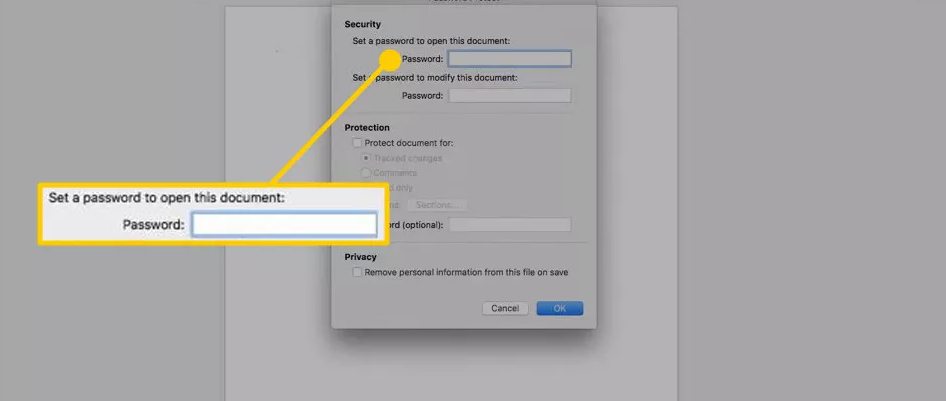
5. You will need to enter the password a second time for verification purposes, and then click the OK button when you are finished.


Vampire Crawlers Coin Farming Guide

Forza Horizon 6 Performance: Why 60 FPS Is Still the Console Standard

Yoshi and the Mysterious Book (2026) – Full Completion Guide, Rewards & Secret Ending

How to Get Free Pets in Adopt Me: A Guide for Players

Roblox Username Generator – Create a Cool & Unique Username in Seconds
How to Get Free Pets in Adopt Me: A Guide for Players
Yoshi and the Mysterious Book (2026) – Full Completion Guide, Rewards & Secret Ending
Forza Horizon 6 Performance: Why 60 FPS Is Still the Console Standard


