Guide
How to Save Battery on Chromebook
Even though Chromebooks have a battery life that is very long, the Chrome operating system does not have any built-in features (such as a battery saver, low power mode, or anything else) that can help to extend the life of the battery even further. This means that Chromebooks do not have the ability to have their battery life increased even further. In spite of this, there are ways in which the features and settings of your Chromebook can be adjusted in order to decrease the amount of battery it uses.
In this essay, we will go over seven distinct ways that will assist you in reducing the amount of time that your Chromebook spends using battery life. In addition to other helpful ideas for taking care of batteries, you will also learn how to check the health of the battery in your Chromebook, which will be covered in this lesson.
Read Also : How to Mod Google Snake Menu on Chromebook 2022
How to Save Battery on Chromebook
1. Lower Display Brightness and Keyboard Backlight
When it comes to gadgets and other battery-powered devices, one of the primary causes of battery drainage and overheating is setting the screen brightness to an excessively high level. Maintaining the display brightness at the minimum level necessary to make the content of the screen visible will help you get more use out of the battery life of your Chromebook.
Reduce the amount of light emitted from your Chromebook’s display by pressing the Brightness Down key. Alternately, you might click the notification area and then slide the brightness control to the left.
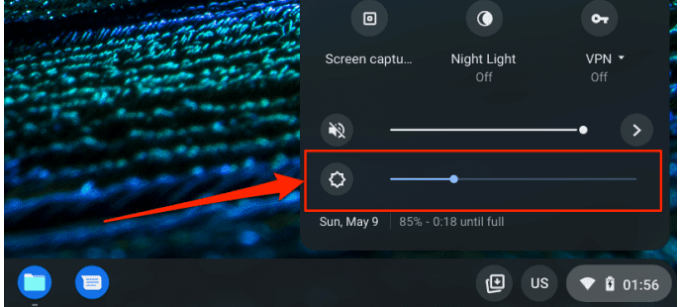
Battery life can be extended by reducing power usage by turning off the keyboard backlight, especially when working in well-lit areas or outside. To reduce the intensity of the keyboard lighting, press the Alt key and the Brightness Down key simultaneously.
2. Close Unused Browser Tabs
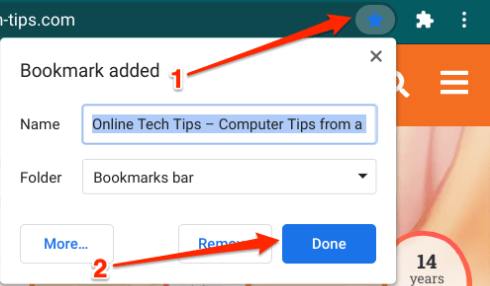
Even when the tabs are closed, websites that you view on Chrome and other browsers still consume the resources of your Chromebook’s central processing unit (CPU), memory footprint, and battery life. Start up your online browser and close any tabs or web pages that you are no longer using. You could save the web page as a bookmark if you don’t want to risk losing the tab you’re currently viewing.
In Chrome and Mozilla Firefox, you may save a webpage as a bookmark by pressing Ctrl + D or by selecting the star icon in the URL bar and then selecting Done.
3. Close Unneeded Apps
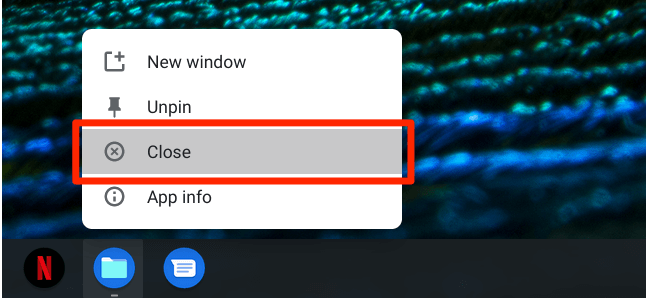
If you have an excessive number of apps open at the same time on your Chromebook, the battery will deplete quicker than normal. By closing apps that you are no longer using or that you have no need for, you will significantly minimize the amount of battery use. You can close an app on the Shelf of your Chromebook by tapping and holding it, or by right-clicking on the app and selecting Close from the context menu.
Alternately, you can swipe up on the app or click the x icon to close it after pressing the Show windows key. You can also close the app by using the Android Settings menu’s “Force Close” option. Launch the Settings app, navigate to the Apps menu, then select Google Play Store, and finally select the Manage Android settings option.
Chrome OS will create a new UI for the Settings app; click Apps & notifications, pick See all apps, and then select the programme you wish to force close from the list that appears.
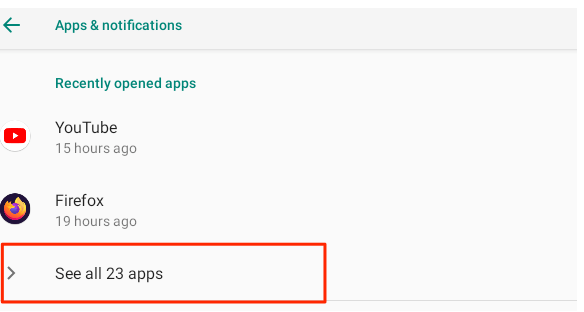
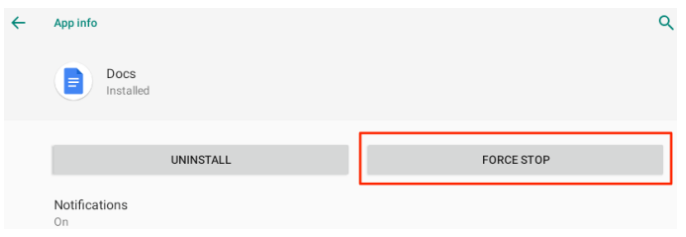
To exit the application, click the option labelled Force Stop, then click OK when prompted to confirm your choice.
4. Turn Off Wi-Fi When Not In Use
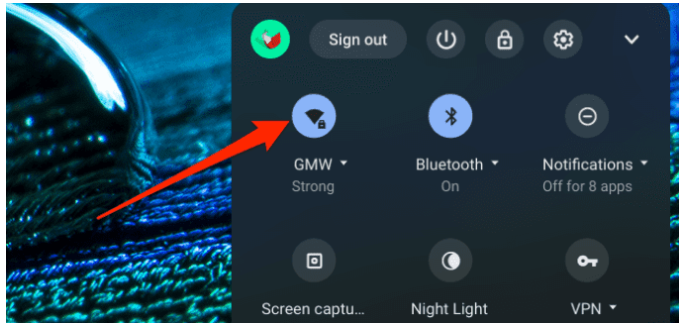
If you leave the Wi-Fi feature activated on your Chromebook when you aren’t connected to a wireless network, the device will continually search for networks that it can connect to. This never-ending activity is also eating away at the battery life of your gadget. When you are not connected to a wireless network, you should make it a practice to turn off Wi-Fi on your Chromebook. This will help you save battery life.
Launch the Settings app, navigate to the Network section, and turn off Wi-Fi there. Tap the notification area, and then tap the Wi-Fi icon that appears. This is even better.
Video

Roblox Username Generator – Create a Cool & Unique Username in Seconds

Grow a Garden Recipes in Roblox: Guide to Cook (Donuts, Sushi, Pie, Pizza & More!)

Job Opportunities in Dubai – 2026

Mr Bit at the SBC Awards Europe 2025: The Bulgarian Brand Setting New Standards in the European Gaming Industry

Dennis Rodman Net Worth 2026 – Everything You Need to Know

Bloxburg Neighborhood Codes 2026
Grow a Garden Recipes in Roblox: Guide to Cook (Donuts, Sushi, Pie, Pizza & More!)
Job Opportunities in Dubai – 2026
Dennis Rodman Net Worth 2026 – Everything You Need to Know


