Guide
How to Schedule a Post on Your Facebook Page

If you want to keep your Facebook page or group’s voice and posting schedule consistent, you may find that creating a content calendar for them is helpful. In addition, scheduling your posts in advance will relieve the pressure of having to post at the appropriate moment.
This article will teach you how to schedule a post on Facebook, how to keep track of what you schedule, and how to change postings after they have been published.
Read Also: How To Make Dark Mode On Facebook
How to Schedule a post on a Facebook page
You have to have management privileges on a Facebook page before you can plan posts to go out from that page. Here is how you do it using the mobile app for the Facebook Business Suite as well as the website for Facebook.
From the Facebook website on a desktop browser:
1. To begin, go to the website for Facebook and sign in to your account there.
2. From the homepage of Facebook, navigate to the sidebar menu on the left and select Pages from the list of options.
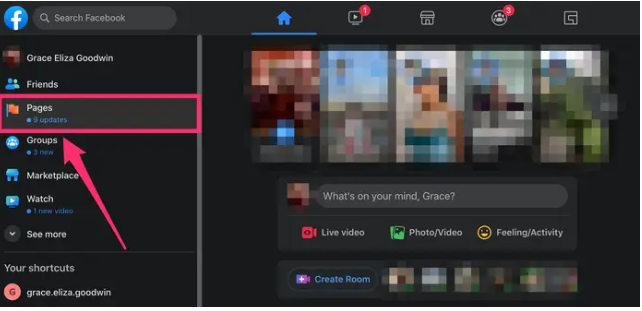
3. Locate the page you wish to post in under Pages you manage and click on it.
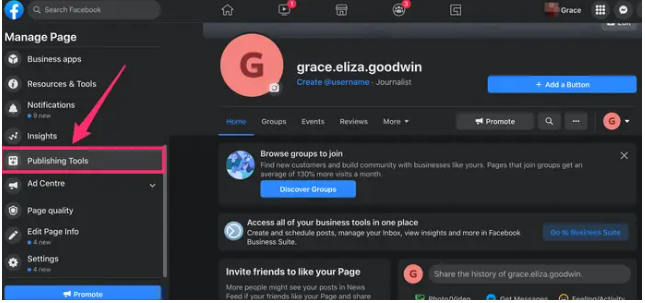
4. When you reach the page you want to edit, navigate to the bottom of the sidebar menu on the left and select Publishing Tools. You will be brought to the website for the Facebook Business Suite.
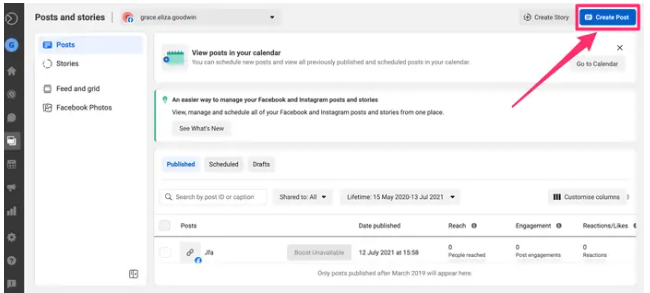
5. Click the Create Post button located in the upper-right hand corner of the Facebook Business Suite.
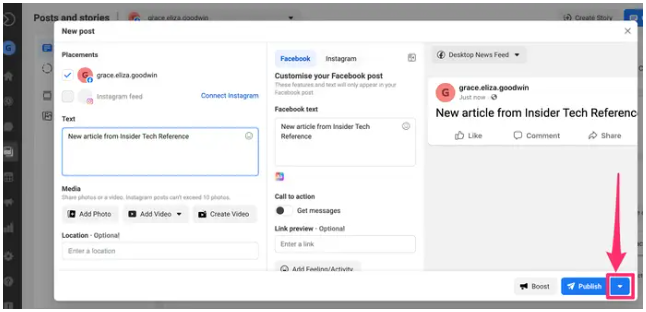
6. On the left-hand side of the pop-up, locate the Text field and start typing your post there.
7. Below the text input field, you have the option to add either media or a location.
8. When you are finished writing your post, locate the blue arrow with a downward pointing arrow next to the blue Publish button in the lower right-hand corner of the window.
9. In the pop-up, click the Schedule Post button.
10. In the next window that appears, choose a day and time for your planned post, and then click the Save button.
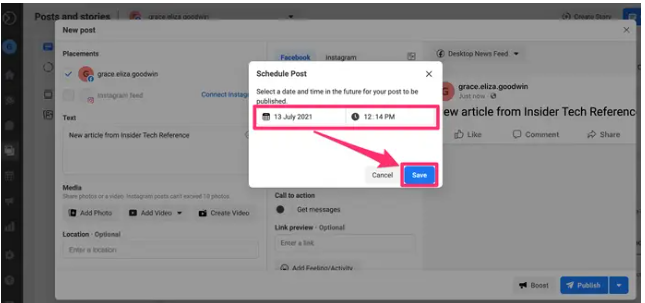
11. In the lower right corner of the window, click the Schedule Article button. After doing so, your post will be automatically published at the date and time that you specified.

If you navigate to the Posts page of the Facebook Business Suite, then click the Scheduled tab that is located in the middle of the page, you will be able to view your scheduled posts. To make changes to a scheduled post, you need to click on the post in question and then click the icon that looks like three horizontal dots.
From the Facebook Business Suite mobile app:
1. Download the Facebook Business Suite app (formerly known as Pages Manager) for your iPhone/iPad or Android device, and then sign in to your account using that app.
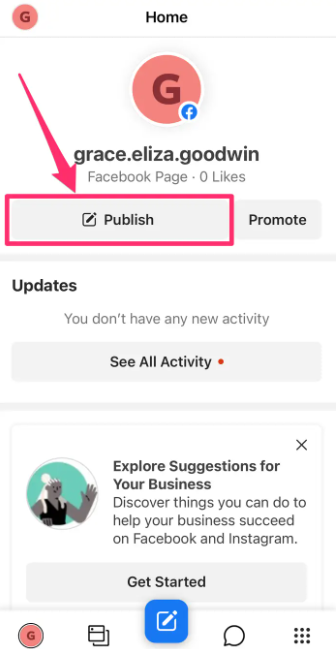
2. Navigate to the app’s Home tab and then hit the Publish button that is located at the top of the page directly below your page’s name.
3. Within the “Write something…” section, compose the text of your article. You have the option to personalize the post at the very bottom by picking Photo/Video, Location, Live Video, Feeling/Activity, or Get Messages, if this is something you would like to do.
4. After you have finished writing and customizing your post, select the Next button located in the upper-right corner of the screen.
5. On the Review screen, at the very top, tap the Scheduling Options button.
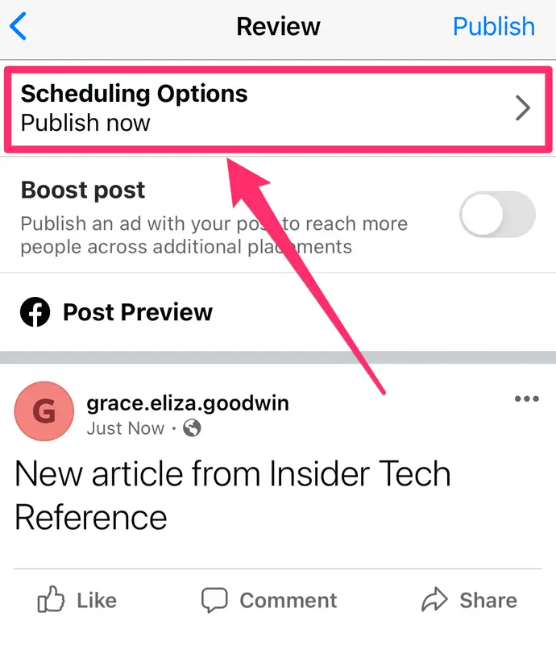
6. Click the Schedule for later option, select a date and time, and then click the Done button in the upper-right corner of the screen.
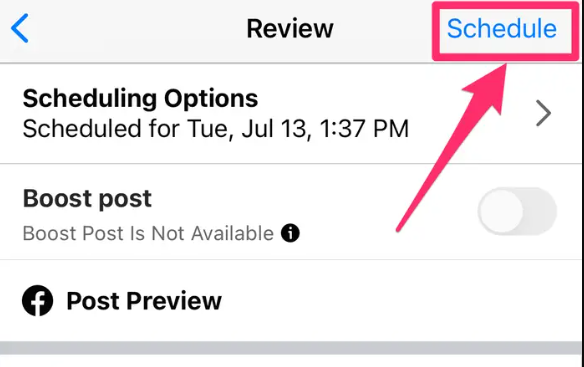
7. After reviewing the specifics of your upcoming post, tap the Schedule icon located in the upper-right corner of the screen.
If you navigate to the Posts page, then press the Scheduled tab located at the very top of the page, you will be able to view all of your scheduled posts. Tap the button that looks like three vertical dots beside the post details in order to make changes to a scheduled post.
Video

Roblox Username Generator – Create a Cool & Unique Username in Seconds

Grow a Garden Recipes in Roblox: Guide to Cook (Donuts, Sushi, Pie, Pizza & More!)

Job Opportunities in Dubai – 2026

Mr Bit at the SBC Awards Europe 2025: The Bulgarian Brand Setting New Standards in the European Gaming Industry

Dennis Rodman Net Worth 2026 – Everything You Need to Know

Bloxburg Neighborhood Codes 2026
Grow a Garden Recipes in Roblox: Guide to Cook (Donuts, Sushi, Pie, Pizza & More!)
Job Opportunities in Dubai – 2026
Dennis Rodman Net Worth 2026 – Everything You Need to Know


