Guide
How To Screen Record Netflix Without Black Screen

Netflix is the most well-known streaming service, and it offers a wide variety of content, including movies, anime, and television series. It has also begun to create original material, which has won numerous award nominations from around the world in recent years. Netflix content cannot be recorded because it is protected by copyright laws; however, screen recordings of Netflix content for other reasons, such as making tutorials, are permitted under certain conditions. Because of Netflix’s safeguards, several customers have reported that they receive a black screen while attempting to screen record Netflix on a PC. This post will instruct users on how to screen record Netflix without getting a black screen on their computer.
Read Also: How to Add a Profile on Netflix
How To Screen Record Netflix Without Black Screen
Step 1: Get to the official website and download and install the application, or click on the symbol below to go directly to the official page.
Step 2: Following the application has been downloaded and installed, enter the registration key that was provided to you after your purchase to complete the registration process.
Step 3: Once you have completed the registration process, your application will be ready for usage.
Step 4: After the App’s user interface (UI) has loaded, there are a few things you need to do before you can start recording anything.
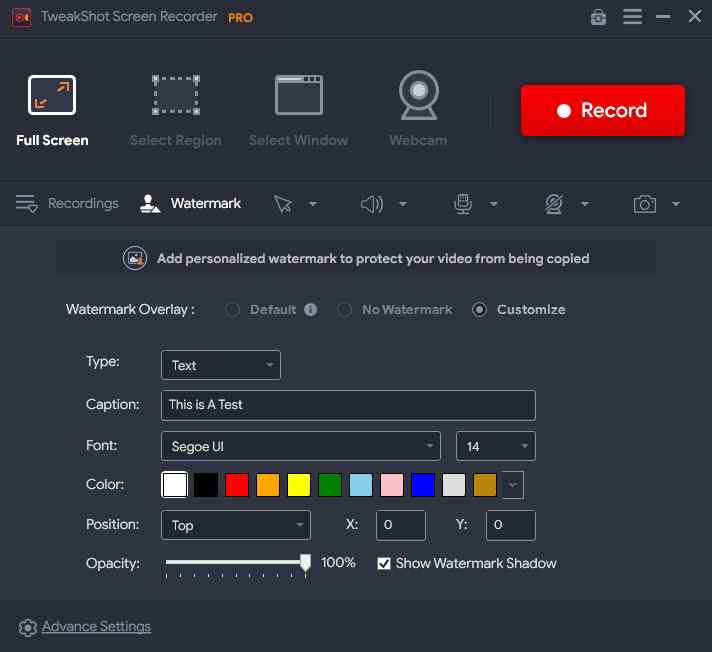
Step 5: Select the type of watermark you wish to use by selecting the Watermark option from the drop-down menu. At the time of recording, you have the option of selecting from the Default Watermark, No Watermark, or creating a new one. Color, fonts, positioning, and opacity are just a few of the customization options accessible.
Step 6: The status of the Mouse Pointer during the recording process is the following step. In the lower portion of the app interface, adjacent to the Watermark section, click the Arrow symbol to the right. You have the option of displaying or hiding the mouse pointer and clicks on the screen.
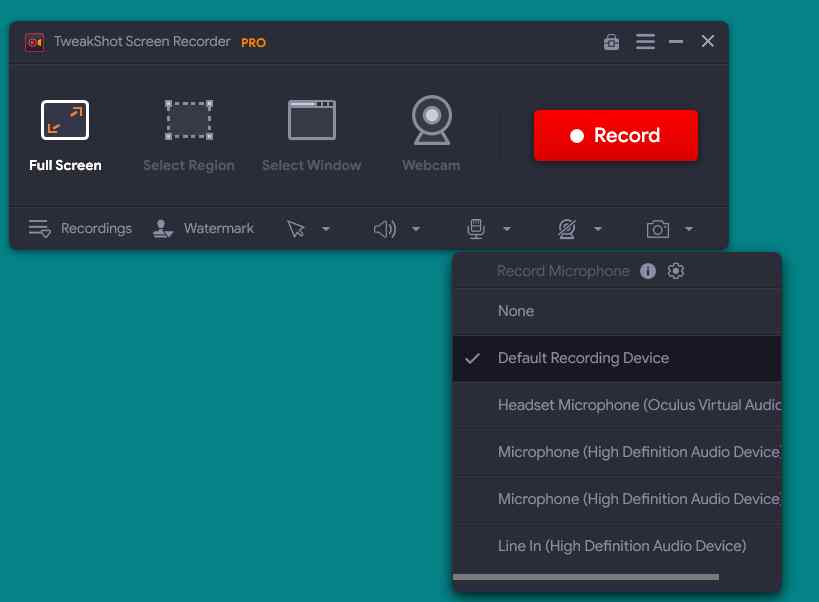
Step 7: Next, select the audio source by selecting the Microphone icon from the drop-down menu. If you wish to record audio for a lecture video, choose Microphone; if you want to record the audio currently playing on your system, choose Default Recording Device.
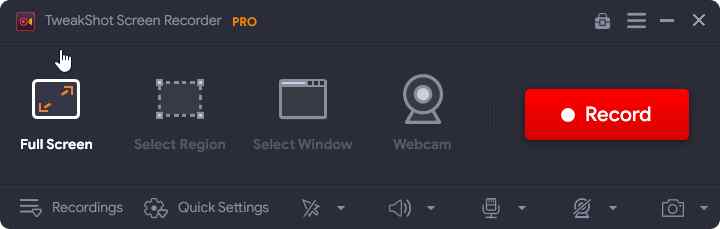
Finally, but certainly not least, select one of the four screen recording choices available.
Full Screen: This option captures the complete screen of your computer.

With the Region option: users can record only a piece of their desktop screen, and only that portion will be captured during the recording process.
Choose a window to record activity in: The user can choose a single program or OS window to record activity in, and it will only record activity in that window.
Camera: You can record anything that is being streamed on your screen using your webcam.
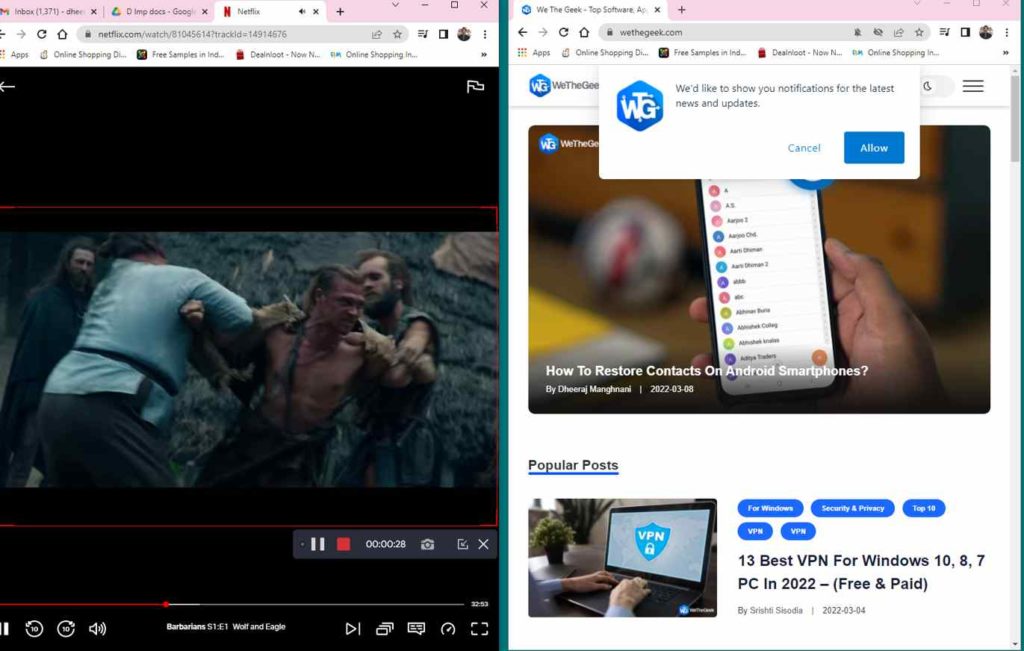
Step 9:To watch the content, you must first open Netflix in your browser and sign in. Click on any movie scene you want to capture for educational or demonstration purposes after you’ve started Netflix.
Step 10: Choose a recording mode and then press the Record Button. A new window with basic controls such as Pause, Stop, Time Duration, and Screenshot option will appear in the lower right corner.

Step 11: The red square in the mini tray can be clicked to cease recording at this point. To stop a recording session, press the F9 key on your keyboard.
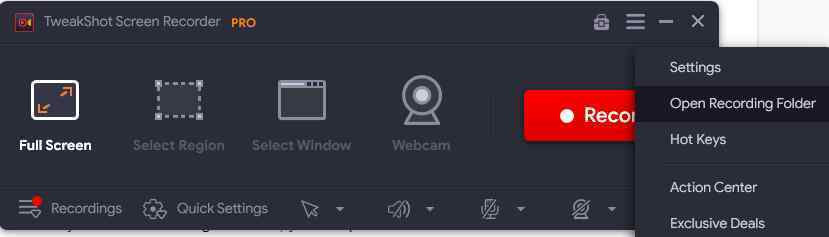
Step 12: To open the recording folder, pick Open Recording Folder from the hamburger menu located in the upper right corner of the screen when it has finished recording.
Step 13: To complete, a new File Explorer window will appear, which will contain all of your screenshots and screen recordings.
Step 14: While the app is active, press the F11 key on your keyboard to snap a screenshot at any time.
Video

Vampire Crawlers Coin Farming Guide

Forza Horizon 6 Performance: Why 60 FPS Is Still the Console Standard

Yoshi and the Mysterious Book (2026) – Full Completion Guide, Rewards & Secret Ending

How to Get Free Pets in Adopt Me: A Guide for Players

Roblox Username Generator – Create a Cool & Unique Username in Seconds
How to Get Free Pets in Adopt Me: A Guide for Players
Yoshi and the Mysterious Book (2026) – Full Completion Guide, Rewards & Secret Ending
Vampire Crawlers Coin Farming Guide


