Apple
How to Set a Sleep Schedule on an Apple Watch
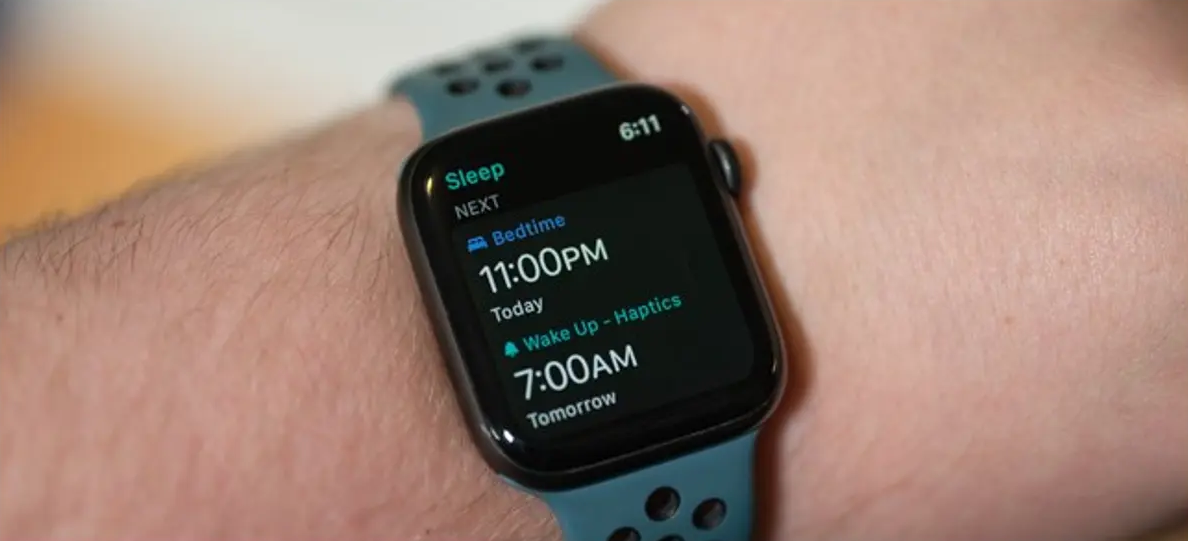
In watchOS 9, Apple introduced Sleep Stages, a major update that significantly improves the functionality of the Apple Watch’s native Sleep app. Along with the length of time that you were awake, the Apple Watch is able to tell you how much time you spent in REM sleep, Core sleep, or Deep sleep throughout the course of the night using a feature called Sleep Stages.
You can also use this information to compare it with the measures of your heart rate, respiration rate, and (on models of the Apple Watch 8 and Apple Watch Ultra) wrist temperature that your Apple Watch is able to take throughout the night. In order to get started with Apple Watch’s sleep monitoring features, you will first need to create a sleep routine on your Apple Watch. The steps that are listed below will teach you how to complete the task.
Read Also: How to Turn Off Keyboard Notification on an Apple Watch
How to Set a Sleep Schedule on an Apple Watch
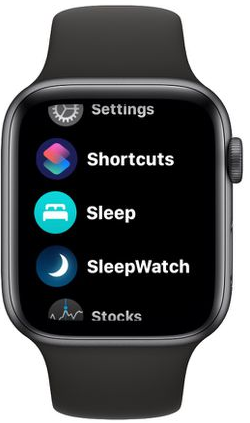
1. To access the App View on your Apple Watch, press and hold the Digital Crown button.
2. Start the app titled “Sleep.”
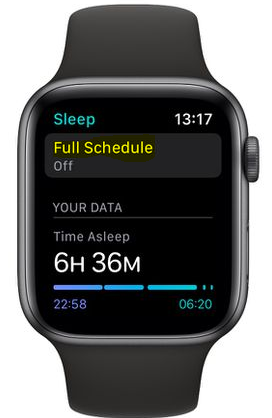
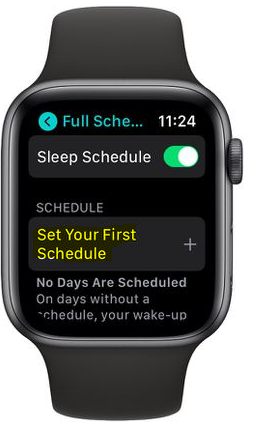
3. Select the Full Schedule option.
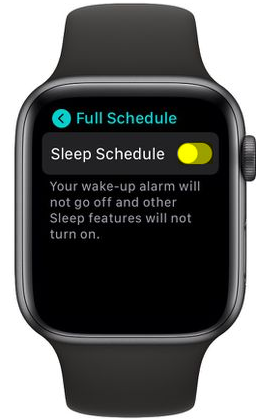
4. You can set your Sleep Schedule to the ON state by tapping the switch that is located next to it.
5. To begin, tap the button labelled Set Your First Schedule.
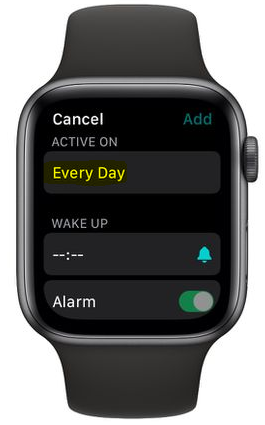
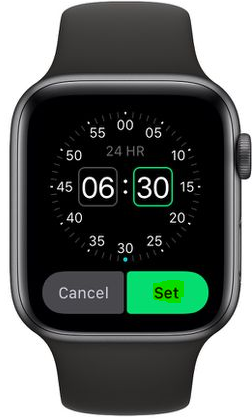
6. Tap Every Day, then de-select the days of the week that you do not want this plan to apply to by unchecking the checkboxes next to their names. In any other case, press the button that is located underneath the Wake Up option, use the Digital Crown to set a wakeup time.
7. And then press the Set button.
8. To turn the alarm on or off, use the switch that is located next to the word “Alarm.” If you have the alarm turned on, you may use the button labelled “Sounds & Haptics” to customise the type of vibration you feel and the sound that you hear. It is important to take note that if your watch is set to the silent mode, the alarm will be replaced by a tap on the wrist.
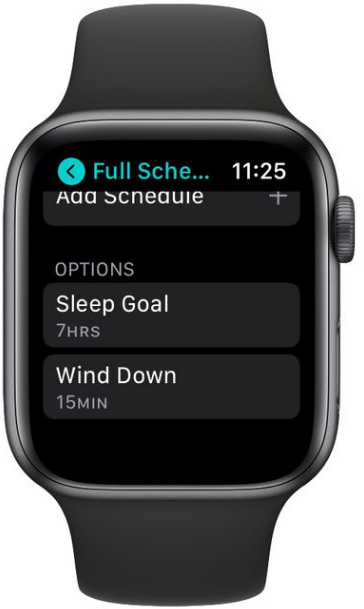
8. The time that is suggested for you to go to bed is determined by your Sleep Goal, which you are able to modify by pressing the back button to navigate back to the screen that displays your whole schedule. From that point on, scroll down until you reach Sleep Goal, then select the appropriate number of hours and minutes.
FAQs
Do you have to set a sleep schedule for Apple Watch to track sleep?
The tracking of your sleep by the Apple Watch is advantageous in that it is a “set it and forget it” feature, which means that your sleep will be monitored without your needing to take any action. However, as you will see, it has a wide range of available configurations.
Where is the sleep app on Apple Watch?
App for Sleeping Incorporated into the Apple Watch
Launch the Watch app on your iPhone, then select General > Software Update from the menu that appears. Either you will be informed that your programme is current, or you will be given the option to download and install the most recent update. Swipe down on the My Watch screen within the Watch app until you see the Sleep button, then tap it.
Is it healthy to sleep 4 hours twice a day?
Biphasic sleep, also known as segmented sleep or siesta sleep, is a type of sleep pattern that can also be referred to as “siesta sleep.” Current research suggests that this type of sleep pattern may be associated with higher levels of energy, alertness, cognitive function, and overall productivity.
How do you schedule sleep on iPhone?
You are able to plan how you will wind down at the end of the day, when you will go to bed, and what time you will get up by using the Health app. After selecting Browse in the upper-right corner, select the Sleep option. Drag your finger up, then hit the Get Started button.

Vampire Crawlers Coin Farming Guide

Forza Horizon 6 Performance: Why 60 FPS Is Still the Console Standard

Yoshi and the Mysterious Book (2026) – Full Completion Guide, Rewards & Secret Ending

How to Get Free Pets in Adopt Me: A Guide for Players

Roblox Username Generator – Create a Cool & Unique Username in Seconds
How to Get Free Pets in Adopt Me: A Guide for Players

Grow a Garden Recipes in Roblox: Guide to Cook (Donuts, Sushi, Pie, Pizza & More!)
Roblox Username Generator – Create a Cool & Unique Username in Seconds
Yoshi and the Mysterious Book (2026) – Full Completion Guide, Rewards & Secret Ending


