Apple
How to Set Up a Scanner On Your Mac
If you need to scan documents onto your Mac computer, you’re in luck. If you have a scanner or a printer that also has a scanner, it’s possible that you won’t need to install any software to get it up and running with your Mac. If you’re in this situation, you’re in the clear.
You will, of course, need to configure your computer and your scanner properly; however, this is a quick and simple process that should not take more than a few minutes of your time. After that, you will be able to begin scanning documents directly onto your Mac. Depending on the kind of scanner you have, this section will walk you through all you need to know to get from setting up your Mac to actually scanning something.
Read Also: How to Change the Profile Picture on Your Mac
How to Setup your Scanner on a Mac
Make sure that the default scanning tool that came preinstalled on your Mac, Image Capture, is running the most recent version possible before beginning the scanning process on your device. You shouldn’t start the process of setting things up until after that point. You are excused from performing this step if you are working with a multifunction printer and scanner that is compatible with AirPrint.
1. Follow the instructions that are included on the package of your scanner or printer in order to connect the scanner to your Mac. After doing so, plug in the scanner and turn it on. However, because your MacOS computer will automatically download any software that comes packed with your scanner, it is not essential for you to install any of the software that comes bundled with your scanner.
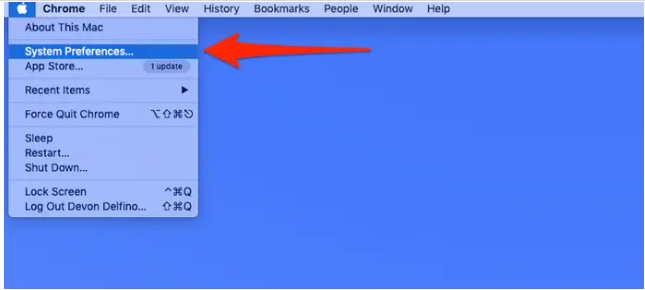
2. Navigate to the settings for your operating system by clicking the Apple icon, which is found in the top-left hand corner of your screen.
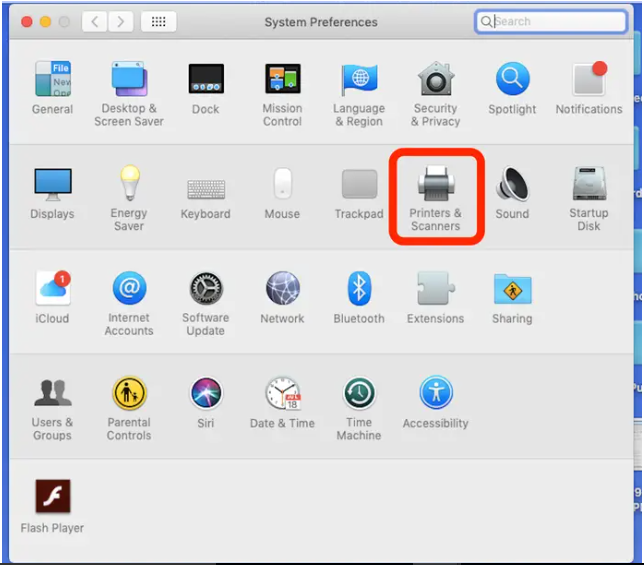
3. Select the “Printers and Scanners” menu item from the available options.
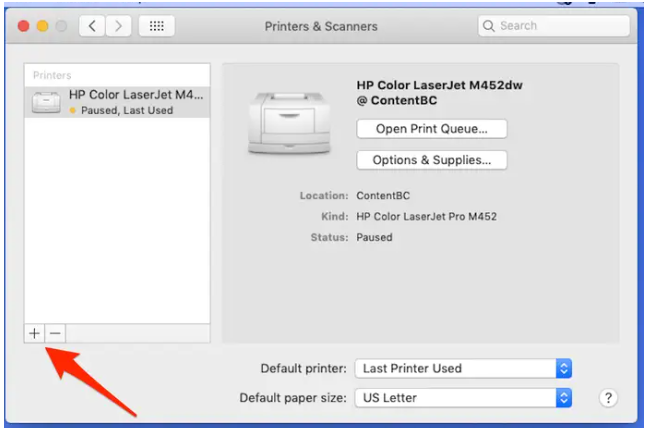
4. Determine which scanner you will use for your document.
5. If you do not find your scanner on the list, you will need to click the + sign that is located in the lower-left hand corner of the screen. It will be added to the list as a result of this. To add something, just click the “Add” button.
How to Scan a Document on a Mac
Here is how to begin utilizing your scanner with your Mac now that it has been properly installed and configured. If you are scanning documents with a document-feeding scanner as opposed to a flatbed scanner, the procedures will be different.
In either scenario, though, you must begin by opening your scanner in order to complete the first step in the process. How to do it:
1. First, turn on your Mac, plug in your scanner, and then connect it to your computer.
2. Navigate to the “System Preferences” menu by clicking the Apple icon in the upper-left corner of the screen, and then pick “Printers and Scanners.”
3. Choose the scanner you want to use from the list that’s located on the window’s left side.
4. Next, ensure that you are following the instructions that correspond to the type of scanner that you own:
Scan with a document-feeding scanner
1. Put the pages you want to scan into the document feeder of the scanner.
2. Click the option labelled “Use document feeder.”
3. Adjust your scanner preferences and settings (like color, two-sided pages, document size and save location).
4. Select the “Scan” option.
Remember that you will need to scan those items as separate groups in order to use different settings (such as colour for certain pages and black-and-white for the remainder), so keep that in mind as you are doing so.
Scan with a flatbed scanner
1. Position your goods so that they may be scanned on the flatbed.
2. Uncheck the box labelled “Use Document Feeder” if it’s required.
3. Select the destination for the file.
4. Determine the size of the document.
5. Select the “Scan” button.
Make sure there is empty space between each item on the scanner bed if you want to scan many images at once and save each one as a separate file. This is necessary if you wish to do so. Be aware that documents with a significant amount of empty space have a greater chance of automatically saving as numerous files.
Video

Vampire Crawlers Coin Farming Guide

Forza Horizon 6 Performance: Why 60 FPS Is Still the Console Standard

Yoshi and the Mysterious Book (2026) – Full Completion Guide, Rewards & Secret Ending

How to Get Free Pets in Adopt Me: A Guide for Players

Roblox Username Generator – Create a Cool & Unique Username in Seconds
How to Get Free Pets in Adopt Me: A Guide for Players
Yoshi and the Mysterious Book (2026) – Full Completion Guide, Rewards & Secret Ending
Forza Horizon 6 Performance: Why 60 FPS Is Still the Console Standard


