Apple
How to Share a Photo Album With Friends on Your iPad

iCloud gives you the ability to back up your photos to the cloud and download them to any of your devices at any time. You now have the option of sharing complete photo albums with your loved ones and friends. When you share an album that you’ve produced on your iPad with friends and family, they’ll be able to “like” specific photographs, comment on those photos, and contribute their own photos and videos to the album that you’ve created.
This article will provide you with a step-by-step guide on how to use the Shared Album option that is included within the Photos app on your iPad. This option allows you to share a photo album with other individuals, such as friends or family members. These instructions are compatible with iOS 12 and subsequent versions of the operating system. Now, in order to accomplish that, here is the procedure:
Read Also: How to Back Up and Sync Google Photos on iPhone, iPad, or Android
How to Share a Photo Album With Friends on Your iPad
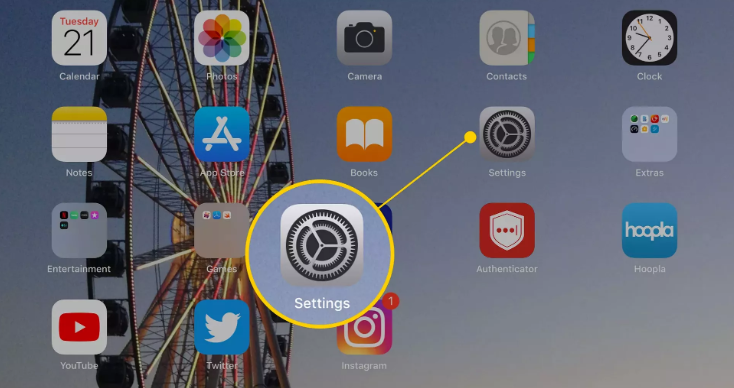
To begin sharing your photographs with others, you will first need to open the Settings app on your iPad and enable the Shared Albums option. The procedure of making a shared album is a simple one that doesn’t take up a lot of time and is very rapid. After that, you create the shared albums through the Photos app on your device.
1. Open the app for configuring settings.
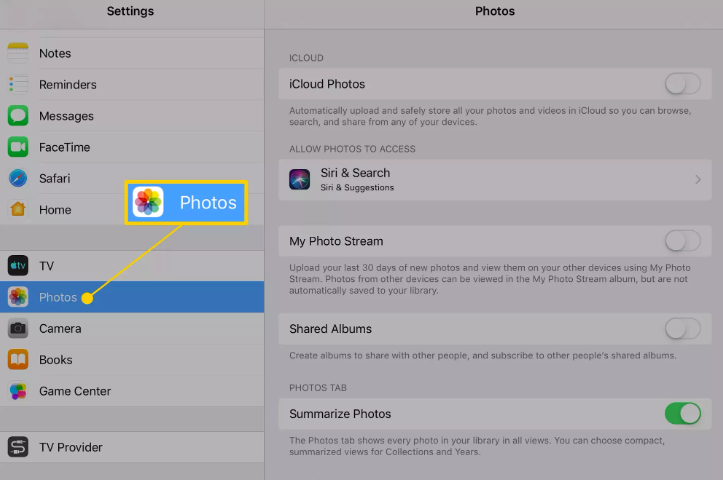
2. Scroll all the way down and select Photos from the menu on the left.
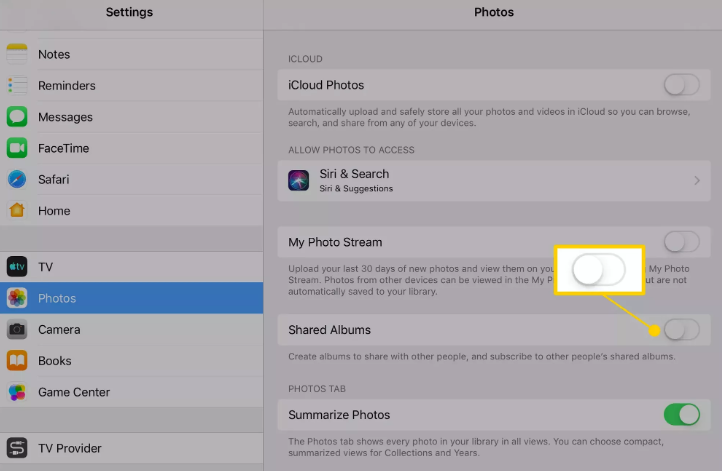
3. To enable shared albums, you’ll need to move the toggle to the “On” position.
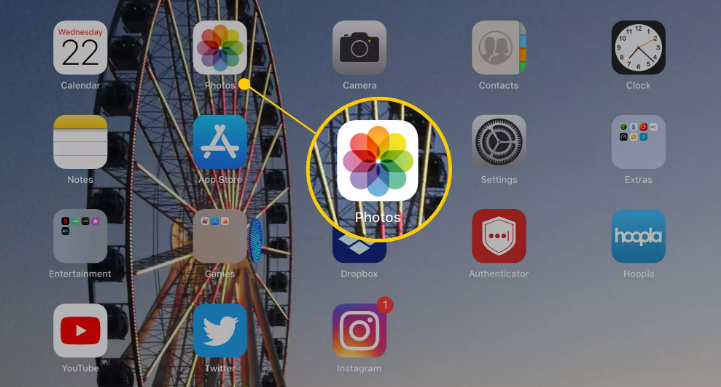
Close the Settings app and then go back to the Home screen on your device.
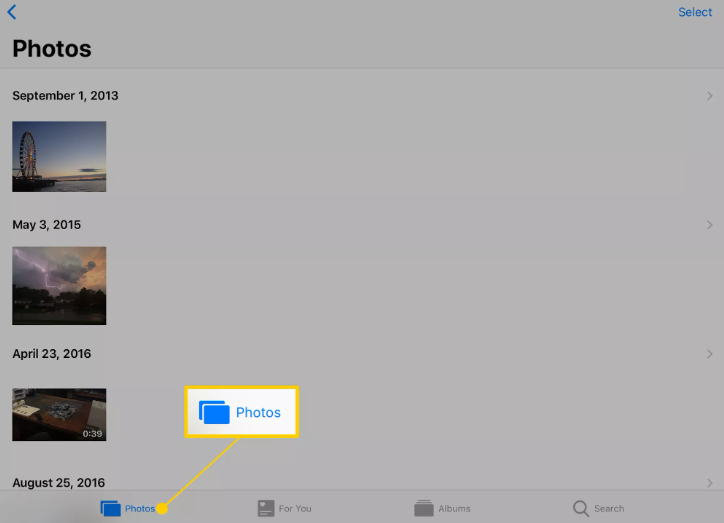
4. Begin by opening the Photos app.
5. Tap Photos.
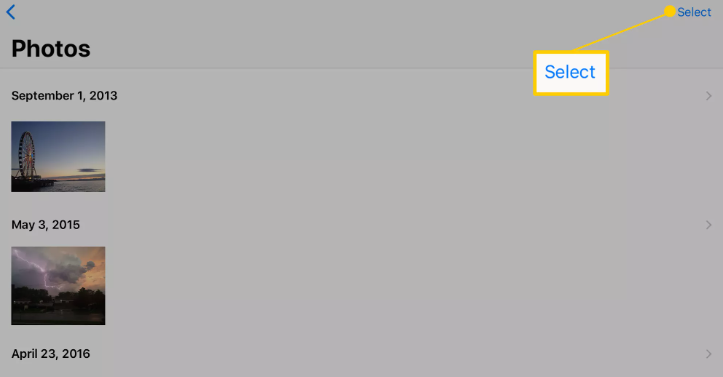
6. The button labelled Select can be found in the upper-right hand corner of the display.
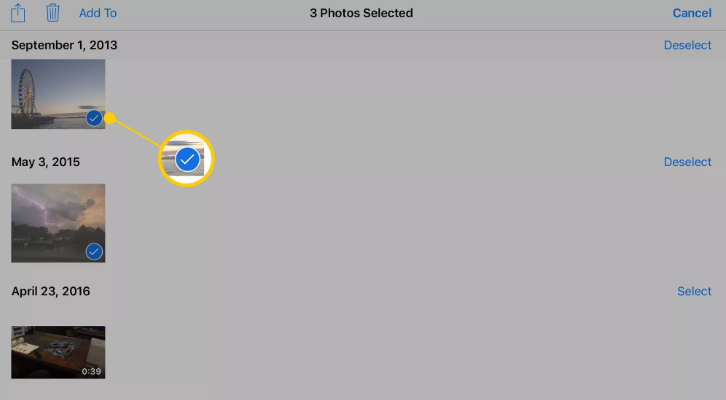
7. Once you have chosen Select, you can then select the photographs you want to share by touching on them. A picked image will have a checkmark in blue next to it to indicate that selection.
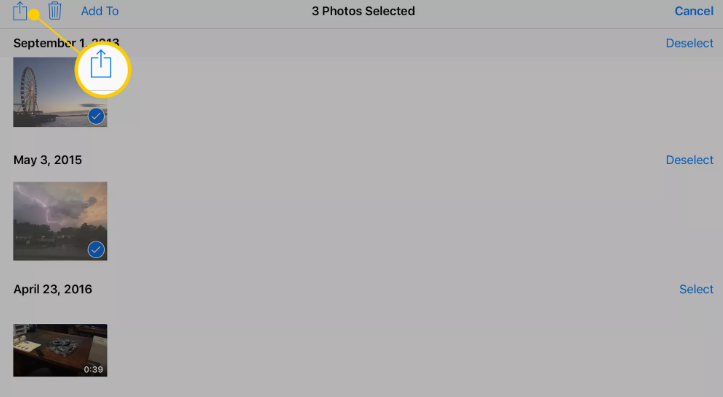
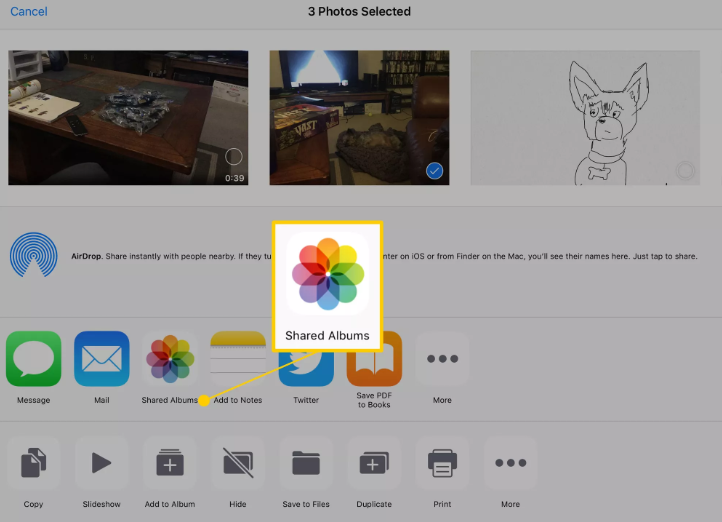
8. Tap the Share button once you have completed making your selections in the previous step.
9. Select the Shared Albums option.
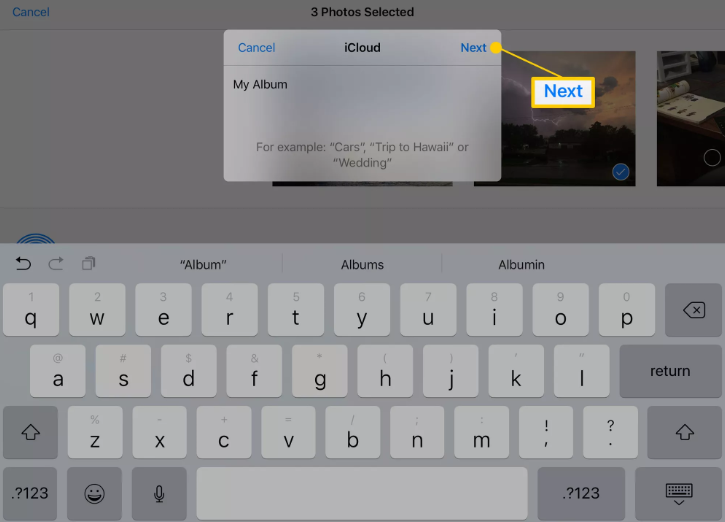
10. Identify the album, then press the Next button.
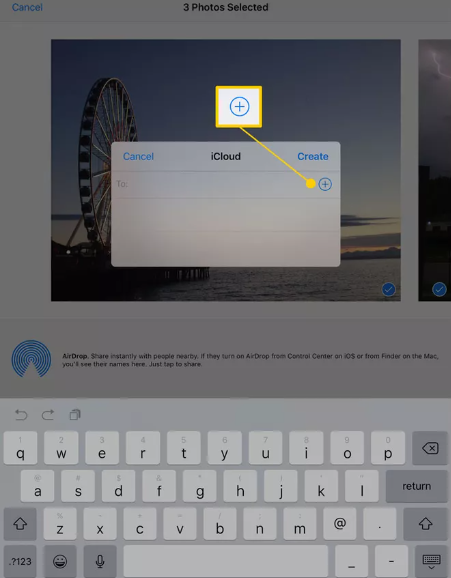
11. You will be prompted to select individuals with whom you wish to share the album on the following screen.
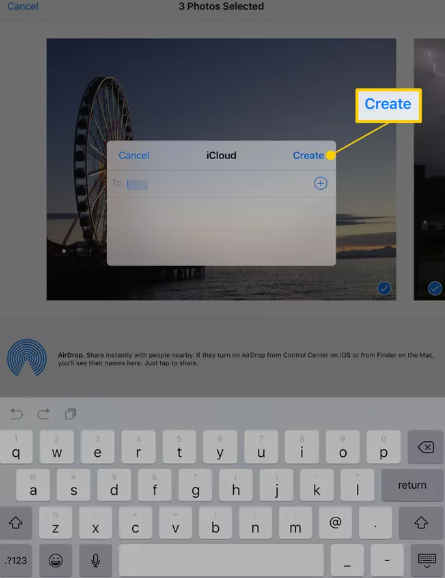
- You can choose from your Contacts by pressing the plus symbol or entering an email address into the area provided. When you are finished,
- select the Create button.
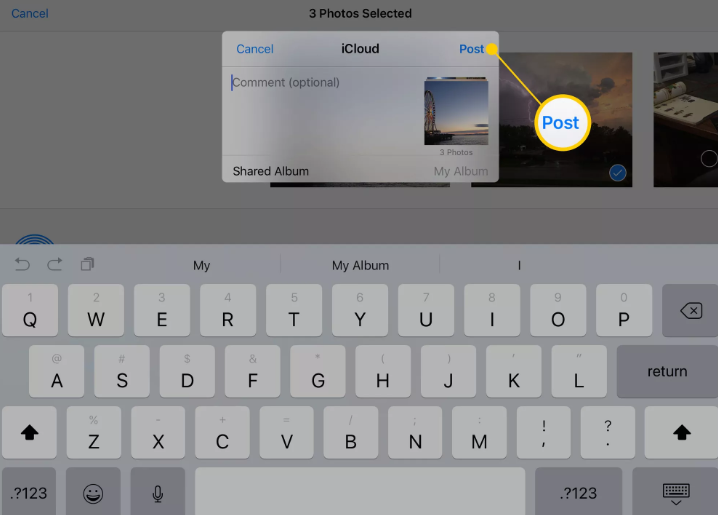
12. Tap the Post button after you have provided a comment, if you so desire.
People that you have shared the album with have the ability to view its contents, make comments on those contents, and add to the album.
FAQs
How can I remove photographs from the app that I no longer want?
If there is an image that you do not want, you can erase it by hitting the button that looks like three dots in the upper right corner of the photo and selecting “Delete.” This will get rid of the image.

Vampire Crawlers Coin Farming Guide

Forza Horizon 6 Performance: Why 60 FPS Is Still the Console Standard

Yoshi and the Mysterious Book (2026) – Full Completion Guide, Rewards & Secret Ending

How to Get Free Pets in Adopt Me: A Guide for Players

Roblox Username Generator – Create a Cool & Unique Username in Seconds
How to Get Free Pets in Adopt Me: A Guide for Players
Yoshi and the Mysterious Book (2026) – Full Completion Guide, Rewards & Secret Ending
Forza Horizon 6 Performance: Why 60 FPS Is Still the Console Standard


