Guide
How to Show the Ruler in Word
You can conduct relatively precise layout work directly within a Word document thanks to a ruler function included into the programme. This tool is handy when making resumes, cover letters and other documents where the location and size of text or visual components are critical. It may also be used to create forms and brochures, among other things.
While working on a document, if the ruler isn’t visible, it’s likely that it has been switched off. Here’s how to display the ruler in Microsoft Word.
Read Also: How to Double Space in Microsoft Word
What Can the Microsoft Word Ruler Do?
Using the ruler, you can determine where a tab should be placed on the page and how large a text box or headline should be when a document is printed. You can also see how large a text box or headline is going to be when it is printed.
In addition, you can use the ruler to put and modify margins and tabs by dragging them around on the ruler’s surface.
How to Get the Ruler in Word
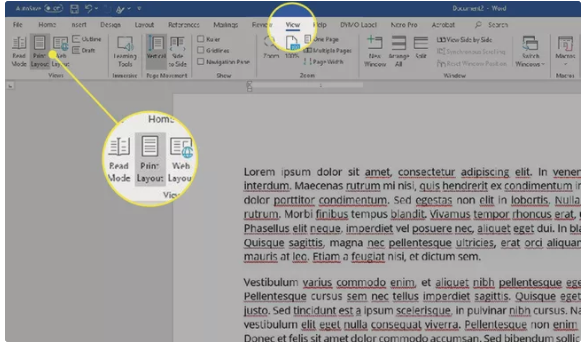
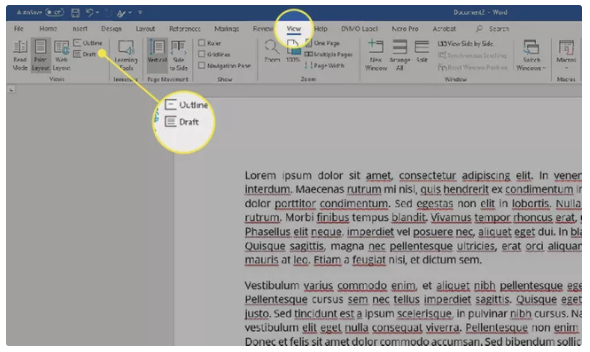
1. In order to have a ruler that shows both horizontally and vertically, you must first ensure that you are working in the Print Layout view of the document. When your document is open, go to the View tab and pick Print Layout.
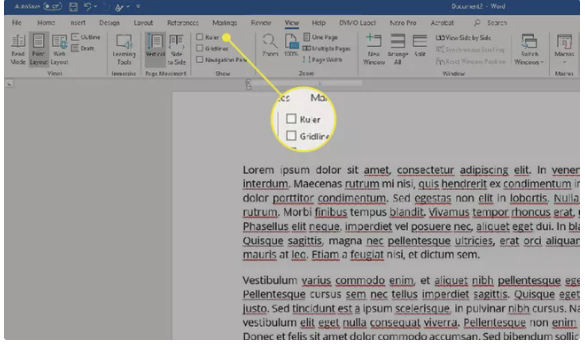
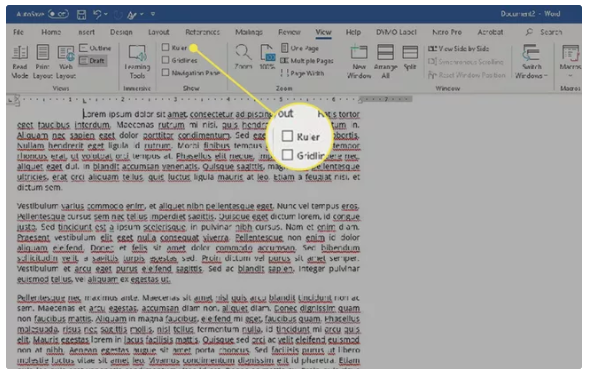
2. The Ruler checkbox should be selected. It’s positioned at the top of the column that also contains Gridlines and Navigation Pain in the Ribbon’s drop-down menu.
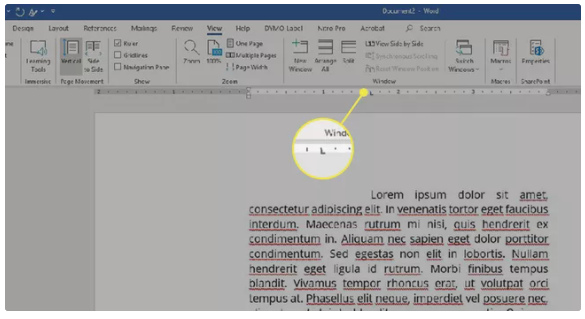
3. Besides appearing above your work in the Print Layout, the ruler will also display vertically on the left side of the page.
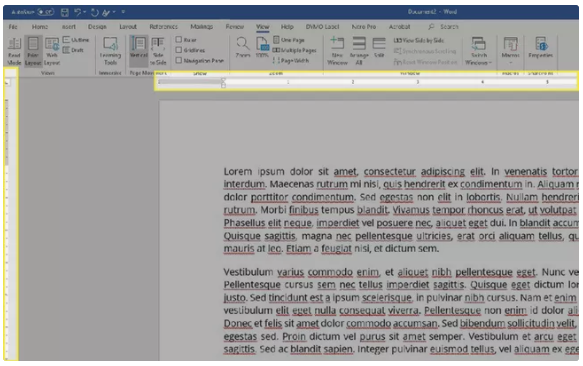
4. When the rule is activated, you may utilize tabs and margins in the Print Layout view, as well as measure the size and location of text boxes, among other things.
5. To turn off the ruler, uncheck the Ruler checkbox on the toolbar.
How to Display the Microsoft Ruler in the Draft Layout in Word
Working in the Draft layout, as opposed to the Print layout, is a comparable experience, as is navigating the ruler with your mouse. While the ruler will not appear along the vertical edge of your page in the Draft style, it will appear at the top of the document. It functions in a similar manner to how it does in the Print layout.
1. Make sure your document is open and that you are viewing it in the Draft view before continuing. To accomplish this, go to the View tab and choose Draft.
2. On the Ribbon, click the Ruler checkbox to enable it. It’s located in the same column as Gridlines and the Navigation Pane on the ribbon.
How to Create a Tab Using the Ruler
1. Select the line where you wish to insert the tab and set your pointer there.
2. Place the ruler in the location where you want the tab to appear. This will result in the creation of a little corner-shaped symbol to represent your tab.
3. Press the Tab key to place a tab in your document, then drag along to ruler to change the tab’s placement.
Video

Vampire Crawlers Coin Farming Guide

Forza Horizon 6 Performance: Why 60 FPS Is Still the Console Standard

Yoshi and the Mysterious Book (2026) – Full Completion Guide, Rewards & Secret Ending

How to Get Free Pets in Adopt Me: A Guide for Players

Roblox Username Generator – Create a Cool & Unique Username in Seconds
How to Get Free Pets in Adopt Me: A Guide for Players

Grow a Garden Recipes in Roblox: Guide to Cook (Donuts, Sushi, Pie, Pizza & More!)
Roblox Username Generator – Create a Cool & Unique Username in Seconds
Yoshi and the Mysterious Book (2026) – Full Completion Guide, Rewards & Secret Ending


