Guide
How to Use All In One PC as Monitor

It is not necessary to do anything further if your all in one computer is equipped with a display-in port; all you need to do is connect a display cable to both its in and out ports, as well as its out port, which is connected to the primary computer you wish to use.
Working around the lack of a display-in connection on your all-in-one computer is achievable through the use of a display port converter or remote desktop software, which may be found online.
For those want to learn all they need to know about setting up your all-in-one computer as an additional display on their computer, this website is for you. We must move quickly to begin the celebration.
Read Also: How to Play Fortnite on Your PC
How to Use All In One PC as Monitor
First, we’ll go through the most straightforward approaches of taking care of this. This is not possible with every all-in-one, so this is merely a starting point. If your all-in-one computer has a built-in monitor, this will be a straightforward process.
Nothing more complicated than connecting a display cable to the in port on your all-in one and an out port on the primary computer that you intend to utilize to make it work! Due to the fact that there are four various sorts of display ports, you’ll need to make sure that the ones on both computers are the same.
- HDMI is still the most common plug type.
- DisplayPort is the second most common and newest.
- The two older types are DVI and VGA.
To avoid needing adapters and converters, both ports must be the same. This will be explored in more detail in a later section. There’s one more thing to take away from all of this. All of a computer’s display ports aren’t display-in ports. For the most part, displays don’t double as both input and output devices.
In order to use the display input ports on the all-in-one, you will need to look for them. Simply look for a label on the port to see if it is a “in” port. As a rule, input ports are referred to as “in.” In general, output ports aren’t marked as input or output, thus you may presume it’s an output port if it’s not marked otherwise. The maker of your all-in-one computer should be able to inform you if there are any input ports on the device. For those who do have input ports, the steps below explain how to use each one.
1 All-In-One’s HDMI
It has been a while since HDMI was the most popular method of connecting a display. For most DVD and Blu-ray players, HDMI is the most common connection method.
As a visual aid, here’s an image of what HDMI looks like:
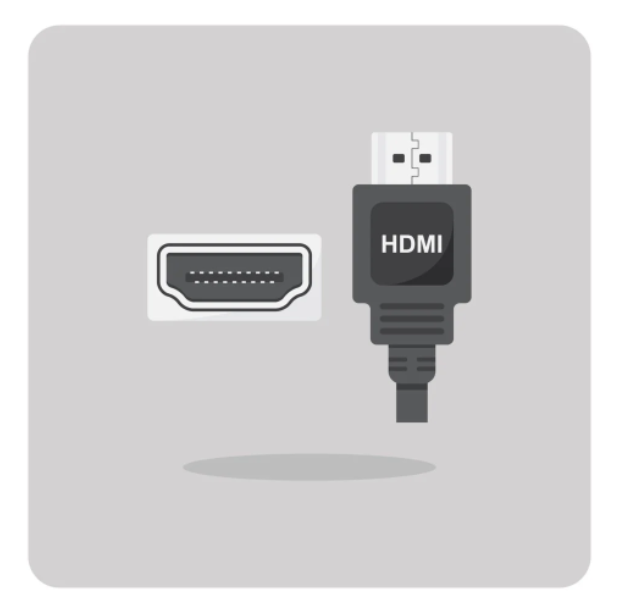
Simply connect an HDMI cable to the HDMI-in port on your all-in-one and you’re ready to go. One end of the cable connects to the primary computer’s HDMI-outport. Assuming both computers are turned on and running, plugging in the all-in-one device will instantly stream video to the main computer.
The display settings on the primary computer may need to be tweaked after the two computers are linked. To access the display settings, simply type “display” into the Windows search box. You’ll be able to customise things like font size and other elements.
Additional display options are available by clicking “additional display settings” in the window’s upper right corner. A place to configure numerous monitors, choose screen resolutions and experiment with extra features. Once the connection is established, you may adjust the display on the all-in-one from the main computer’s settings. Displays may be found in System Preferences or by searching for “display” in the search bar (known as Spotlight). You’ll be able to adjust the display’s resolution, screen layout, brightness, and other settings from this point on.
2 All-In-One’s DisplayPort
DisplayPort is a more recent video interface that is gradually replacing HDMI. Simply attach the DisplayPort cables to the relevant ports after you’ve located them. If you don’t know what a DisplayPort is, here’s a photo:
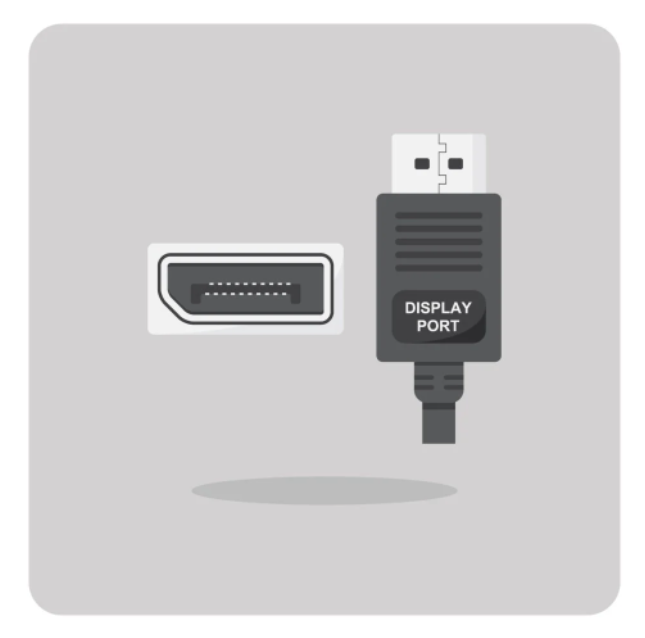
After connecting them, they will function just as if they were linked one at a time. All video settings may be managed from the primary computer.
3 All-In-One’s DVI
DVI is a more ancient connection type, and you may find it to be more grating than the other options. This is due to the fact that DVI is available in a variety of formats that are incompatible with one another.
Basically, you need to look at the plug design to decide which cable is proper.
Here’s the trick.
Every DVI cable (or port) has a horizontal line connection on one side, which is common to all of them. Some DVI varieties include dot connections above and below the horizontal line, which is shown in the image below.
There are no more dot connectors available for any other DVI kinds. This portion must match up on the cable as well as the connection port in order for the video feed to function properly. For reference, the DVI connections with the additional dots are referred to as DVI-I connections (which is important if you need to order a cable).
The ones without the dots are DVI-D. If you’re not sure what DVI looks like, here’s a picture:
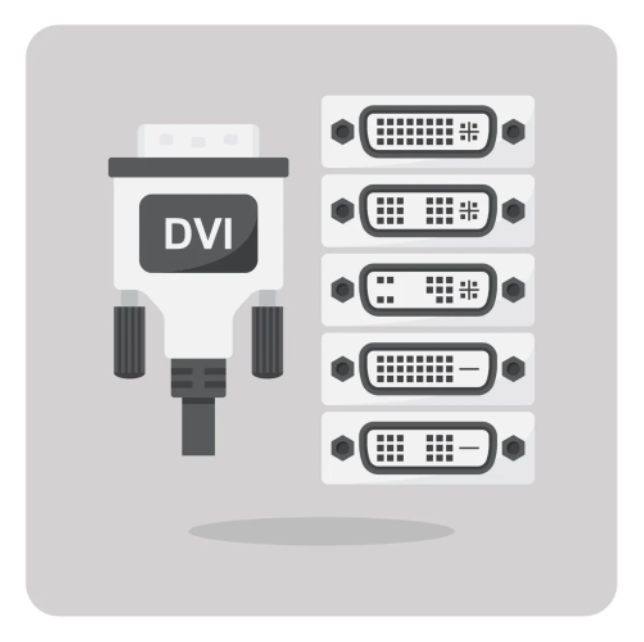
Once the right DVI cable has been used to link your two computers, the remainder of the procedure is the same as it was with the previous ways.
Video

Vampire Crawlers Coin Farming Guide

Forza Horizon 6 Performance: Why 60 FPS Is Still the Console Standard

Yoshi and the Mysterious Book (2026) – Full Completion Guide, Rewards & Secret Ending

How to Get Free Pets in Adopt Me: A Guide for Players

Roblox Username Generator – Create a Cool & Unique Username in Seconds
How to Get Free Pets in Adopt Me: A Guide for Players
Yoshi and the Mysterious Book (2026) – Full Completion Guide, Rewards & Secret Ending
Forza Horizon 6 Performance: Why 60 FPS Is Still the Console Standard


