Guide
How to Use Track Changes in Word
This feature of Microsoft Word allows you to keep track of all the changes you make to your document and add notes to them using the Track Changes tool. When Track Changes is enabled, the changes you make are highlighted and shown in a variety of colours and styles to distinguish them from the rest of the text in the document.
This is especially beneficial for texts that have numerous writers or editors, who may each examine and approve (or reject) the modifications made by the other authors or editors.
Read Also: How to Search for a Word in Google Docs
How to Turn on Track Changes in Microsoft Word
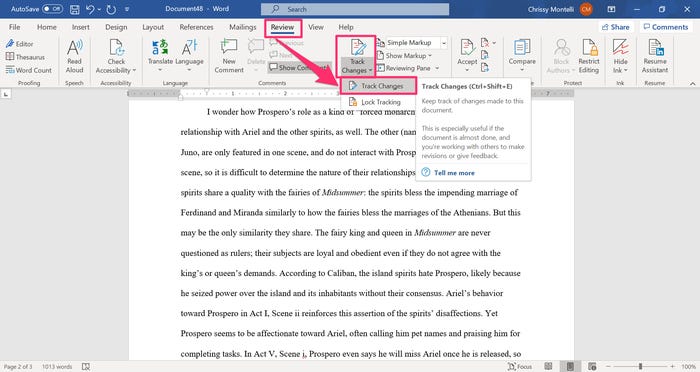
Track Changes may be enabled by selecting the “Review” tab and then clicking on the icon above the word “Track Changes.” To turn off Track Changes, simply click this symbol a second time. Track Changes may also be toggled on and off by selecting the “Track Changes” menu option from the drop-down menu and then selecting “Track Changes” from the list.
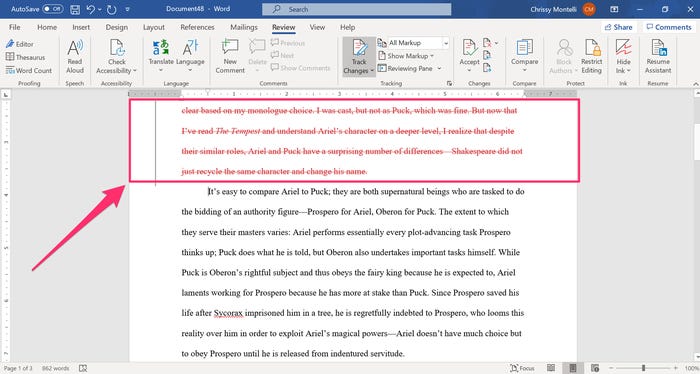
When Track Changes is enabled, you can simply type or edit as you usually would to make changes to the document and they will be saved. In order to distinguish the modifications from the rest of the document, each one will be formatted differently and will have a mark in the margin to show that a change has been made.
With Track Changes enabled, for example, if you delete a paragraph from a document, the paragraph that was deleted will stay visible but will show in red font with strike-throughs to avoid being confused with the rest of the document’s text.
How to Make and Remove Track Changes Comments
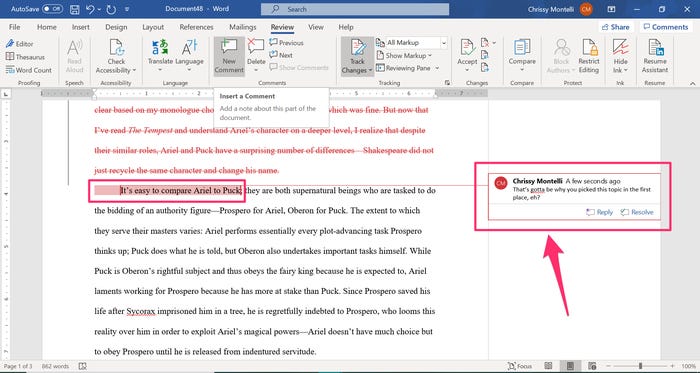
Using your mouse, highlight the text you wish to remark on, and then click “New Comment” on the “Review” tab to add your comment without adding it to the document’s text. There will be a bubble in the margin of the page that contains your name and the colour that has been allocated to you. Once the comment bubble displays, you may input your response.
Click “Reply” on the remark you wish to react to, then write your response into the text box that appears. When you’re finished, you can click anywhere outside of the comment bubble to close it.
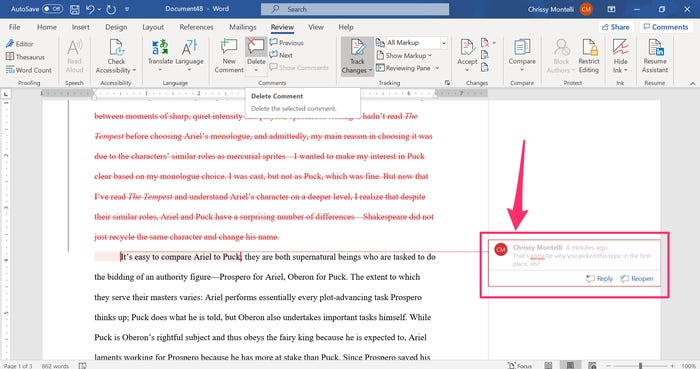
There are two methods for removing a remark from a post. To delete a remark, select it and use the Delete button. In the comment bubble, select “Resolve” if you want to maintain the comment in the document for the time being but want to indicate that it has already been handled. The remark will still be visible in the document’s margin, but it will now be greyed out, making it easier to differentiate it from the other comments.
If you want to entirely erase a remark from the document, leaving no trace of it in the document, click on the comment and then on the symbol above “Delete” on the “Review” tab, which is located above the word “Delete.” It’s directly next to the “New Comment” button on the left-hand side of the screen.
How to Accept or Reject changes
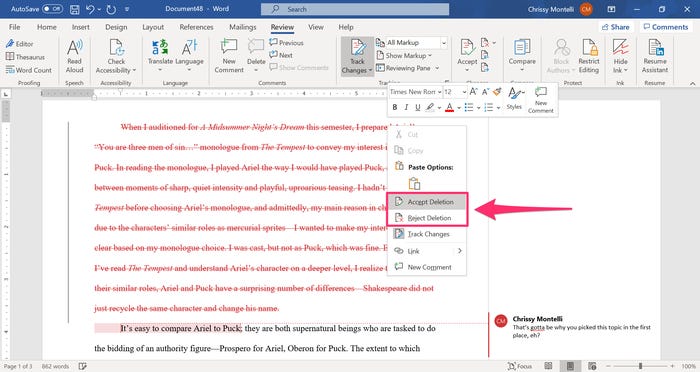
You have the option of accepting or rejecting the modifications that have been made to your document once they have been made. Click on the section of the document that has been modified using the right mouse button. If you wish to keep the change, select “Accept” from the drop-down choice that displays; otherwise, select “Reject” to reject the modification.
However, once you’ve completed working and turned Track Changes off, the section’s design may vary depending on your selection, but it will remain consistent with the rest of the document.
How to Hide All the Changes and Comments
You can control which changes and comments you see by adjusting the markup options.
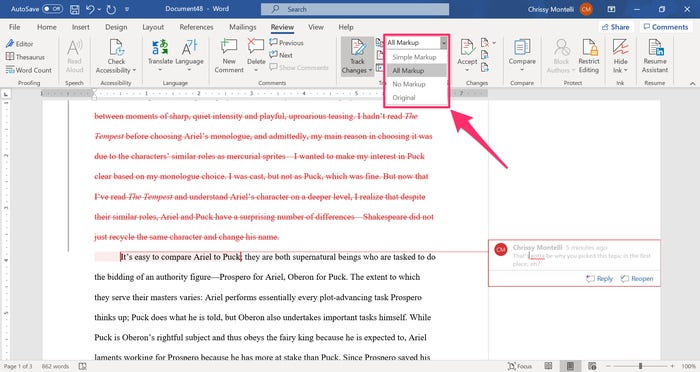
In the “Review” tab, next to “Track Changes,” there’s a drop-down menu with four options that show different levels of changes made to the document.
- “All Markup” will show all changes and comments that have been made since Track Changes was turned on.
- “Simple Markup” will show a simplified version of changes and commentary, represented by notes in the document’s margins rather than visible formatting.
- “No Markup” will hide all change markings and comments but retain the changes.
- “Original” will show the document as it originally appeared before Track Changes was turned on.
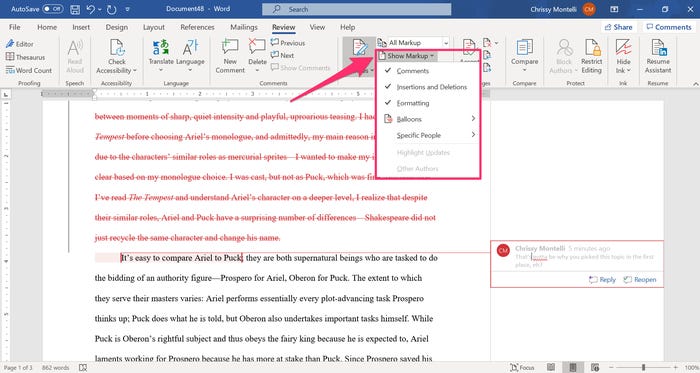
By selecting “Show Markup,” you may further specify the sorts of modifications that are displayed. This will bring up a menu with checkmarks next to each of the available choices. If a checkbox is selected, the choice will be included in the markup. To check or uncheck a box, simply click on the option you want to change.
There are other options for how you may personalize which updates are shown to you, such as which people’ comments are displayed to you and how the comment bubbles (or “balloons,” as they’re referred to in the list) appear.
Video

Vampire Crawlers Coin Farming Guide

Forza Horizon 6 Performance: Why 60 FPS Is Still the Console Standard

Yoshi and the Mysterious Book (2026) – Full Completion Guide, Rewards & Secret Ending

How to Get Free Pets in Adopt Me: A Guide for Players

Roblox Username Generator – Create a Cool & Unique Username in Seconds
How to Get Free Pets in Adopt Me: A Guide for Players
Yoshi and the Mysterious Book (2026) – Full Completion Guide, Rewards & Secret Ending
Vampire Crawlers Coin Farming Guide


