Guide
How to Wrap Text Around a Table in Microsoft Word

Microsoft Word makes it easy to combine photos and text to illustrate a document, and you can learn how to wrap text around images in order to adjust the default settings in the programme. Tables can be wrapped around images in your document in the same way that text can be wrapped around an image. To make a small table look larger and more appealing, use these steps in Microsoft Word to wrap the text around it.
Read Also: How to Double Space in Microsoft Word
How to Wrap Text Around a Table in Word
Tables are automatically placed outside of the text by default in Word. This enables you to manually or even automatically adjust your table to better suit the page or its contents, depending on your preference. However, aligning your table with your content is as simple as a few clicks of the mouse.
Either right-click the table and choose “Table Properties” or select “Properties” from the floating toolbar to access its properties.

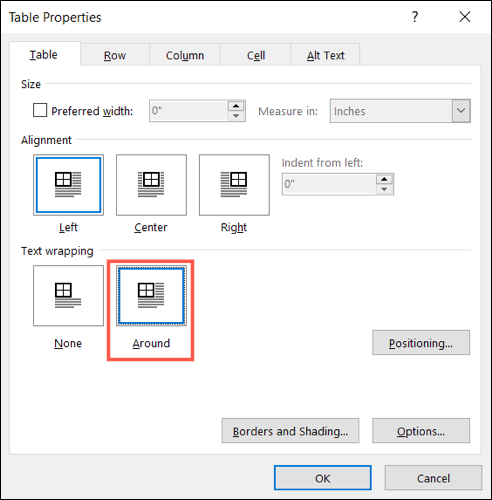
In the pop-up box, select the Table tab from the drop-down menu. Select “Around” from the Text Wrapping option at the bottom of the page and click “OK.”
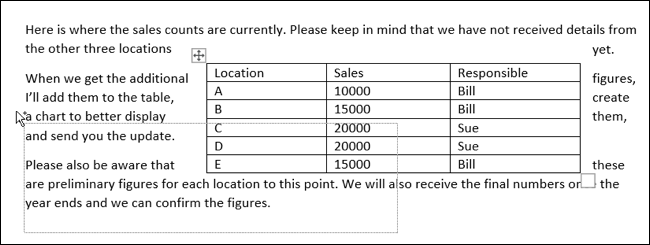
You’ll notice right once that your table and text have moved to make room for each other.
How to Position a Table With the Text
If you feel that the way the table and text appear together may be improved, you have a few of alternatives.
To reposition the table within the text, pick it and drag it to the desired area within the text. Please keep in mind that line breaks or various paragraphs within your text block may have an impact on where the table is displayed.
Altering the table’s size, orientation, or position are all options to think about as you plan your layout. Returning to the Table Properties window is a quick and simple way to accomplish this.
Instead of resizing the table manually, you may use the Size option at the top of the Table tab, which allows you to input or use the arrows to choose the precise width of the table rather than manually resizing it. You may modify the Alignment for the left, centre, or right of the screen beneath the Size setting.
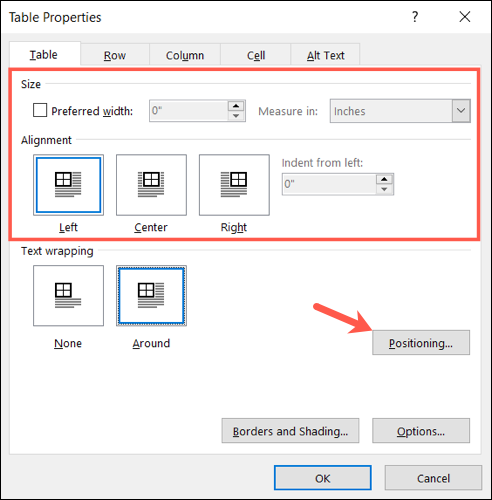
“Positioning” provides even more customization choices. This button is only available if you select Around from the Text Wrapping drop-down menu.
In the Table Positioning box, you may specify the Horizontal position of the table in relation to the column, the margin, or the page, among other options. Additionally, you have the option of adjusting the Vertical position in relation to the paragraph, margin, or page.
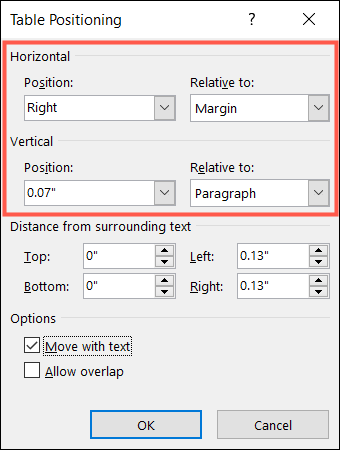
You may also specify how far you want the table to be separated from the surrounding text by entering measures. If you want to enter an inch measurement for the Top or Bottom or Left or Right, click on the arrows to raise or decrease those dimensions.
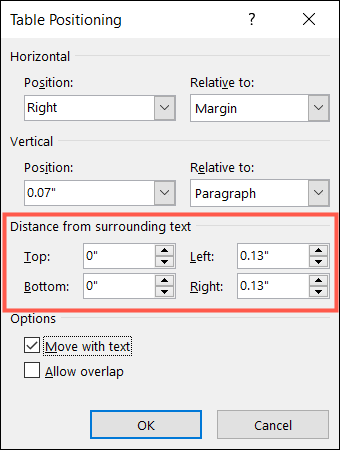
You can optionally tick the boxes to shift the table with the text and enable overlapping with other tables, which are located below the Options section at the bottom of the window.
When you’re finished, click “OK” to view the changes that have been made to the document.
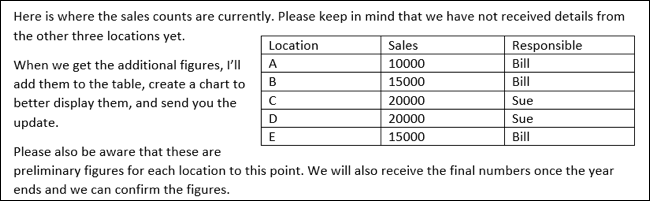
For a short table that does not extend the entire width of your page or has only a little quantity of material, wrapping the text around your table may be the most effective way to give that area of your document the best aesthetic possible.
Video

Vampire Crawlers Coin Farming Guide

Forza Horizon 6 Performance: Why 60 FPS Is Still the Console Standard

Yoshi and the Mysterious Book (2026) – Full Completion Guide, Rewards & Secret Ending

How to Get Free Pets in Adopt Me: A Guide for Players

Roblox Username Generator – Create a Cool & Unique Username in Seconds
How to Get Free Pets in Adopt Me: A Guide for Players
Yoshi and the Mysterious Book (2026) – Full Completion Guide, Rewards & Secret Ending
Vampire Crawlers Coin Farming Guide


