Gaming
How to Make a Minecraft Server for Free to Play With Friends
Many players enjoy Make a Minecraft Server for Free. It’s simple to pick up and learn, gives you the freedom to do anything you want in the game, is essentially endless, and allows you to construct whatever you imagine if you have the imagination.
However, the most significant reason why Make a Minecraft Server for Free so popular is because of the opportunity to interact with other people. This isn’t to be confused with online games like Call of Duty in which you and your pals play pre-stocked stages together. You can create an entire world from scratch using nothing but online Scutes in Minecraft, allowing you and your buddies to collaborate on it together. To play online with your friends, however, you’ll need to set up a server that all of you may connect to.
What is a Minecraft Server?
A Minecraft server allows people from all over the world to play in the same universe. This may be accomplished in a variety of ways, so it’s vital to know your alternatives.
You may rent a server through a third-party, such as Apex Hosting or Hostinger. It does virtually everything for you but comes with a monthly service charge. Depending on the service you use, this can be as affordable as $5 per month.
You may operate your own server. This eliminates the need for you to pay a monthly fee, as well as gives you complete control over how your server is managed. This post discusses how to create your own Minecraft server without utilizing a third-party provider.
Step 1: Get the Latest Version of Java
Go to java.com/en/download and get the latest version of Java.
Step 2: Download the Minecraft Server
Download the latest version of the server from the official download page. It will be a server.jar file. Put that downloaded file in a folder where you’d like to run the Minecraft server.
Step 3: Run the Server
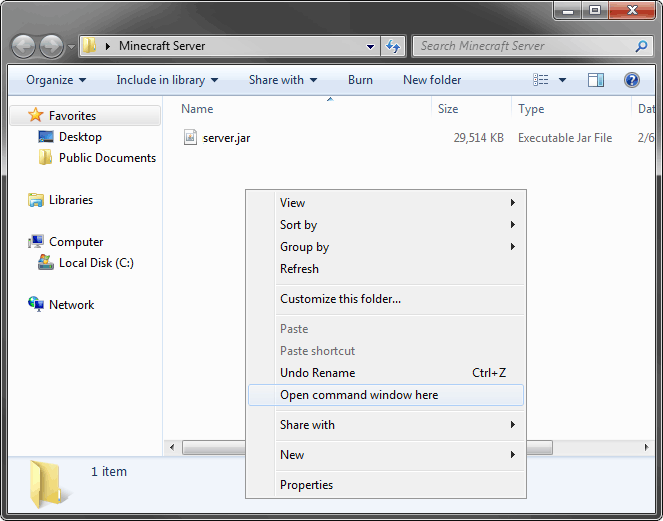
Open a Windows command prompt in the folder where you put the server jar file. To easily do this, hold down shift while you right-click in an empty space inside the folder:
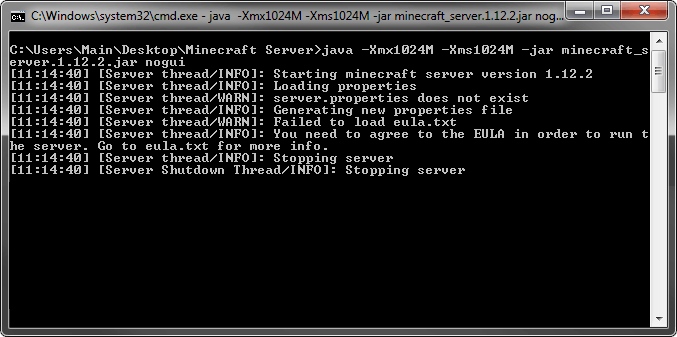
Once in the command prompt, run this command to start the server:
You can paste the command into the command prompt by right-clicking and choosing paste
If the command prompt didn’t work or you would prefer to use PowerShell, you can and it works similarly. Just make sure you have PowerShell open in the directory where server.jar is. This may be accomplished differently on different Windows versions. Search online if you’re unsure how. Once in the proper directory, run the same command from above. To paste into PowerShell you only need to right-click inside the window.
Once ran, the Minecraft server will create some files in the folder it resides in and you should receive an error message about the EULA:
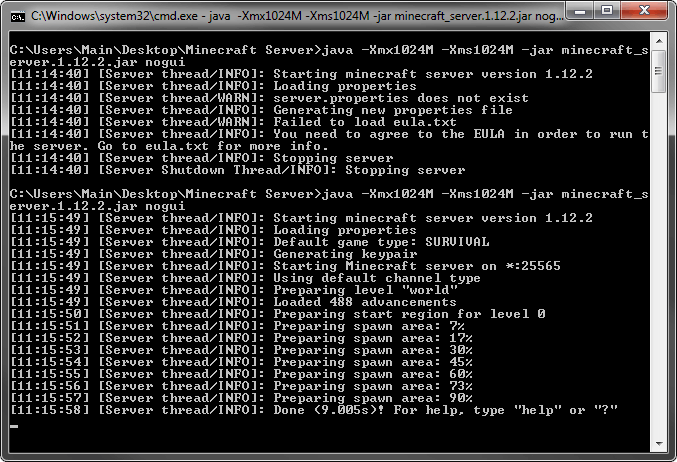
You will have to open the generated eula.txt file and set:
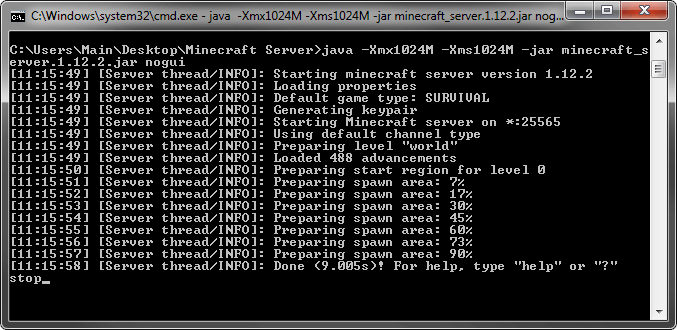
After doing that, run the command again. This time a new world should be generated and your server should be running:
Step 4: Server Commands
The server is controlled using server commands that you enter in the command prompt. View the basic server commands here and familiarize yourself with them. At the very least, know how to use stop, which safely closes down the server and saves the world.
Step 5: Connect to Your Server
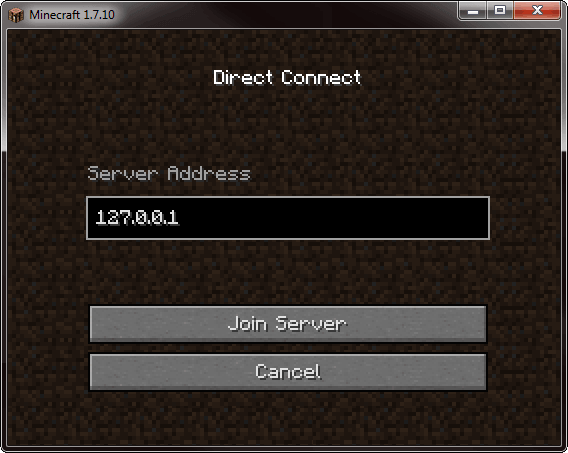
Open the regular Minecraft game, click Multiplayer, then click Direct Connect. You’ll be entering an IP address here based on where you are relative to the server computer. If you’re playing Minecraft on the same computer as the Minecraft server, enter 127.0.0.1:

Vampire Crawlers Coin Farming Guide

Forza Horizon 6 Performance: Why 60 FPS Is Still the Console Standard

Yoshi and the Mysterious Book (2026) – Full Completion Guide, Rewards & Secret Ending

How to Get Free Pets in Adopt Me: A Guide for Players

Roblox Username Generator – Create a Cool & Unique Username in Seconds
How to Get Free Pets in Adopt Me: A Guide for Players

Grow a Garden Recipes in Roblox: Guide to Cook (Donuts, Sushi, Pie, Pizza & More!)
Roblox Username Generator – Create a Cool & Unique Username in Seconds
Vampire Crawlers Coin Farming Guide


