Technology
How to Fix the PNP Detected Fatal Error in Window
Obsolete or failing drivers are the main driver of numerous Windows 10 bluescreen errors. The PNP Detected Fatal Error is the same. Normally brought about by breaking down Plug and Play (PNP) drivers or gadgets, it can without much of a stretch be settled utilizing the accompanying strategies.
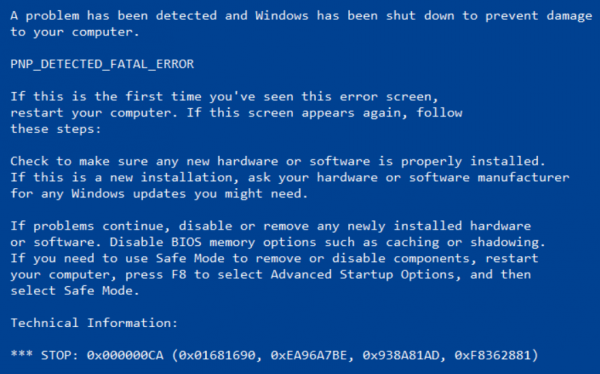
In the event that a specific driver on a PC is expressing ‘PNP Detected Fatal Error’ it has smashed and consequently your framework has broke down, prompting the Blue Screen of Death. There might be a ton of reasons why this error is happening in any case. PNP gadgets are the primary explanation for this fatal issue. Go through these simple fixes and authorize these likewise on your framework to figure out the issue rapidly.
PNP Detected Fatal Error is a fatal error that can bring about Blue Screen of Death for Windows 10 clients. This happens because of equipment disappointments or programming contrary qualities. This issue brings about your PC going into a pattern of constant restarts. So in case you are a casualty of this PNP-detected fatal error here’s the means by which to fix it.
The Roblox Error Code 524 bug check has a worth of 0x000000CA which shows that the Plug and Play Manager experienced some serious error which is no doubt have something to do with a tricky Plug and Play driver. To fix this error, here are some potential arrangements that could help.
How to Fix PNP Detected Fatal Error?
There are a couple of various approaches to fix PNP Detected Fatal Error in Windows 10. In the first place, use System Restore Point to reestablish your PC to a past stable state. In the event that that doesn’t work, you can boot into Safe Mode to uninstall the drivers or applications that caused the fatal error. This BSoD error for the most part happens subsequent to downloading new applications, equipment, or updates.
On the off chance that you need more direction, here’s the manner by which to do this bit by bit:
- Utilize an alternate PC to make bootable media for Windows 10 on a DVD OR USB streak drive from the connection here. This connection will direct you on the most proficient method to do this effectively. When prepared continue on to the subsequent stage.
- To permit the machine to stack from a DVD/USB, change the boot request in BIOS.
- Boot into Windows 10 by embeddings the establishment DVD or USB into your gadget.
- By tapping on ‘next’ go through the initial 2-3 pages of the ‘Windows arrangement’ tab, which incorporate language to introduce, time and cash configuration, and console or info measure.
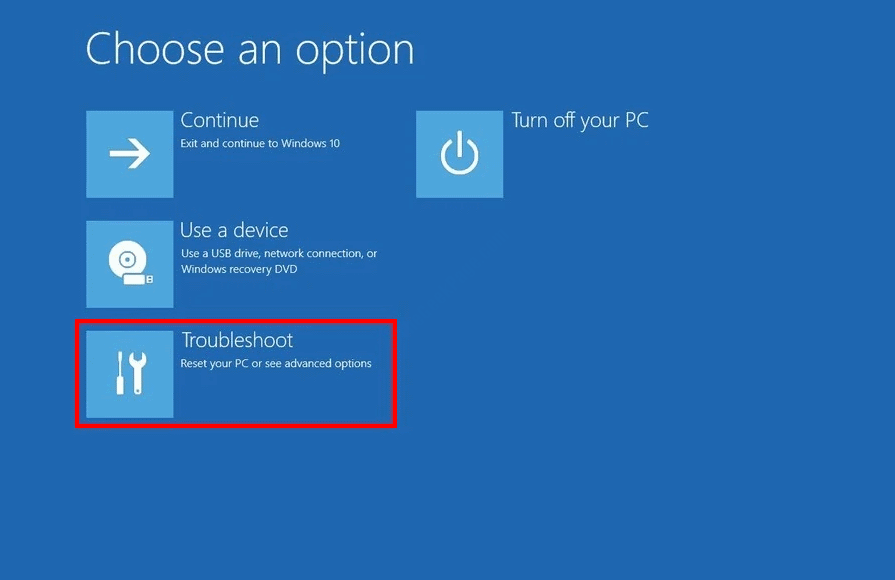
- When you see the ‘Fix your PC’ alternative, click on it, and afterward go ahead ‘Investigate’.
- Select ‘Programmed Repair’ from the ‘Progressed choices’ menu. Make a note to cripple the driver registration the startup arrangement.
- On the off chance that you can’t get your PC for sure, attempt the recuperation interaction. Select before the update’s System Restore Point: Intel – System 8.3.10209.6897
- Disengage the WIFI/LAN interface and restart the PC in ordinary mode.
- In the Run order ( Win + R ), type “services.msc”.
- From the Services list, select the Windows Update program.
- Change the “Startup Form” to “Debilitated” on the “General” page.
- Presently, either in normal or systems administration mode, reboot in protected mode.
- Incapacitate all gadgets under ” Intel Dynamic Platform and Thermal Framework ” in the
- Gadget Manager
- Presently restart and boot again in typical mode.
Option 1 – Run the Blue Screen Troubleshooter
The Blue Screen investigator is an implicit device in Windows 10 that helps clients in fixing BSOD errors like PNP Detected Fatal Error Blue Screen error. It tends to be found on the Settings Troubleshooters page. To utilize it, allude to these means:
- Tap the Win + I keys to open the Settings board.
- Then, at that point go to Update and Security > Troubleshoot.
- From that point, search for the choice called “Blue Screen” on your right-hand side and afterward click the “Run the investigator” catch to run the Blue Screen Troubleshooter and afterward follow the following on-screen choices. Note that you may need to boot your PC into Safe Mode.
Option 2 – Try disabling or removing newly installed hardware
In this alternative, you should cripple or eliminate the equipment you’ve quite recently introduced as of late since outside gadgets could be the one that is making the Blue Screen of Death error show up. To do that, simply disengage any outside gadget that is associated with your PC genuinely and afterward check in the event that it fixes the PNP Detected Fatal Error Blue Screen error.
Option 3 – Try disabling BIOS Memory options namely Caching Shadowing
Crippling the BIOS Memory choices, for example, Caching and Shadowing can help you in fixing the PS4 Unrecognized Disc Errors Blue Screen error. You should simply enter the BIOS first and afterward utilize the Arrow and Enter keys to choose your decisions. What’s more, on the off chance that you can’t discover it, search for explicit directions from your OEM or you could likewise pay special mind to guidelines from the maker of your motherboard.
Option 4 – Try to run the CHKDSK utility
Running the CHKDSK utility may likewise help you settle the PNP Detected Fatal Error Blue Screen error. On the off chance that your hard drive has issues with honesty, the update will truly fizzle as the framework will believe that it’s not beneficial and that is the place where the CHKDSK utility comes in. The CHKDSK utility fixes hard drive errors that may be causing the issue.
- Open Command Prompt with administrator advantages.
- Subsequent to opening Command Prompt, execute the accompanying order and hit Enter:
- Trust that the interaction will be finished and afterward restart your PC.
Option 5 – Try to uninstall programs you’ve installed recently
Odds are, a few projects that you just introduced may be the one that is causing the BSOD error. In this way, you need to uninstall the program to determine the issue.
- In the hunt box, type in “charge” and afterward click on Control Panel (work area application) among the list items.
- From that point forward, select Programs and Features from the rundown which will give you a rundown of the multitude of projects introduced on your PC.
- From that point, search for the concerned program and select it and afterward uninstall it.
Option 6 – Update the Device drivers
- Tap the Win + R keys to dispatch Run.
- Type in devmgmt.msc into the container and tap Enter or snap OK to open the Device Manager.
- From that point onward, a rundown of gadget drivers will be shown. Search for the gadget driver you and afterward select by the same token “Update driver” or “Uninstall gadget”. Also, on the off chance that you track down any “Obscure gadget”, you need to refresh it too.
- Select the “Search consequently for refreshed driver programming” alternative and afterward adhere to the guidelines to finish the interaction.
- In the event that you have decided to uninstall the driver, follow the screen alternatives to finish the cycle and afterward restart your PC.
- Interface the gadget and Scan for equipment changes – you can see this alternative under Device Manager > Action.

Roblox Username Generator – Create a Cool & Unique Username in Seconds

Grow a Garden Recipes in Roblox: Guide to Cook (Donuts, Sushi, Pie, Pizza & More!)

Job Opportunities in Dubai – 2026

Mr Bit at the SBC Awards Europe 2025: The Bulgarian Brand Setting New Standards in the European Gaming Industry

Dennis Rodman Net Worth 2026 – Everything You Need to Know

Bloxburg Neighborhood Codes 2026
Grow a Garden Recipes in Roblox: Guide to Cook (Donuts, Sushi, Pie, Pizza & More!)
Job Opportunities in Dubai – 2026
Dennis Rodman Net Worth 2026 – Everything You Need to Know


