Apple
How to Transfer Apple Music Playlists to Spotify

If you decide to switch to a different music streaming service, you may find that it is more difficult than you would want to transfer your favourite songs to the new platform. This is something that you should prepare yourself for before making the switch. Should you decide to migrate from Apple Music to Spotify, we will assist you in moving your playlists over and guide you through the process step-by-step.
Read Also: How to Get the Spotify Widget on Your Phone
How to Transfer Apple Music Playlists to Spotify
We would love to be able to show you a native solution to convert your Apple Music playlists to Spotify, but unfortunately, this is not possible at this time. Because of this, we have decided to use a tool that is provided by a third party in order to complete the task.
This helpful application is known as “Tune My Music,” and it is a straightforward website that enables you to transfer your tunes from one streaming provider to another. Although they do offer subscription plans, the free tier of their service enables users to transfer up to one thousand songs at a time from Apple Music to Spotify. In the event that you need to move more than 1000 songs, you may always restart the process in order to transfer your whole music library.
Open Tune My Music in any browser, and on the home page, click the option that says “Let’s Start.” This will allow you to begin the process of migrating your playlists.

You will now be prompted by Tune My Music to choose the source service for your music. We are going to say our final goodbyes to Apple Music, therefore we will go with that option. Therefore, do not hesitate to select “Apple Music” from the menu.

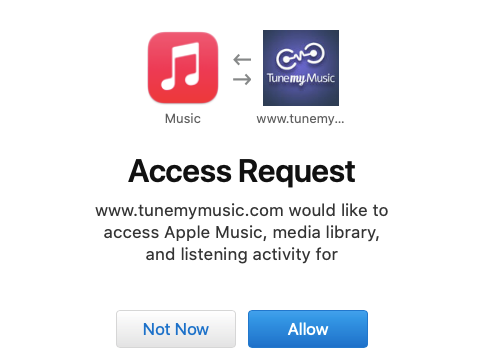
When you have finished choosing Apple Music as the source service, a pop-up window will appear, requesting that you link your Apple Music account to Tune My Music. Sign in to your Apple Music account by entering your Apple Music credentials, which are essentially your Apple ID email address and password. On the following screen, Apple will inquire as to whether or not you are ready to let Tune My Music access to the music library that you have on Apple Music. Simply select the “Allow” option.
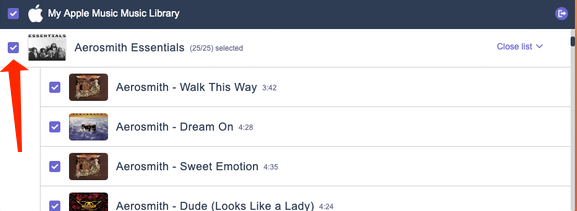
Once Tune My Music is able to connect to your Apple Music library, it will display all of the playlists that are associated with your Apple Music account. You can deactivate the transfer of any playlists that you do not wish to take with you by scrolling down to the “Playlists” section. Be warned that it will take a significant amount of time to migrate everything from Apple Music to Spotify if you choose to move everything at once using the “select all” option and try to move your enormous music library all at once.
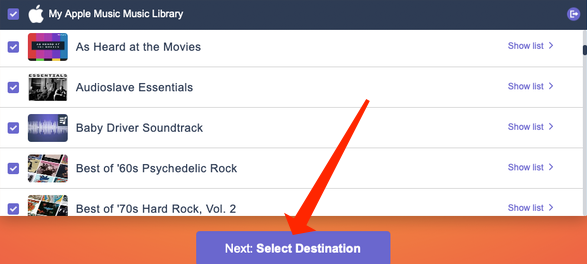
After you have finished choosing the playlists that you wish to transfer, click the button labelled “Next: Select Destination.”
On the following page, choose “Spotify” from the selection of music streaming services because that is the destination to which we will be transferring our Apple Music playlists.

You will be prompted to login in to your Spotify account by another pop-up window that appears. After you have successfully joined in, you will be able to read about the permissions that Tune My Music will have, scroll down, and then click the “Agree” option to continue.
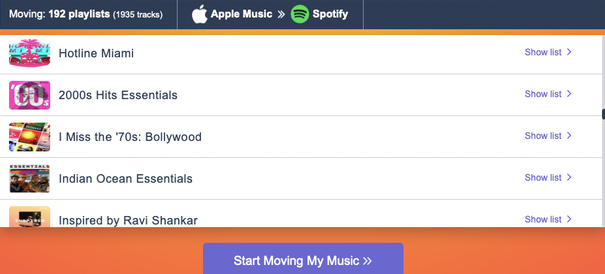
This will take you back to Tune My Music, where you can view information regarding the number of songs that are being transferred from Apple Music to Spotify. After you are finished, click the button that says “Start Moving My Music.”
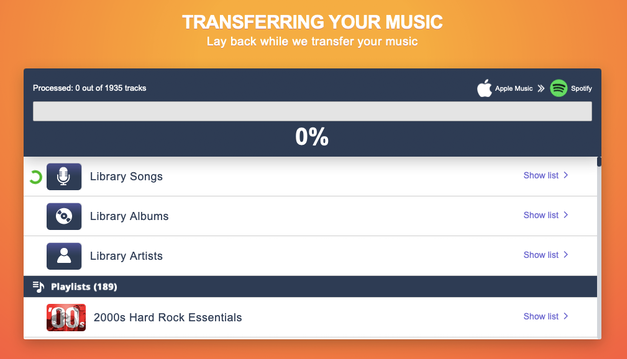
While you wait for Tune My Music to finish the transfer, you can take this opportunity to kick back, relax, and play some of your favourite songs from your collection. When it’s all said and done, your Apple Music playlists will be accessible through Spotify. During the transfer, Tune My Music will highlight in red any tracks that are missing from your library. It is important to point out that certain songs may occasionally have a slightly different name on Spotify; hence, it is possible that you will be able to find them after all.
As was stated before, you are able to bring all of your music to Spotify by simply repeating the method described above on Tune My Music as many times as necessary. Additionally, finding new music to listen to is simple with Spotify.
FAQs
Is Spotify better than Apple Music?
Apple Music is head and shoulders above Spotify when it comes to the quality of its audio streaming. Apple Music now supports lossless audio quality of up to 24-bit/192 kHz and spatial audio with Dolby Atmos as a result of a recent update to the service.
What does Apple Music have that Spotify doesn t?
If you use the web player on Spotify, the music will stream in AAC at 128 kilobits per second for free users and 256 kilobits per second for premium users. Apple Music now supports lossless and spatial audio, in addition to streaming files encoded in AAC at 256 kilobytes per second. On the iPhone, users will need to activate lossless audio by heading to the Settings menu, selecting Music, and then selecting Audio Quality.
Is Apple Music louder than Spotify?
Apple Music employs its own AAC audio codec, thus even while its streaming bitrate is lower than Spotify’s (which is 320 kbp/s), the two services are not quite comparable. Apple Music streams at 256 kbps, while Spotify streams at 320 kbp/s. Assuming that your device is connected to Wi-Fi, Apple also sets the default audio quality to the highest possible level.


