Guide
How to Add or Remove Startup Programs in Windows 11

Eventually, after you’ve been using your computer for a time, you’ll notice that the starting procedure is becoming increasingly sluggish. However, even if you are utilizing a solid-state disc, you will notice that tasks that once took seconds or minutes will suddenly take five or six seconds.
When compared to the hard disc drive computers of the past, this is a small amount of time; yet, the additional four seconds implies that you are now waiting three times longer than you would have been if no programmes were loaded on your computer. So, what is the source of this sluggishness? And what steps can you take to ameliorate the situation?
Read Also: How To Choose the Right Antivirus Software For Windows 11
Startup Programs That Slow Your PC Down
As you continue to add applications and features to your PC, you will discover that some of them will automatically launch when you enter into the computer. Cloud services, keyboard and mouse drivers, messaging apps, and other applications are examples of what is available.
It is convenient to have your most frequently used applications instantly available the moment your computer is turned on. However, applications that are launched at startup but are not used significantly lower the wake-up time of your PC and use unnecessary computer resources. Some of these include gaming services, unused drivers, and even pre-installed applications, among other things.
How to Remove Startup Programs in Windows 11
You must go into the settings of your computer in order to prevent applications from starting when you log in. To begin, click on the Start Menu button, then on the Gear symbol next to the Power Button to access the Start Menu. If you prefer another option, you may choose All applications from the top right-hand corner of your Start Menu and then select S to locate the Settings option.

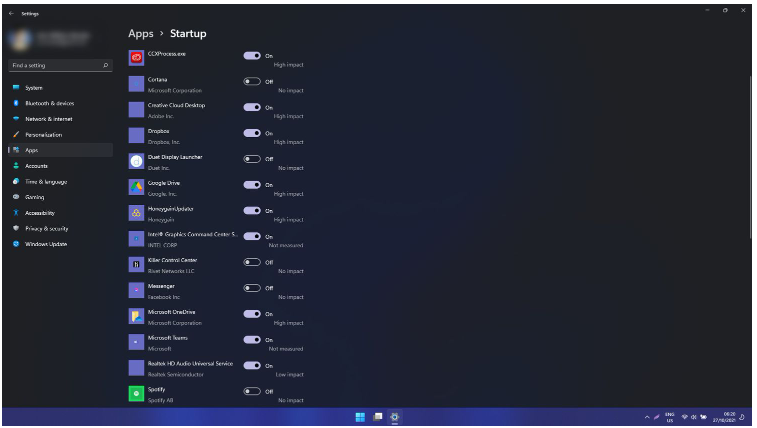
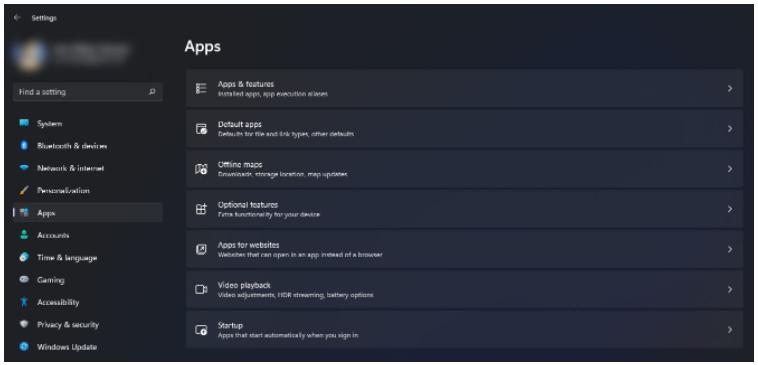
Once the Settings window has been opened, navigate to the Apps section of the left-hand menu. Go to the Startup option in the main Apps panel. When you log in, you will now see a list of applications that will run automatically. Choose the applications that you don’t use from the list, and then click on the slider in the right column to turn them off (if necessary).
When you’re finished, the applications you’ve chosen not to launch will no longer be accessible when you log in. As a result, your computer will start up more quickly and will have less unwanted applications running throughout the boot process.
Video
How to Add Startup Programs to Your Windows 11 PC
In the Startup folder of your Start Menu, you may store apps that you want to run on a regular basis. Because it is not easily accessible, you must use the Windows key + R command to enter the Run dialogue box. After that, you must put shell:startup in the text field and push the OK button.

Following that, a new file explorer window named Startup will emerge. After that, you must browse to the executable file of the software that you wish to have auto-launched. Right-click on the application and select Show additional choices from the traditional context menu. Then pick Create shortcut from the new context menu.

Once the shortcut has been generated, it should be moved to the Startup folder. After that, every time you log in, your computer will open the programmes you’ve added to that folder, saving you valuable time and effort.
Video

Vampire Crawlers Coin Farming Guide

Forza Horizon 6 Performance: Why 60 FPS Is Still the Console Standard

Yoshi and the Mysterious Book (2026) – Full Completion Guide, Rewards & Secret Ending

How to Get Free Pets in Adopt Me: A Guide for Players

Roblox Username Generator – Create a Cool & Unique Username in Seconds
How to Get Free Pets in Adopt Me: A Guide for Players
Yoshi and the Mysterious Book (2026) – Full Completion Guide, Rewards & Secret Ending
Vampire Crawlers Coin Farming Guide


