Guide
How to Add Page Numbers to Microsoft Word

The addition of page numbers to lengthy documents created in Microsoft Word requires only a few clicks. It is not necessary to upload the pages one at a time because they will be numbered automatically after they are added. You have the option of placing the page numbers at the top or the bottom of the page, and there are several other designs from which to choose (top-right corner, bottom-center, et cetera). Both Mac and PC users can follow these instructions to add page numbers in Microsoft Word.
Read Also: How to Group Objects in Microsoft Word
How to Add Page Numbers to Microsoft Word
On macOS
1. In a document that is now open, go to the Insert tab, and once you’re there, click the icon that looks like a page number.
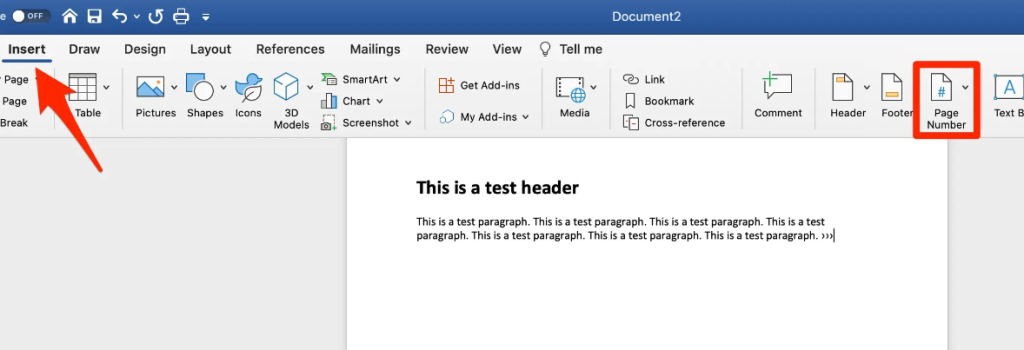
2. Select the desired page number from the drop-down menu.
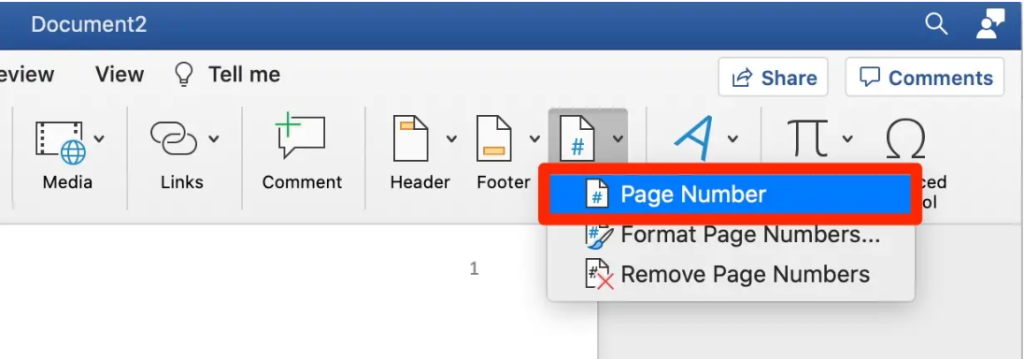
3. Choose the area on the page where you want the page numbers to appear, as well as the type of alignment you want them to have. You may also choose whether or not you want them to be centred.
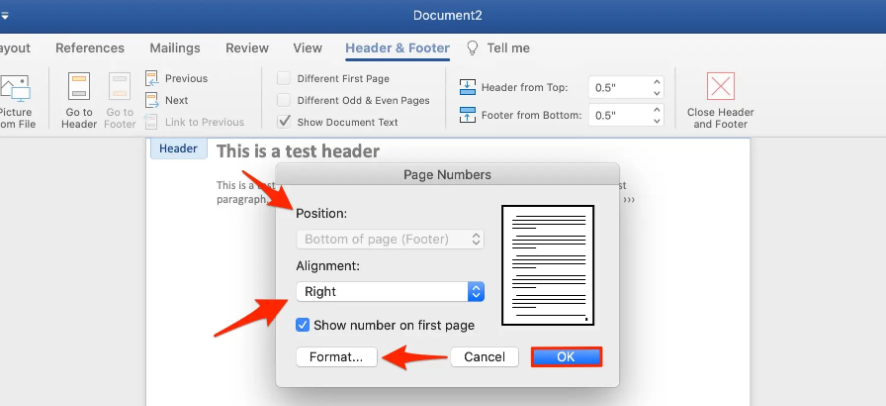
4. If you do not want the first page of your document to have a page number, make sure that the option titled “Show number on first page” is not checked. This will prevent the page number from appearing on the first page of your document.
5. If you want to change the way the numbers are formatted, you may do so by clicking the Format button and then selecting the desired option from the list of possible choices.
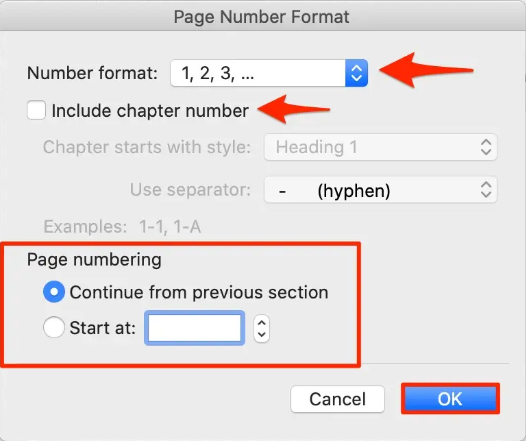
6. When you are finished, you need to select the OK button on the toolbar. They will become immediately obvious after that. Simply double-click on them wherever they appear in the header or footer of the document to make any necessary modifications to them.
On Windows
1. In the document that is currently open, select the Insert button and click it.
2. Choose Page Number.

3. Choose the location for the page numbers using the drop-down menu. You have the option of using either the header or the footer. The next step is to look through all of the many possibilities for the style, and pick the one that appeals to you the most.

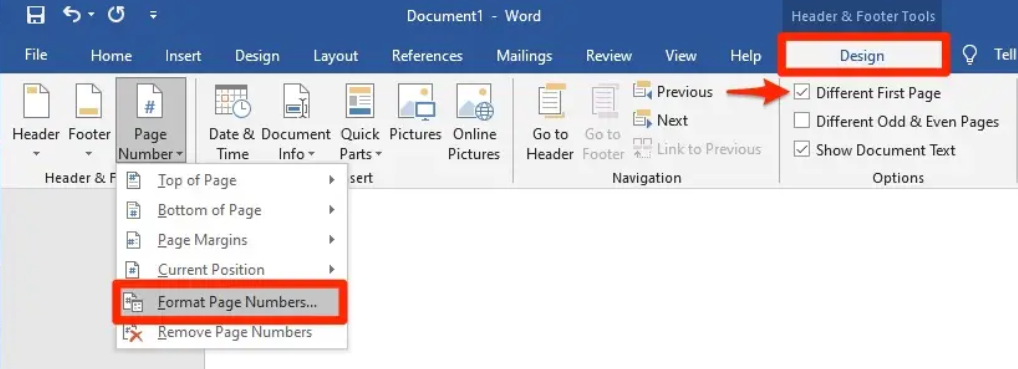
4. If you do not want your document to begin with a page number on the first page, navigate to the tab labelled Design and select Different First Page from the drop-down menu. This choice can likewise be made for the page that serves as the title of the document.
5. Go to the drop-down menu for Format Page Numbers after selecting Page Number from the top menu bar.
6. Click the circle that is positioned next to the words “Start at:” in order to return the number to its initial value of zero.
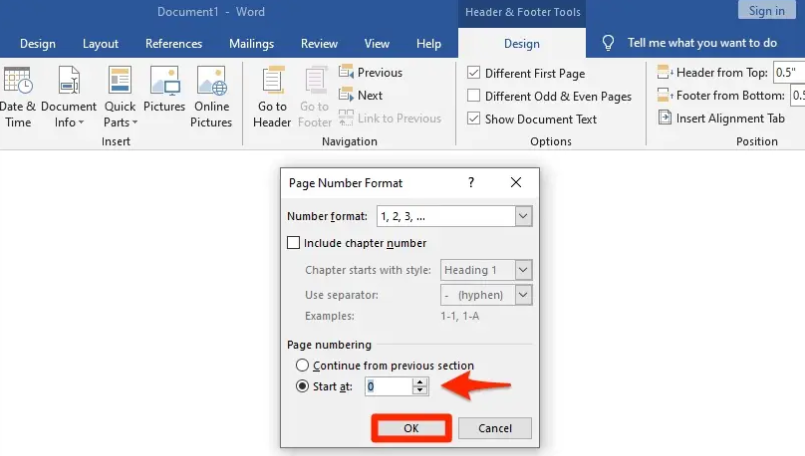
7. When you are through making changes, select the option to Close Header and Footer after you have clicked the OK button.
FAQs
How do I correct the page numbers that are displayed in a table of contents in Microsoft Word?
After you have created a table of contents in Word, you have the option to change the way that it looks. To modify the page numbers, use the Table drop-down menu and select the Update Table option. In addition, if you want to personalise the table of contents that you already have, you can do so by going to References > Table of Contents > Custom table of contents.
What does it mean when it says “page merge format” on my page number in Word?
If you see *MERGEFORMAT instead of the page numbers, this indicates that field codes are enabled in Word. If you want the field numbers to appear instead of the field code, you can display them by pressing the shortcut key combination ALT and F9.


