Guide
How to Blur a Picture on Your iPhone or Android
No one wants to look at a blurry photo, or at the very least, no one wants to look at a fuzzy picture that was taken inadvertently. On the other hand, there are several compelling reasons to purposefully blur an image. It’s possible to achieve an artistic aesthetic with it, and having a blurry background can help focus attention on what’s in the foreground. Both the iPhone and Android operating systems make it simple to blur images when armed with the appropriate application. Now, here’s how to go about doing that:
Read Also: How to Delete Contacts on an Android Phone
How to Blur a Picture on iPhone or Android
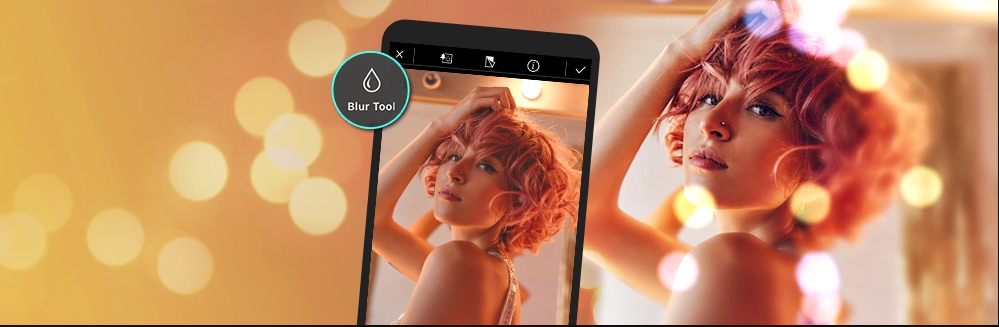
It is not necessary to rely on the portrait mode on the iPhone in order to blur images; there are apps that are available for both the iPhone and Android platforms that allow you to apply a blur effect. YouCam Perfect is both an easy-to-use and very adaptable program that comes equipped with a blur function.
YouCam Perfect provides users with a variety of blur features from which to pick. There is an option that allows you to blur the entire photo with the exception of a certain region (such as a circular, elliptical, or rectangular region) that remains crisp, and there is another option that allows you to use a brush to blur whatever part of the image you like. This is a guide on how to use the application.
1. Download and install the YouCam Perfect app on your iOS or Android device.
2. Launch the YouCam Perfect program. However, in order to use the app’s premium features, you will be presented with advertisements after downloading the app for free. You are free to disregard them.
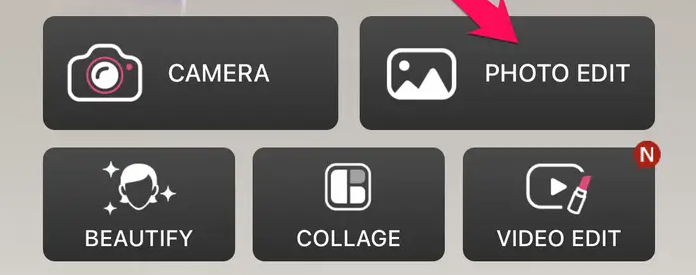
3. Select the Photo Alter option, then navigate to the camera roll on your device and select a photo that you wish to edit.
4. Tap Tools.
5. Select Blur from the menu that appears.
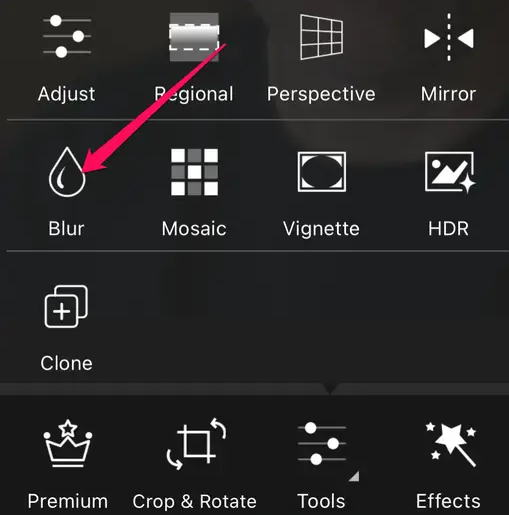
6. The Blur tool provides several different options for blurring the image.
- Circle: Is selected automatically, and it displays a series of concentric circles. You have the ability to reposition the circles wherever on the screen, as well as alter their size. The sharpness of the image is maintained in the circle’s center, while it softens gradually as it moves outward, giving the photograph a more candid appearance. Adjust the size of the circle and its location so that the shot has the desired amount of blur. You also have the option of selecting a Rectangle or an Ellipse, and the operation of all three of these tools is roughly the same.
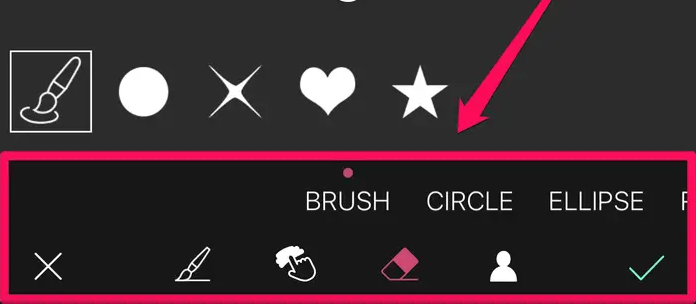
- Brush: The brush tool is superior than other options in a wide variety of contexts. You can selectively add or remove blur from any part of the photo by making use of the Paint and Erase tools that are located at the bottom of the screen. Alternately, if you want the app to automatically try to detect the person in the shot and keep them in focus while blurring the background around them, you can tap the icon that looks like a person.
7. When you are happy with the way your image looks, hit the checkmark in the bottom right corner to save it with the modifications you made.

Vampire Crawlers Coin Farming Guide

Forza Horizon 6 Performance: Why 60 FPS Is Still the Console Standard

Yoshi and the Mysterious Book (2026) – Full Completion Guide, Rewards & Secret Ending

How to Get Free Pets in Adopt Me: A Guide for Players

Roblox Username Generator – Create a Cool & Unique Username in Seconds
How to Get Free Pets in Adopt Me: A Guide for Players
Yoshi and the Mysterious Book (2026) – Full Completion Guide, Rewards & Secret Ending
Forza Horizon 6 Performance: Why 60 FPS Is Still the Console Standard


