Guide
How to Clean Your Printer’s Printheads
This article describes a few different methods for cleaning printheads. On a Windows PC or a Mac, you can use the self-cleaning functions, or you can manually clean the printheads.
Read Also: How to Add a Printer to Your Chromebook
How to Clean Printheads via a Windows PC
Inkjet printers produce papers and photographs of exceptional quality. When the printheads become clogged, the image quality suffers as a result. Occasionally, you may notice ink smudges or lines on the paper. Cleaning printheads, on the other hand, is a quick and straightforward procedure.
The printheads of your printer can be cleaned using the Windows Control Panel, which is accessible through the printer’s printer drivers.
1. Start by navigating to the Control Panel. Depending on the Windows version, either the Power User Menu or the Start menu should be used.

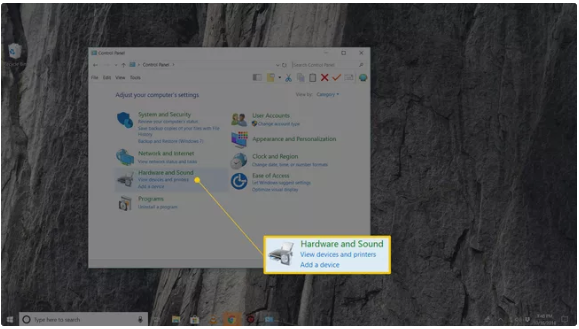
2. Select either Hardware and Sound or Printers and Other Hardware from the drop-down menu. The option you see is determined by the version of Windows you are using.
3. Choose Devices and Printers or View Installed Printers or Fax Printers from the drop-down menu.
4. Locate your printer, right-click it, and then select Properties from the drop-down menu.
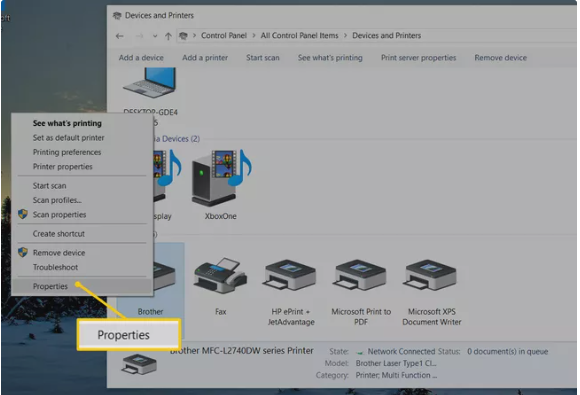
5. Select the Maintenance or Hardware tabs from the drop-down menu.
6. Choose a cleaning option, such as Clean Heads or Clean Cartridges, from the drop-down menu. If you are asked which printheads you want to unclog, choose All Colors if that choice is offered.
7. To begin the cleaning procedure, select OK, Start, or another command that is comparable. Any on-screen prompts that occur should be followed.
8. While the printer is cleaning itself, pay attention to and respond to any on-screen suggestions. It is possible that the printer will request that you print a test page. If you’re satisfied with the outcome, you’re finished. If the print quality is unacceptable, the process should be repeated.
How to Clean Printheads via a Mac
A utility application for Mac computers was probably included when your printer was purchased, and it allows you to monitor ink levels and generate test and diagnostic prints. Look for it in the Applications folder on your computer.
How to Manually Clean Your Printheads
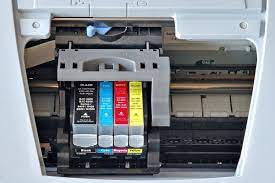
Clogged ink can sometimes be removed with a simple manual cleaning procedure. You’ll need a bowl, water, isopropyl alcohol, a soft microfiber cloth or paper towels, and a soft microfiber cloth or paper towels before you start.
1. Turn the printer off and unhook it from the wall.
2. Remove the inkjet cartridges from the printer with care. For specific details regarding this procedure, refer to the printer’s user manual.
3. Remove the printhead tray, which contains the cartridges, with care. For specific details regarding this procedure, refer to the printer’s user manual.
4. In a mixing bowl, combine a half cup of water and a half cup of isopropyl alcohol.
5. Place the printhead unit into the liquid and stir thoroughly. When using ink cartridges that have built-in printheads, add the cartridges to the mixture one at a time until the mixture is completely mixed.
6. Observe the printhead unit or cartridges for two minutes to ensure they are not moving.
7. Disassemble and dry the printhead unit or cartridges with a microfiber cloth or a paper towel until completely dry.
8. Insert the printhead unit or cartridges into the printer and print a test page to ensure that everything is working properly. If everything is printing normally, you’re finished. If you are dissatisfied with the print quality, you may need to soak the printhead unit or cartridges for a longer amount of time to resolve the issue.
Video

Roblox Username Generator – Create a Cool & Unique Username in Seconds

Grow a Garden Recipes in Roblox: Guide to Cook (Donuts, Sushi, Pie, Pizza & More!)

Job Opportunities in Dubai – 2026

Mr Bit at the SBC Awards Europe 2025: The Bulgarian Brand Setting New Standards in the European Gaming Industry

Dennis Rodman Net Worth 2026 – Everything You Need to Know

Bloxburg Neighborhood Codes 2026
Grow a Garden Recipes in Roblox: Guide to Cook (Donuts, Sushi, Pie, Pizza & More!)
Job Opportunities in Dubai – 2026
Dennis Rodman Net Worth 2026 – Everything You Need to Know


