Apple
How to Connect a Bluetooth Mouse to a Chromebook

It is explained in this post how to attach a wireless mouse to a Chromebook. If your device is Bluetooth capable or has a USB port, these instructions will work on any Chrome OS-based device you own.
Read Also: How to Add a Printer to Your Chromebook
Which Wireless Mouse Do You Have?
You could believe that there is only one type of wireless mouse, the one that does not require the usage of a cable. Wireless mouse, on the other hand, are made possible by two forms of wireless technology, which are discussed below. When it comes to connecting your wireless mouse to your Chromebook, the model you pick will have an impact.
- Bluetooth Mouse: These mice communicate to your computer via Bluetooth protocol and don’t require any USB receiver to work.
- Radio Frequency (RF) Mouse: These mice use an RF transmitter (in the mouse) and receiver (plugged into your USB port) to bypass the need for any wires.
Because most Chromebook devices contain Bluetooth functionality, as well as a large number of USB ports, either type of wireless mouse will operate with your Chromebook. If, on the other hand, you’d like to utilize your Chromebook’s USB port for other devices, the Bluetooth wireless mouse could be the ideal choice for your needs.
How to Connect a Bluetooth Mouse to a Chromebook
It is as simple as attaching any other Bluetooth device to your Chromebook if you have a wireless Bluetooth mouse in your possession.
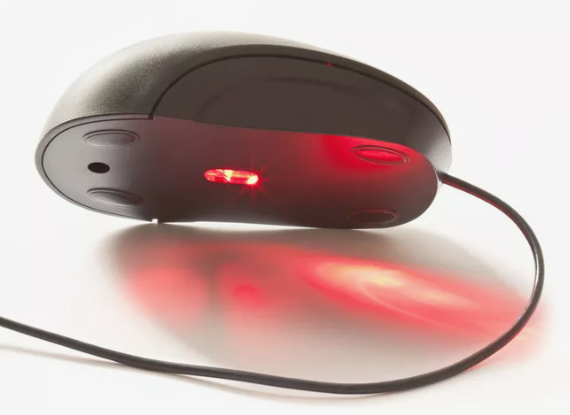
1. Switch off and on your Bluetooth mouse by looking for the power button. Check to see that it is switched on. You should be able to see the optical light come on (usually red). Return the mouse to its flat position on the mouse pad.
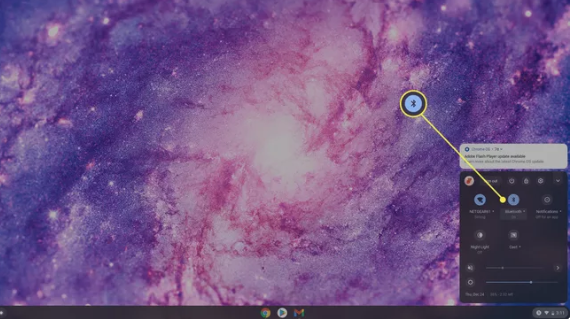
2. The lower right corner of the taskbar on your Chromebook is where you should start. Select the Bluetooth icon from the drop-down menu that appears.
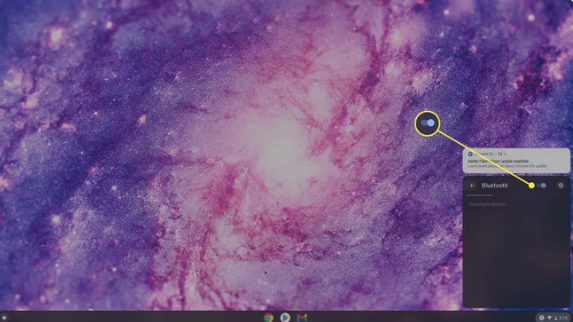
3. If the Bluetooth status is now turned off, turn on the toggle button to turn on Bluetooth again. Once enabled, you’ll notice a scanning status on your Chromebook while it searches for active Bluetooth devices in the vicinity. When your wireless mouse displays, you may pick it to pair with it and connect to it using the appropriate buttons.
4. Your Chromebook will recognize your Bluetooth wireless mouse as soon as it establishes a connection with it, and you will observe the mouse pointer moving as you move your mouse.
How to Connect a Radio Frequency (RF) Mouse to a Chromebook
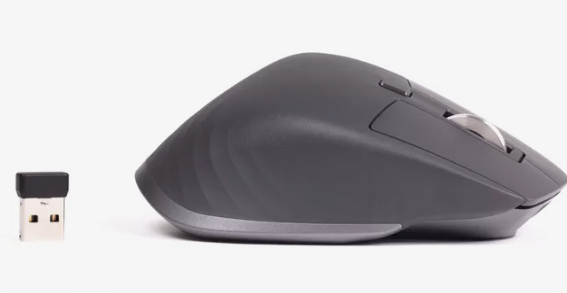
In order to use a wireless mouse with a Chromebook, the most commonly used type is the RF mouse. A tiny receiver device is included, which may be connected straight to the USB port on the back of your Chromebook. It is not need to configure anything. You must, however, be certain that the RF mouse you purchase is compatible with Chrome OS before proceeding.
1. When purchasing an RF mouse, be sure you pick one that has been tested and certified to work with Chromebooks. Due to the fact that Chromebooks do not support the installation of driver software, no RF mouse that requires driver software will function on a Chromebook (because driver software cannot be installed).
2. In addition to your mouse, you will receive a little USB receiver. Connect this little receiver to any USB port on your Chromebook and you’re good to go.
3. Move your mouse to the other side of the screen and press the power button. Once the mouse is connected to the USB receiver, you should be able to use it right away without having to do any more configuration.
Video

Vampire Crawlers Coin Farming Guide

Forza Horizon 6 Performance: Why 60 FPS Is Still the Console Standard

Yoshi and the Mysterious Book (2026) – Full Completion Guide, Rewards & Secret Ending

How to Get Free Pets in Adopt Me: A Guide for Players

Roblox Username Generator – Create a Cool & Unique Username in Seconds
How to Get Free Pets in Adopt Me: A Guide for Players
Yoshi and the Mysterious Book (2026) – Full Completion Guide, Rewards & Secret Ending
Forza Horizon 6 Performance: Why 60 FPS Is Still the Console Standard


