Guide
How to Fix a Bad Sky in Adobe Photoshop

When you take images outside, the sky may give the appearance of being grey or washed out at times. This is especially true if you photograph in direct sunlight. It is possible to change or replace the sky in a photograph by using either the clouds filter or the image compositing feature in Photoshop. The steps to take are as described below.
Read Also: How to Redo Changes in Photoshop
How to Fix a Bad Sky in Adobe Photoshop
To edit a shot with the cloud filter in such a way that it completely replaces the sky:
1. Use the tool called Quick Selection, which can be found in the toolbox, to make a selection of something.
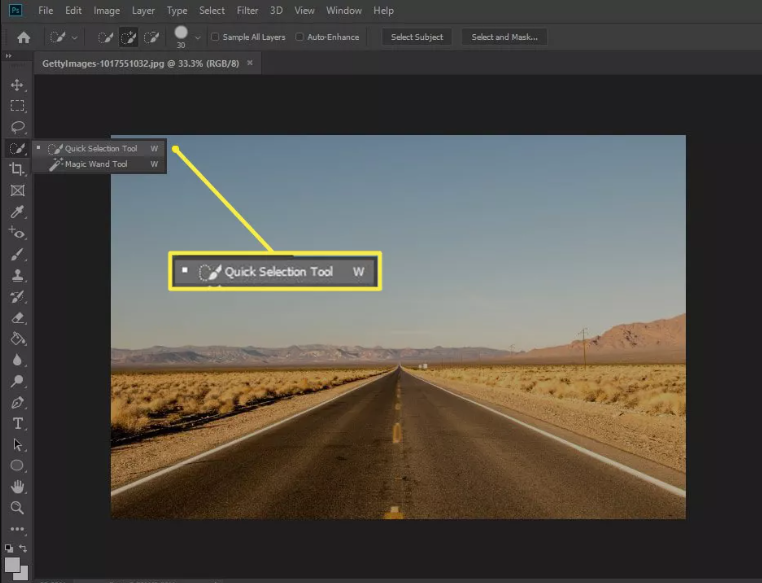
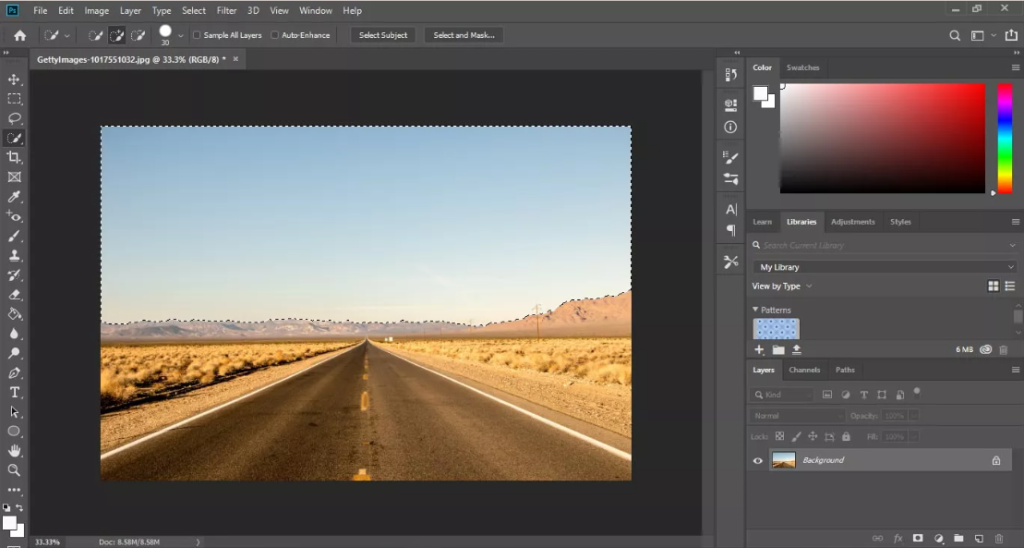
2. After clicking and dragging the cursor around the region that needs to be altered, selecting the sky is accomplished by releasing the button on the mouse after it has been held down.
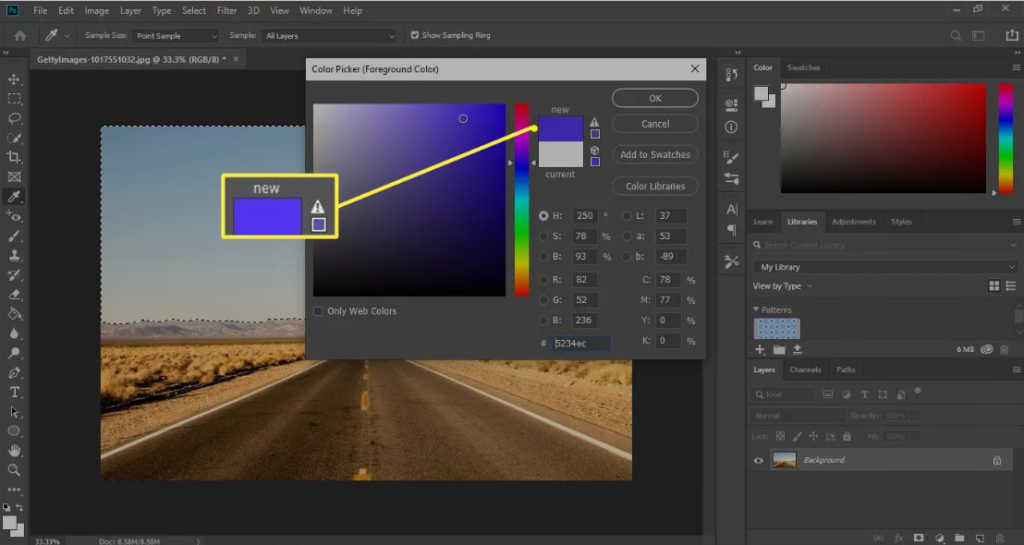
3. Change the colour of the foreground to blue and the colour of the backdrop to white after making a choice from the colour swatches in the lower-left corner of the workspace.
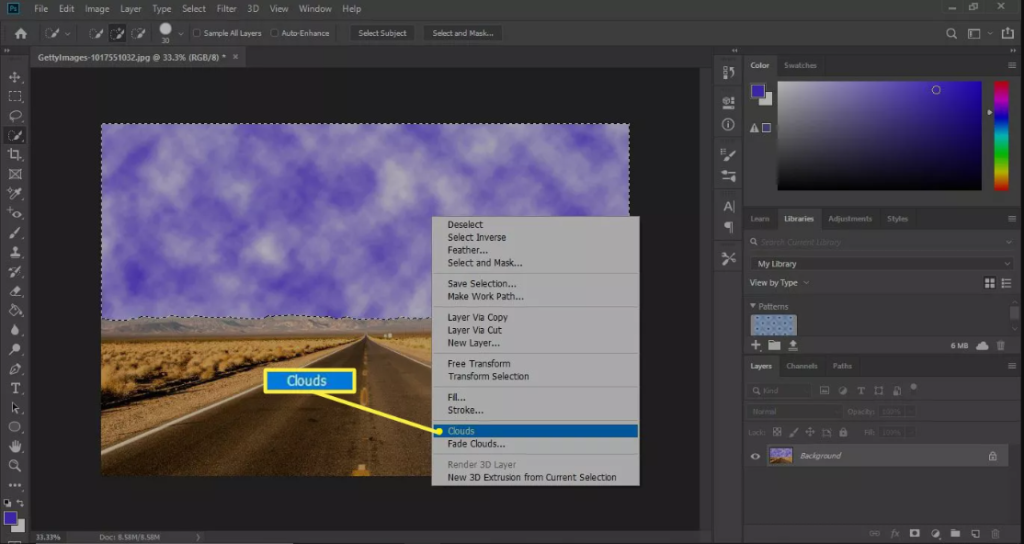
4. Select Filter > Render > Clouds.
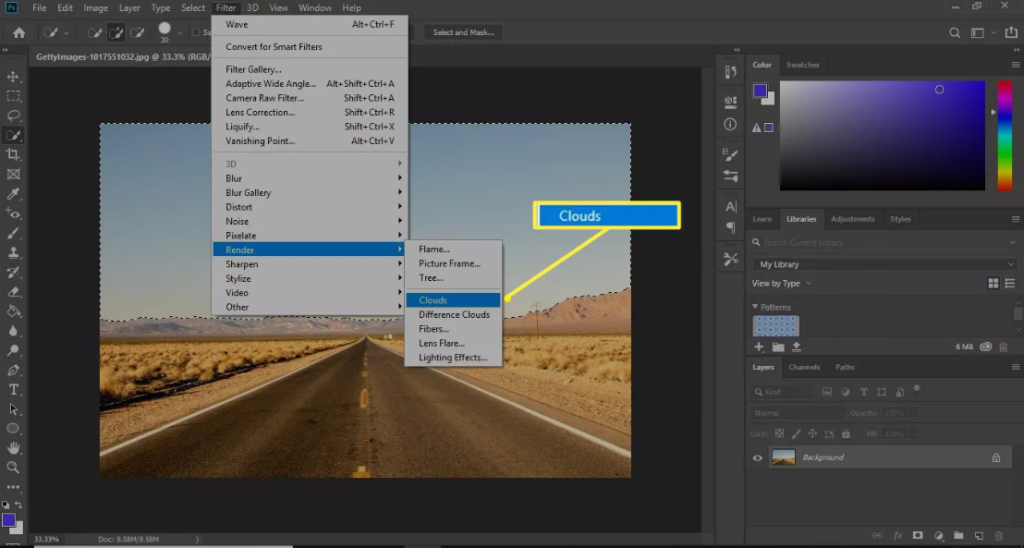
5. In its stead, the current sky option will be replaced with a brand-new one that features clouds. By right-clicking the new sky and selecting Clouds from the context menu, you can reapply the filter with a different pattern.
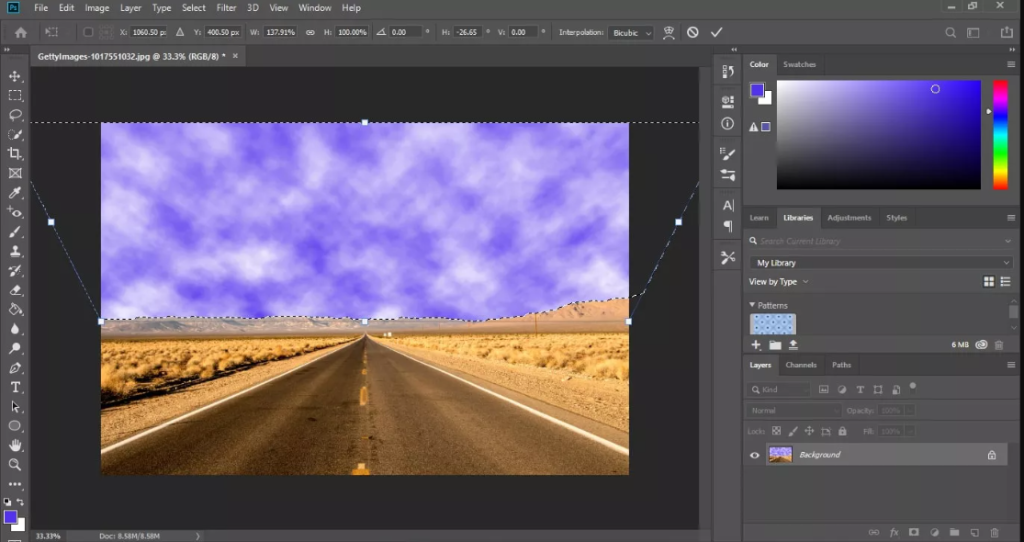
6. To alter the viewpoint from which the sky is viewed, choose Edit > Transform > Perspective when the sky is selected in the editor.

7. You may create the effect of the clouds moving in from the left as the viewpoint moves by clicking and dragging the handle in the upper left corner of the screen to the left. This will give the impression that the clouds are approaching from the left.
FAQS
How do you fix a blown image in Photoshop?
After selecting the “Radial Filter” icon that is located above your photo, move the cursor over the part of the picture that is too bright. Make sure that the “Inside” Effect option is selected by scrolling down through the available options. Reduce the amount of white in the image by adjusting the exposure and highlight levels as necessary.
How do you fix over exposure?
If you want your photograph to be better exposed, try stopping the aperture down. Following the completion of the ISO and aperture settings, you should now focus on the shutter speed. If the image you took is excessively bright, you need to make sure that your shutter speed is high enough. It will be helpful to raise it from 1/200th to 1/600th as long as it does not have an effect on the other parameters.
How do you deal with blown out highlights?
Adjusting the whites and highlights sliders is the simplest and quickest method for restoring blown-out highlights in an image. The Basic Panel in Lightroom is where you’ll find these sliders to adjust various settings. These two sliders, when used in conjunction, will allow you to target the exposure of the brightest region of your photograph.
What does an overexposed photo look like?
The Definition of Overexposure
When an image appears brighter than it should, or brighter than it would be with neutral exposure, this is known as overexposure. When an excessive amount of light strikes the sensor of the camera, the picture that is captured as a result is extraordinarily vivid and overexposed.

Vampire Crawlers Coin Farming Guide

Forza Horizon 6 Performance: Why 60 FPS Is Still the Console Standard

Yoshi and the Mysterious Book (2026) – Full Completion Guide, Rewards & Secret Ending

How to Get Free Pets in Adopt Me: A Guide for Players

Roblox Username Generator – Create a Cool & Unique Username in Seconds
How to Get Free Pets in Adopt Me: A Guide for Players
Yoshi and the Mysterious Book (2026) – Full Completion Guide, Rewards & Secret Ending
Forza Horizon 6 Performance: Why 60 FPS Is Still the Console Standard


