Guide
How to Fix Broken Headphones
The option of mending headphones may be more appealing and cost-effective than the alternative of getting new headphones if you already have the appropriate tools.
Read Also: How to Make Headphones Louder
Causes of Broken Headphones
Common headphone failures include:
- An electrical short in the wires that transmits sound.
- A malfunctioning earpiece.
- A defective jack plug.
- Problems with the audio jack.
Prior to attempting to repair your headphones, you must first determine the root of the problem. These troubleshooting steps can assist you in determining why your headphones are not functioning properly:
- Connect the headphones and listen for any audio signals: Bending the wires while listening for feedback may help if the sound cuts in and out. If you hear sounds when you position the cables in a specific way, this indicates that there is an electrical short in the headphones’ wires, which must be repaired.
- Gently insert the plug into the audio jack by pressing down on it: If you hear sound, it’s possible that the plug has to be repaired.
- Make use of a second set of functional headphones: If you are not hearing anything, it is possible that the headphone jack has to be repaired.
- To check the wires, use a millimeter as follows: If there are no breaks identified, the multimeter will beep. If you are unable to get it to beep, the cables must be repaired.
- If one side of the conversation is completely silent, you may need to adjust the earpiece.
How to Fix Headphones Without Tools
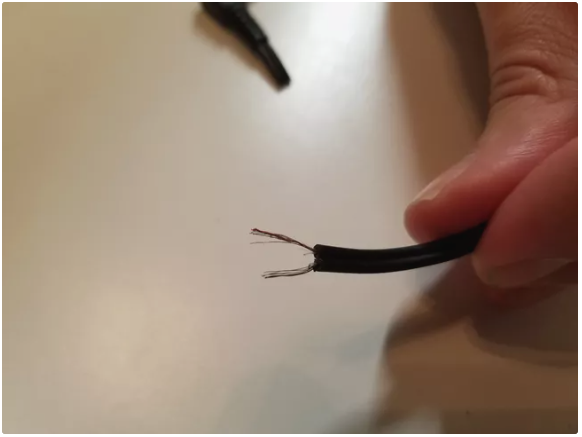
If the problem is with the cables, you may be able to repair your headphones without having to open them up completely.
1. It is possible to hear sounds when the damaged wires come into contact with each other as you twist, bend, straighten, and adjust the cable. This approach can be used to pinpoint the location of the problematic connection. Shorts are most commonly seen at the earpiece or the jack.
2. When you have found a position that permits you to hear sound, hold the cable in place with your fingers until the sound stops.
3. Continue to apply pressure to the cable while wrapping electrical or duct tape over the frayed end of it. If the job is done correctly, the tape should compress the cable just enough to keep the wires from coming into contact.
4. If it’s possible, fold the cable over on itself and tape it together at the kink to keep it from shifting.
How to Fix a Broken Headphone Plug
If the plug on your headphones is damaged, you may replace it by visiting an electronics store or ordering one online. A metal plug with a stereo connection and an identical-sized spring to your present plug should be used.
To repair or replace a damaged headphone plug, follow these steps:
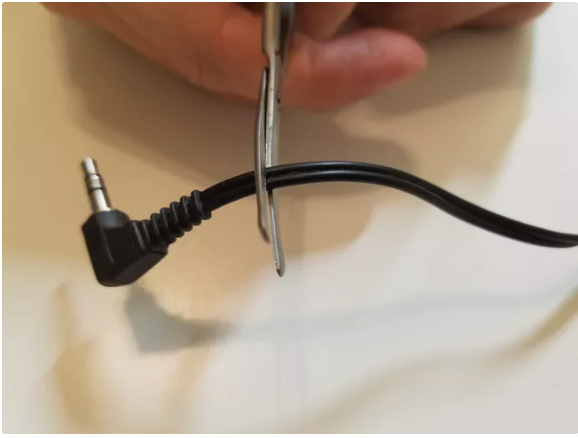
1. Remove the old plug by slicing it. Cut through the cable about an inch above the point where the cable and the plug connect, then remove the cable. Some cables can be screwed off, but the problem is most likely at the cable’s base, thus you should cut it regardless of whether or not it can be screwed off.
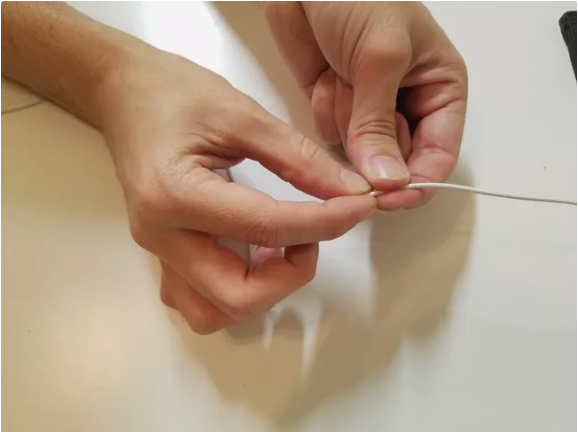
2. Remove an inch or so of the cable’s cover using scissors or wire strippers to reveal the wires beneath it.
3. Using a lighter, burn off the enamel covering from the wires once they have been sorted by colour and kind.
4. Twist wires that are similar in colour together. Twist the frayed ends of both ground wires together if there are two ground wires.
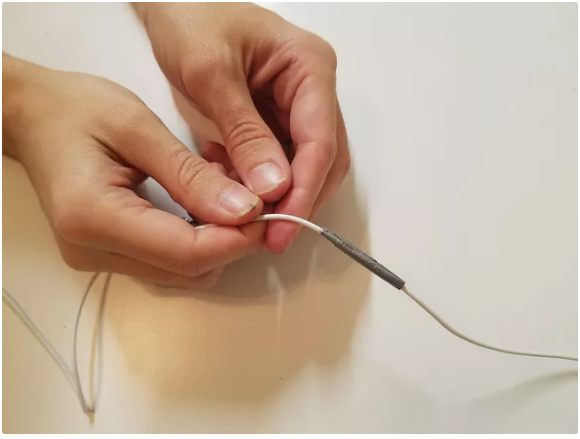
5. Slide the sleeve of your new headphone plug over the wire so that the part of the plug that connects with the wire is facing the exposed wire.
6. Solder a small dab of solder to the end of each wire and let the solder to cool before continuing.
7. Add solder to one of the pins in the plug’s housing and heat it until the solder is melted.
8. Connect the wire to the plug by touching the soldered end of the wire to the soldered pin on the plug.
9. Then repeat the procedure for the remaining wires.
10. Assembly of the new headphone plug begins with the jack sleeve being screwed into the headphone plug. Check to see that the wires are not touching and that the sleeve is securely fastened.
Video

Vampire Crawlers Coin Farming Guide

Forza Horizon 6 Performance: Why 60 FPS Is Still the Console Standard

Yoshi and the Mysterious Book (2026) – Full Completion Guide, Rewards & Secret Ending

How to Get Free Pets in Adopt Me: A Guide for Players

Roblox Username Generator – Create a Cool & Unique Username in Seconds
How to Get Free Pets in Adopt Me: A Guide for Players

Grow a Garden Recipes in Roblox: Guide to Cook (Donuts, Sushi, Pie, Pizza & More!)
Roblox Username Generator – Create a Cool & Unique Username in Seconds
Yoshi and the Mysterious Book (2026) – Full Completion Guide, Rewards & Secret Ending


