Guide
How to Format a Hard Drive in Windows
It will be necessary for you to format the hard disc in order for your operating system to be able to read data from the drive and write data to the drive. In order to accomplish this, you will need to delete all of the information that is currently saved on the disc and then create a file system. You will need to format the hard disc before you can use it with Windows. This is a prerequisite for using the drive.
Read Also: How to Scan Documents in Windows 10
How to Format a Hard Drive in Windows
In order to format a hard disc using Windows 11, Windows 10, Windows 8, Windows 7, Windows Vista, or Windows XP, simply follow these straightforward steps:
1. Launch the hard disc manager that comes standard with all editions of Windows, known as Disk Management.
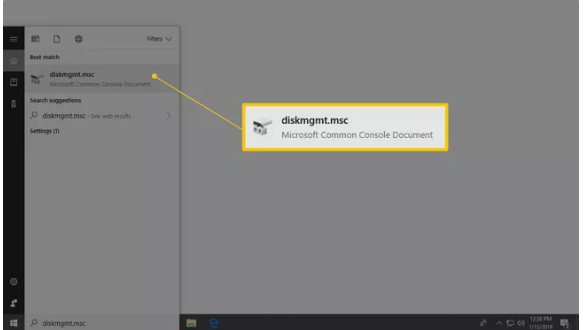
It is possible to open Disk Management in a variety of different methods, depending on the version of Windows you are using; however, the one that is the most straightforward is to go to the Run dialogue box or the Start menu and type in devmgmt.msc.
2. Control Panel provides a another access point to the Disk Management interface.
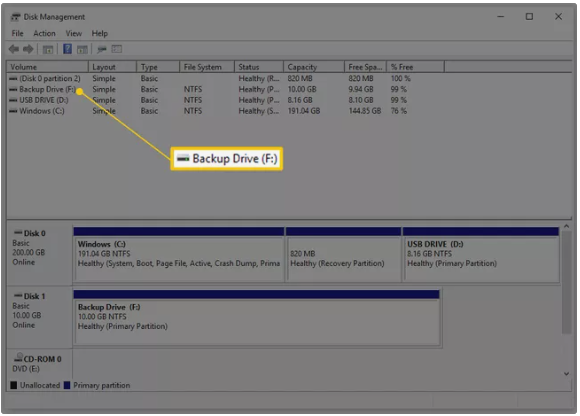
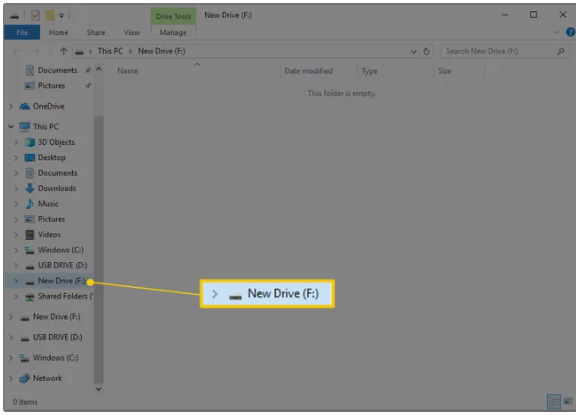
Once Disk Management has opened, which could take a few seconds, locate the drive that you wish to format in the list that is located at the very top of the window. This application contains a significant amount of data; therefore, if you are unable to view everything, you should make the window as large as possible.
Look for the drive name as well as the quantity of storage space that is available on the disc. For instance, if the name of the drive is “Music,” and it has 2 gigabytes of space on the hard disc, then you have most likely chosen a little flash drive that is filled with music.
3.You are allowed to open the drive to verify that it is indeed the device you wish to format if doing so will inspire greater confidence on your part that you will be formatting the correct device. Right-click the drive you want to format, and then select Format from the context menu to launch the disk-formatting wizard. Once you have located the drive you wish to format, you can now format it.
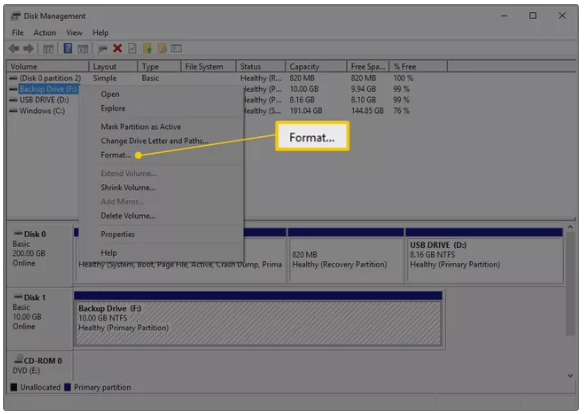
- Existing Drive: If you’re formatting a drive that you’ve been using and that has data on it, double-check in Explorer that the drive letter you’re choosing here in Disk Management is the same as the one you see in Explorer that has the information on it that you want to erase. Once formatted, the existing data on the disk are probably unrecoverable for most people.
- New Drive: If you’re formatting a new drive, a great way to tell that it’s the right one is to look at the File System column in the top part of Disk Management. Your existing drives will show file systems of NTFS or FA32, but a new, unformatted drive will show RAW instead.
4. Volume labels are the first of many formatting details we’ll cover in the next steps, and they’re just the name assigned to the hard drive. Using the Volume label textbox, you may assign the drive whatever name you desire.
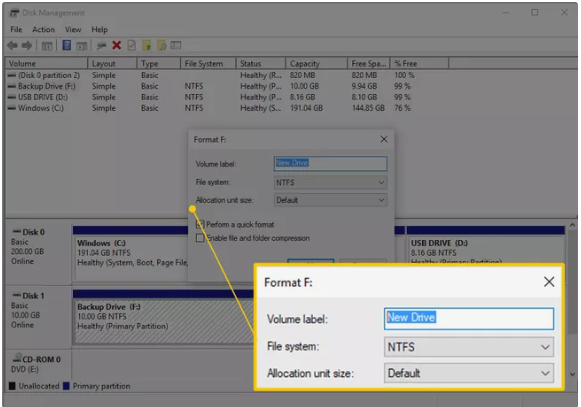
5. The next step is to select a file system. Select NTFS as the file system in the text box.
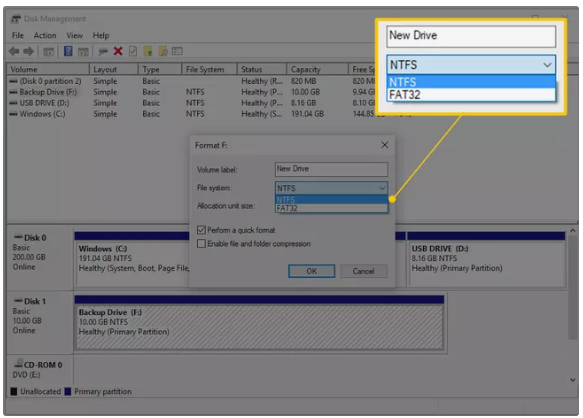
NTFS is the most modern and, therefore, the finest file system. Choose FAT32 (FAT16 isn’t available unless you have a 2 GB or less drive) only if you’re specifically instructed to do so by a program’s instructions. It’s not every day that you see anything like this.
6. Select Default in the textbox for Allocation unit size. Depending on the hard drive’s capacity, a suitable allocation size will be selected.

When formatting a hard drive in Windows, setting a custom allocation unit size is not very popular.
7. Next, there is the option to perform a fast format. We propose that you uncheck this item so that a “standard format” is executed instead of a “fast format” by default.
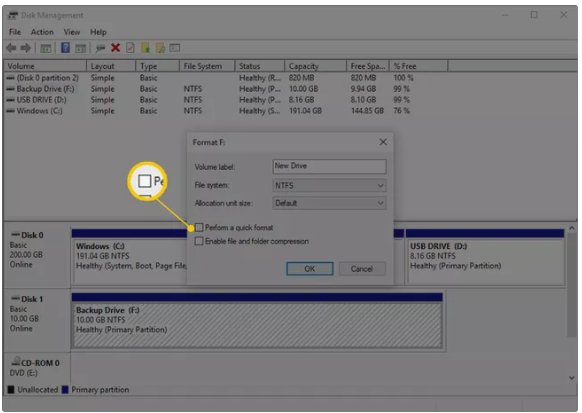
It can take hours or even days to check every single “sector” of a hard disc for defects and then overwrite the bad sectors with the value zero. With this operation, you may rest assured that your hard drive is in perfect operating order, that each sector is a dependable location for storing your data, and that any data you’ve already saved is permanently erased from it. Windows thinks that the hard disc is error-free and skips the bad sector search and basic data sanitization during a fast format. A fast format is really convenient.
Of course, you have complete freedom of choice—either way, the drive will be formatted. For older and newer drives, we prefer to undertake the error checking ourselves rather than relying on our vital data to complete the testing for us afterwards. If you plan to sell or dispose of this drive, the data sanitization feature of a full format is a bonus.
8. Enable file and folder compression is the final format option, and we recommend keeping it unchecked by default.
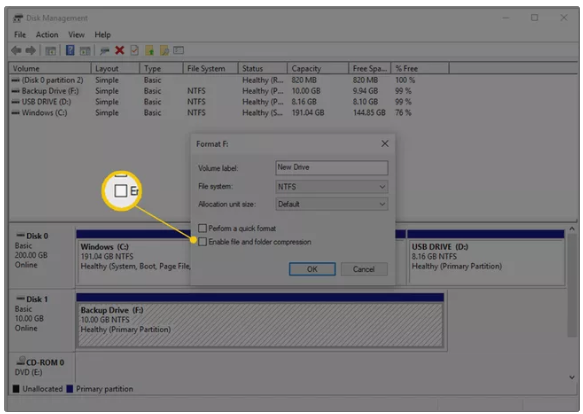
Compressing and decompressing files and folders on the fly is possible using the file and folder compression feature, which can save a lot of hard drive space. One disadvantage of using compression is that it might significantly slow down your Windows operating system’s performance when it is enabled on a regular basis.
Compression of files and folders is a thing of the past with today’s huge and low-cost hard discs. Modern computers with huge hard drives are better off protecting as much processing power as possible and foregoing hard drive space savings in the vast majority of cases.
9. Click OK to finalize the changes you’ve made in the previous steps.
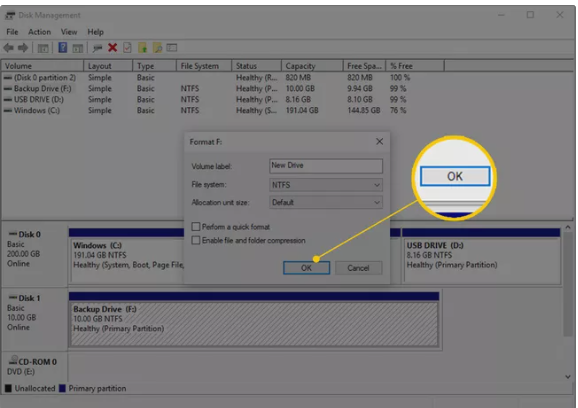
As a reminder, here’s what you should see:
- Volume label: [label of your choosing]
- File system: NTFS
- Allocation unit size: Default
- Perform a quick format: unchecked
- Enable file and folder compression: unchecked
Look back at whatever previous steps you need to if you’re wondering why these are the best options.
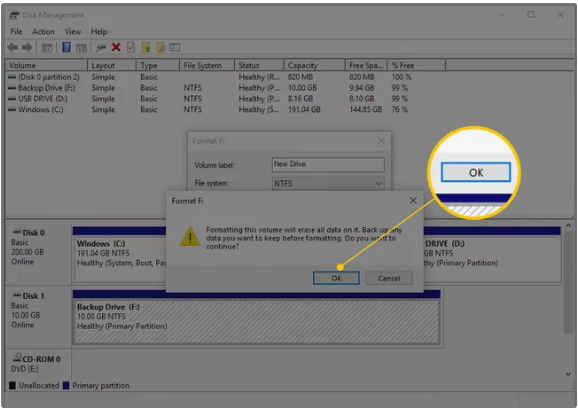
10. A hard disc format is no exception to this rule, as Windows is usually quite effective at alerting users to the potential consequences of their actions.
The drive will be formatted if you accept the warning message.
11. The formatting of the hard disc has begun! In Disk Management, look for the Formatting: xx percent indicator in the Status column at the top or the graphical representation of your hard drive at the bottom to see how far along you are in the formatting process.
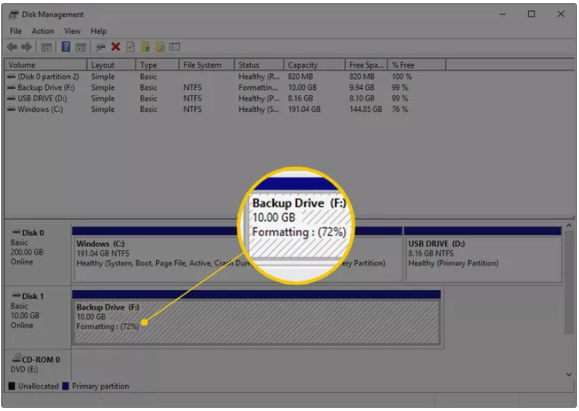
If you select a speedy format, your hard disc will be formatted in a matter of seconds. For the standard format, we recommended, the time it takes to format a disc depends nearly entirely on its size. The time it takes to format a small drive varies greatly from the time it takes to format a large disc.
Speed of your hard drive and overall computer play a role, but the size is the most important factor.
12. In Windows Disk Management, you won’t see a large “Your Format is Complete!” message, so wait a few seconds and then check again under Status and make sure it’s listed as healthy like your other discs.
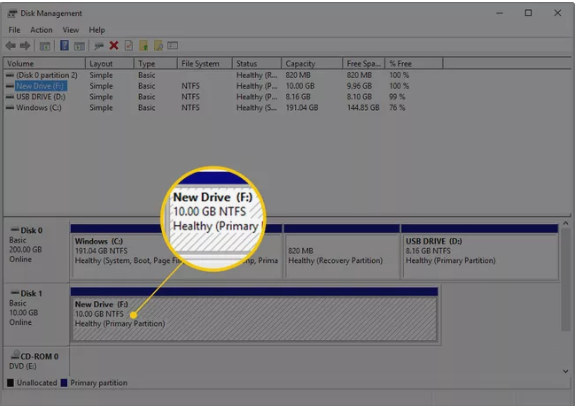
13. It’s done! Now that your hard drive has been formatted, you can use it with Windows XP. When you buy a new hard drive, there is no limit to what you can do with it.
Video

Vampire Crawlers Coin Farming Guide

Forza Horizon 6 Performance: Why 60 FPS Is Still the Console Standard

Yoshi and the Mysterious Book (2026) – Full Completion Guide, Rewards & Secret Ending

How to Get Free Pets in Adopt Me: A Guide for Players

Roblox Username Generator – Create a Cool & Unique Username in Seconds
How to Get Free Pets in Adopt Me: A Guide for Players

Grow a Garden Recipes in Roblox: Guide to Cook (Donuts, Sushi, Pie, Pizza & More!)
Roblox Username Generator – Create a Cool & Unique Username in Seconds
Yoshi and the Mysterious Book (2026) – Full Completion Guide, Rewards & Secret Ending


