Guide
How to Indent on Google Docs

It is possible to decide precisely how far away from the margins you want each paragraph’s beginning line to be if you know how to indent on Google Docs using either the built-in indentation choices or the ruler tool. Hanging indents are also available in Google Docs, although they must be manually created.
Read Also: How to Change Margins in Google Docs
How to Indent in Google Docs
While you may indent a paragraph in Google Docs by using the Tab key, you can also create custom indents for a paragraph by doing the following steps:
1. In a Google Docs document, choose the paragraph you wish to indent and press the Enter key.
TIPS: If you want to highlight all of the text in a document, use the keyboard shortcut Ctrl+A or Command+A.
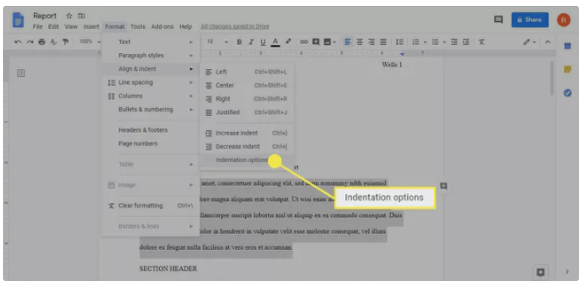
2. Select Format > Align & Indent > Indentation choices from the drop-down menu.
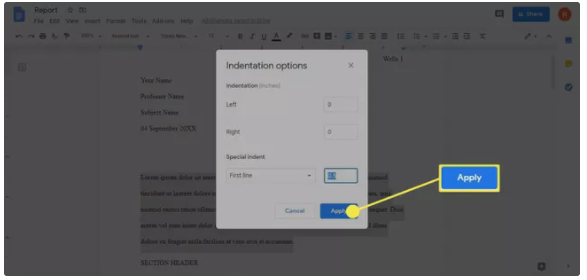
3. Select First Line under Special indent.
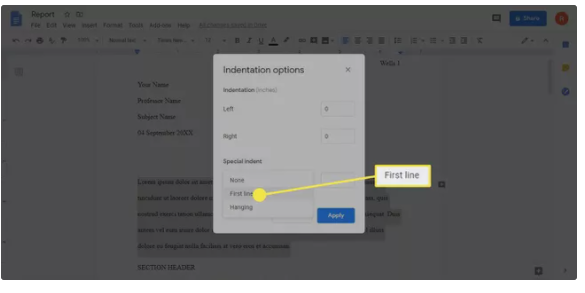
4. If you choose, you may enter a custom value for the indent and then click Apply.
When to Indent in Google Docs
Most academic writing follows the traditional practice of indenting the first line of each new paragraph on the first page of the document. First-line indents are not frequently used in news stories or blogs; nonetheless, you should be familiar with how to modify the indentation settings in case you need to structure a paragraph in a certain way for a particular audience. Creating a hanging indent is important if you need to prepare a references page in MLA format on Google Docs.
How to Indent the Second Line in Google Docs
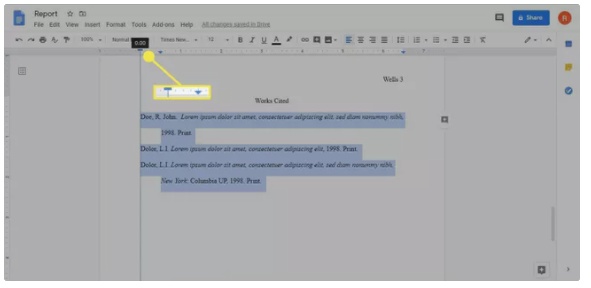
A hanging indent occurs when the initial line of a paragraph is not indented, but each subsequent line is indented after the first. To create a hanging indent in Google Docs, follow these steps:
1. Select Format > Align & Indent > Indentation Options from the menu bar after selecting the text you wish to format.
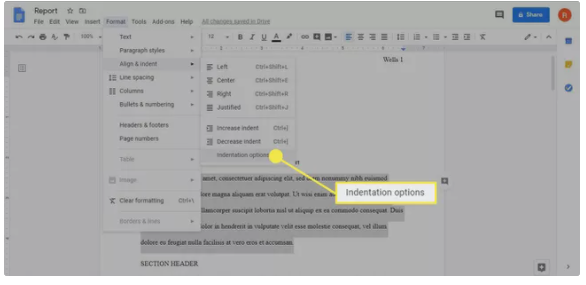
2. Select Hanging under Special indent.
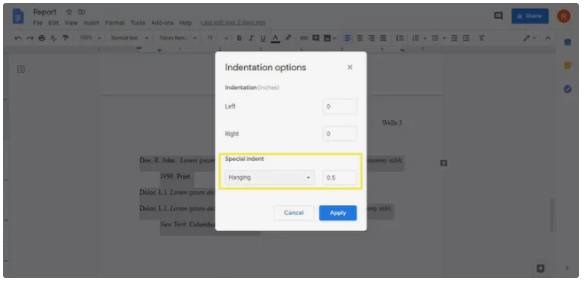
3. As soon as you’re through making your change, click Apply to have the indent applied and return to the document.
How to Indent in Google Docs Using the Ruler
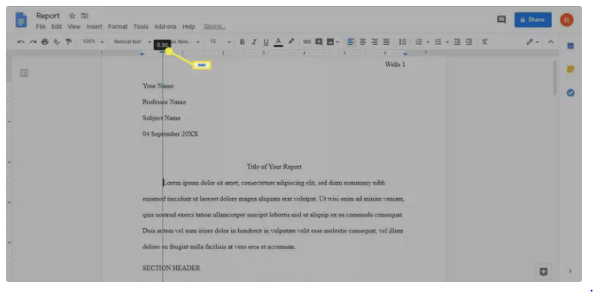
The ruler tool in Google Docs may be used to create custom indents in addition to the previous methods. On the left side of the ruler, there are two blue sliders that are placed on top of each other. The First Line Indent is controlled by the blue rectangle at the top of the page, while the Left Indent, or the indent for the remainder of the paragraph, is controlled by the blue triangle at the bottom of the page.
In Google Docs, you may indent text by using the ruler:
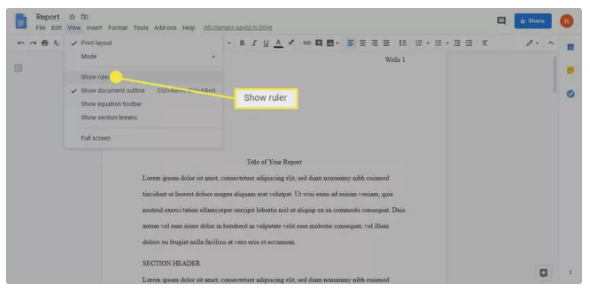
1. If you don’t see the ruler at the very top of the page when you have a Google Docs document open, pick View > Show Ruler from the menu bar.
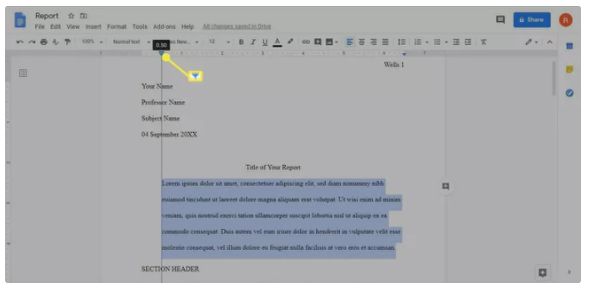
2. Indent the paragraph you wish to indent by highlighting it.
3. To the right of the First Line Indent slider, drag the cursor. On the left side of the ruler, there’s a little blue horizontal line that indicates the point at which the rule turns from grey to white. As you move the slider along the line, the measurement will show in a black box above the line where you are holding the line.
A vertical line will appear to the right of the text to assist you in adjusting it to your desire.
4. Drag the Left Indent slider to the right if you want to indent all of the lines that have been chosen. It’s the blue arrow pointing downward that’s located below the First Line Indent slider. When you begin moving the slider, a black measurement reading will appear on the screen once more.
5. To make a hanging indent with the ruler, first move the Left Indent slider to the right, then drag the First Line Indent slider back to the left, as shown in the example.
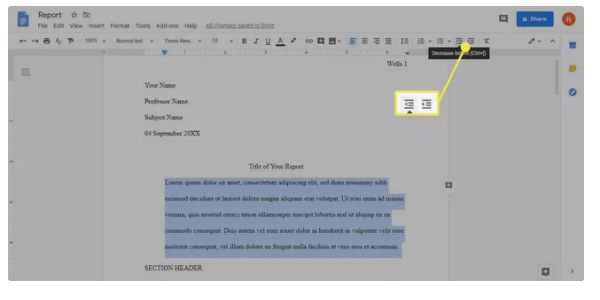
6. Alternatively, you can select Increase Indent or Decrease Indent in the toolbar.
Video

Vampire Crawlers Coin Farming Guide

Forza Horizon 6 Performance: Why 60 FPS Is Still the Console Standard

Yoshi and the Mysterious Book (2026) – Full Completion Guide, Rewards & Secret Ending

How to Get Free Pets in Adopt Me: A Guide for Players

Roblox Username Generator – Create a Cool & Unique Username in Seconds
How to Get Free Pets in Adopt Me: A Guide for Players
Yoshi and the Mysterious Book (2026) – Full Completion Guide, Rewards & Secret Ending
Forza Horizon 6 Performance: Why 60 FPS Is Still the Console Standard


