Guide
How to Install MySQL on Windows 10
Databases like MySQL store critical information such as user passwords, website content, and product options such as size and colour for your preferred goods. It is a component of a software “stack” known as LAMP, which stands for Linux, the Apache web server, MySQL, and the PHP programming language, among others.
Here’s why you would want to install MySQL on Windows 10 as well as how to go about doing so successfully.
Read Also: How to Delete Temporary Files in Windows
Why Install MySQL on Windows 10?
MySQL is a free and open-source database management system, and you may even obtain the source code if you so choose. This is one of the reasons it was trusted to be a part of the world’s most popular online platform, according to many. In more practical terms, this implies that you are free to download and use MySQL for your own personal use without restriction.
Why would you want to go through with it? If you’re interested in technology, you may experiment with it to learn more about how it performs its functions. Creating your own databases may be useful for a variety of reasons, including educational purposes or keeping track of critical objects at home. You might also use it to study SQL, which is a programming language that is used to manage and interface with most databases, by installing it on your computer.
How to Install MySQL on Windows 10
To set up MySQL, follow these steps:
1. To begin the installation procedure, open the file you downloaded and double-click it.
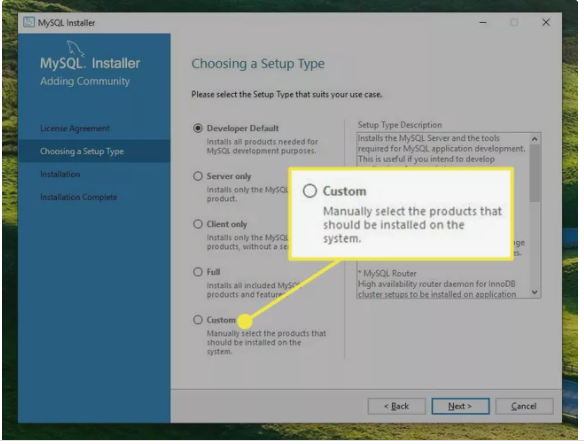
2. You’ll be able to see the various installation types. Select Custom from the drop-down menu and then Next.
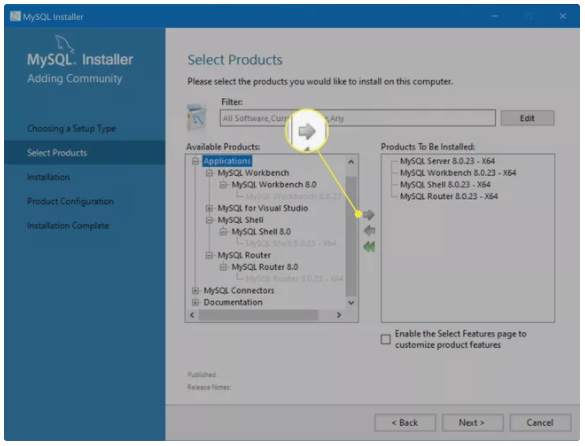
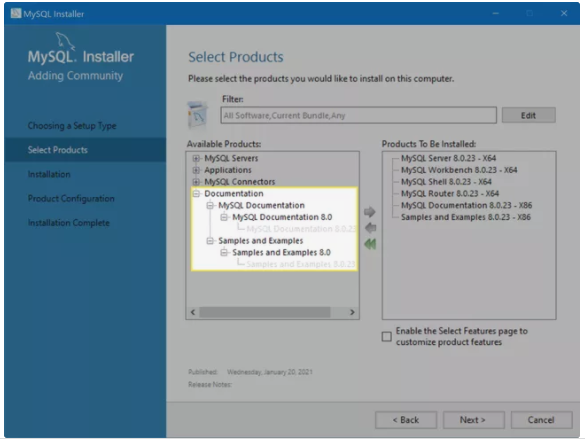
3. On the Select Products and Features page, you’ll need to transfer items from the Select Products box to the Products to be Installed box in order to complete the installation.
To begin, enter the MySQL Servers folder and expand the MySQL Server folder, then choose the proper MySQL Server version for your system to shift it to the relevant column in the left column.
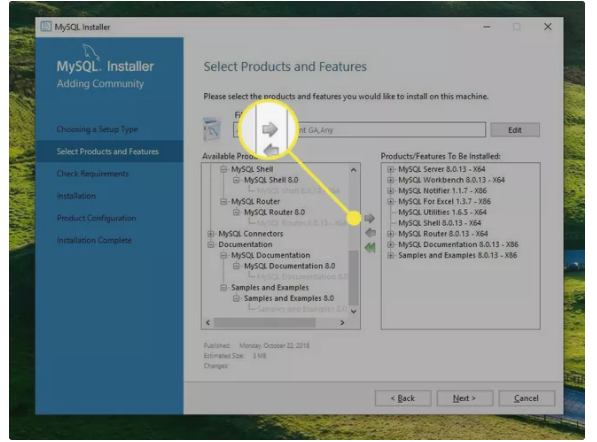
4. Select Applications to expand it, then select everything except MySQL for Visual Studio. Again, select the right-facing arrow to line it up for installation.
5. Finally, select Documentation, and add its items. This option provides some example databases you can look through.
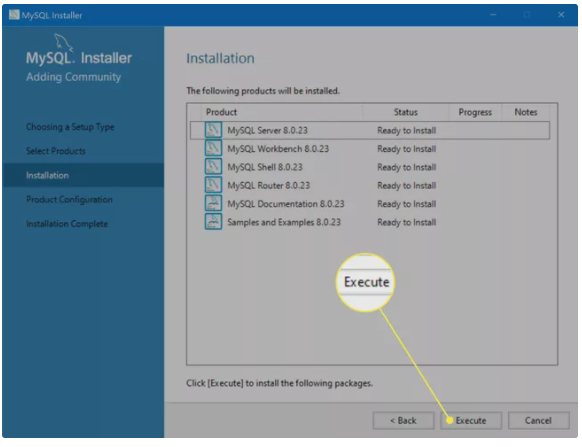
6. Select the Execute option. You may view the status of the installation by selecting Show Details from the drop-down menu.
7. Now the installer will start downloading MySQL.
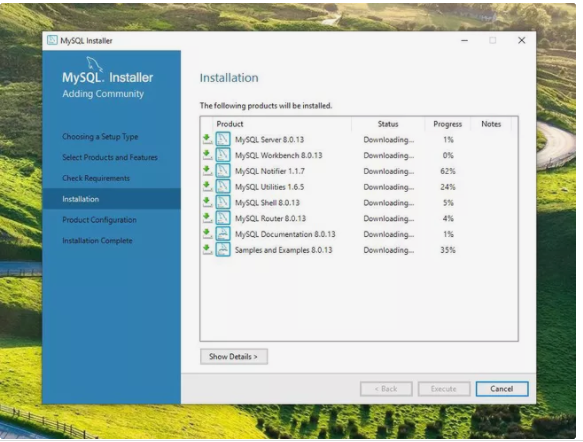
8. Once everything downloads, MySQL will start installing. Once the Status of each item changes to Complete, select Next.

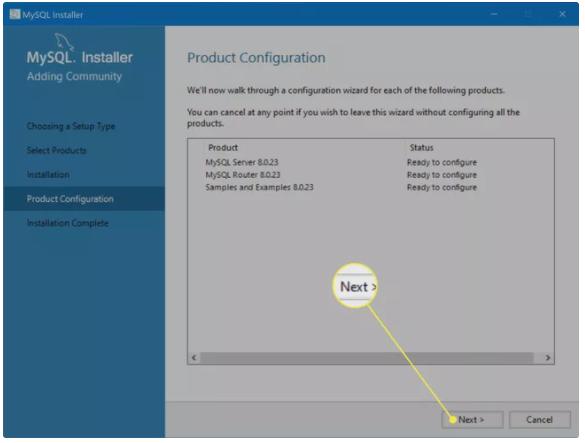
9. The wizard will then lead you through configuration. Configure the MySQL Server as follows:
- Group Replication: Select Standalone MySQL Server / Classic MySQL Replication.
- Type and Networking: Select the default Config Type Development Computer, which will set things up for you to work locally.
- Authentication Method*: Select Use Strong Password Encryption for Authentication.
- Accounts and Roles: Enter a password for your MySQL root (i.e., admin) user. Normally, you can (and should) set up at least one normal user with a name and password as well, but since you’re just testing things out, the root account will be enough.
- Windows Service: You can keep the defaults here, but you should select Start the MySQL Server at System Startup to disable it. As a general rule, try not to leave services you don’t need running on your machine.
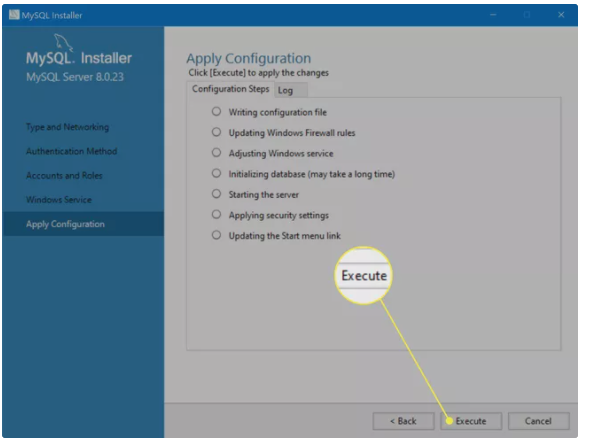
10. Select Execute to apply configurations.
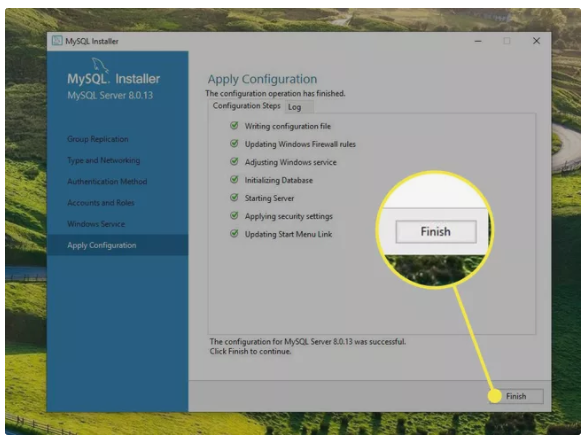
11. Select Finish to apply your configurations.
12. Repeat this process for other components.
13. Select Finish to complete the installation. You don’t need to start any of the apps at this stage.
Video

Vampire Crawlers Coin Farming Guide

Forza Horizon 6 Performance: Why 60 FPS Is Still the Console Standard

Yoshi and the Mysterious Book (2026) – Full Completion Guide, Rewards & Secret Ending

How to Get Free Pets in Adopt Me: A Guide for Players

Roblox Username Generator – Create a Cool & Unique Username in Seconds
How to Get Free Pets in Adopt Me: A Guide for Players
Yoshi and the Mysterious Book (2026) – Full Completion Guide, Rewards & Secret Ending
Forza Horizon 6 Performance: Why 60 FPS Is Still the Console Standard


