Guide
How to Make an Animated GIF in Photoshop
When it comes to GIFs, you’ve undoubtedly seen one at some point in your internet browsing history. Animated pictures can be included in this image file, giving the impression that the image is moving. Think of them as a cross between a photograph and a video.
What are the benefits of using animated GIFs in your marketing? They’re quick and easy to absorb, and they may have a significant emotional impact on your audience. If you want to get people to share your material, you need to make them feel something.
Read Also: 4 Photoshop Tricks to Make Design Process Faster
How to Create an Animated GIF in Photoshop
Here’s an example of an animated GIF you might make using this tutorial:
Step 1: Upload your images to Photoshop.
If you already have images created …
Set up a folder for each image you wish to use. Click File > Scripts > Load files into stack to import them into Photoshop.
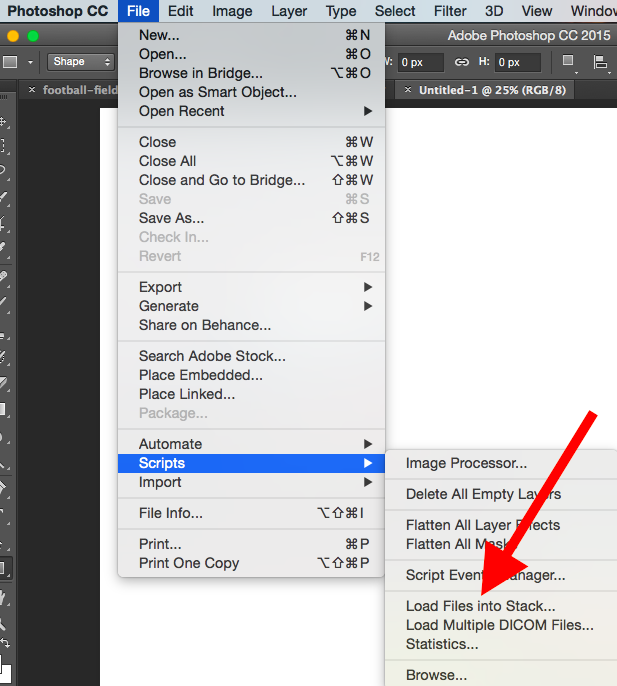
Then, pick the files you want to utilize in your GIF by clicking on the Browse button. After that, simply click the OK button.
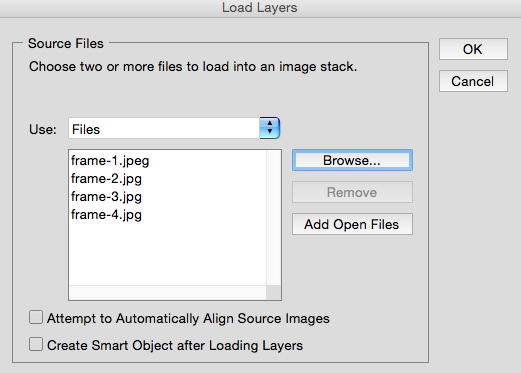
Each image you’ve picked will be given its own layer in Photoshop. Once you’ve completed the first step, you may go on to the second.
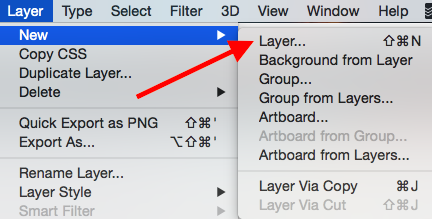
If you don’t already have the series of images created …
Create each frame of the animated GIF as a different Photoshop layer. To add a new layer, chose Layer > New > Layer.
When creating your GIF, be careful to give each layer a unique name so that you can readily identify them. In the Layer panel on the bottom right of your screen, double-click on the default layer name and put in the name you want to modify it to in the Name field. When you’re done, press the Enter key.
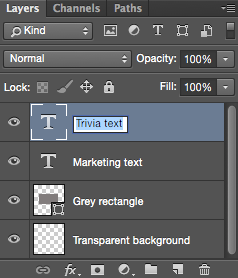
Having all of your layers in place and naming them is the next step.
Tip: Make sure the layers you wish to merge are visible in your GIF by turning on the visibility option (by clicking on the “eye” to the left of each layer name so only the eyes for the layers you want to merge are open). You’ll then need to use the keys Shift-Command-Option-E (Mac) or Shift-Command-ALT-E (PC) (Windows). After merging the content, Photoshop will generate an additional layer and rename it as well.
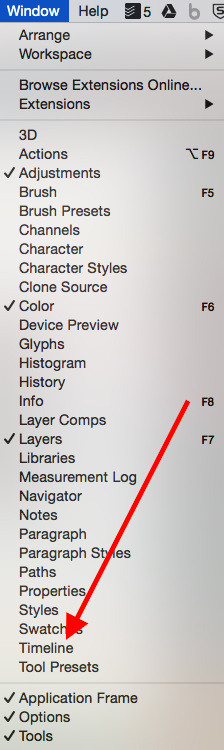
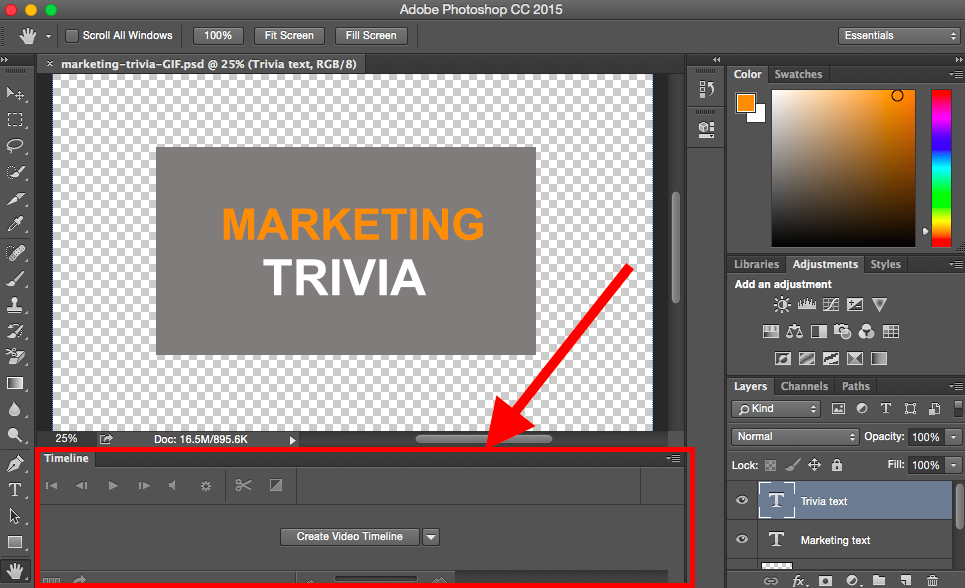
Step 2: Open up the Timeline window.
To access Timeline, pick Window > Timeline from the top menu bar. You may use the Timeline to transform your still image into a GIF by enabling and disabling different layers at different times.
The Timeline window will appear at the bottom of your screen. Here’s what it looks like:
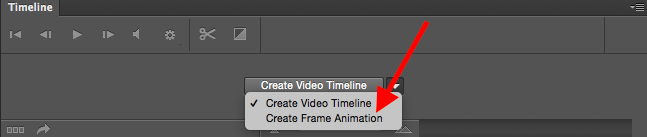
Step 3: In the Timeline window, click “Create Frame Animation.”
If it isn’t already chosen, choose it from the dropdown menu and then click it to bring up the frame animation choices. Otherwise, nothing will happen.
Now, your Timeline should look something like this:

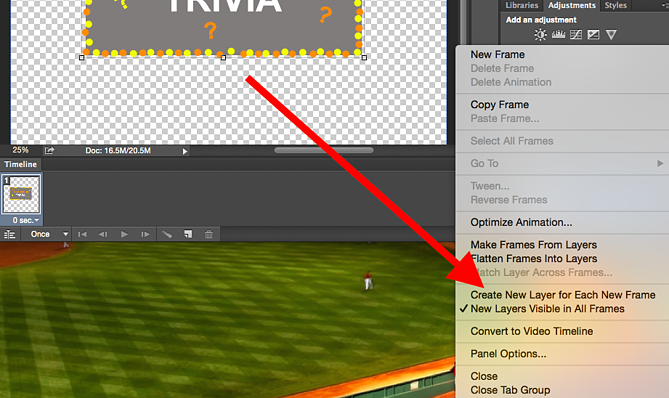
Step 4: Create a new layer for each new frame.
First, pick all your layers by heading to the top navigation menu and clicking Select > All Layers. To return to the Timeline screen, click the menu button to the right of the screen.
![]()
From the dropdown menu that appears, choose Create new layer for each new frame.
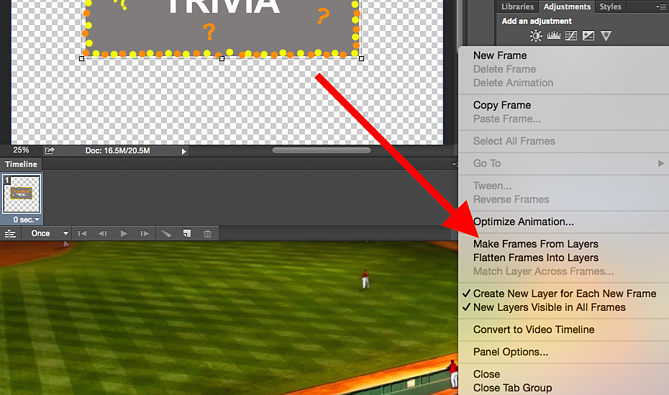
Step 5: Open the same menu icon on the right, and choose “Make Frames From Layers.”
This will make each layer a frame of your GIF.
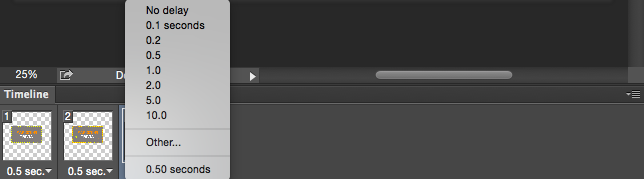
Step 6: Under each frame, select how long it should appear for before switching to the next frame.
To do this, click on the time icon to the right of each frame and select how long you’d like it to be visible. In our situation, we selected a frame rate of 0.5 seconds each frame.
Step 7: At the bottom of the toolbar, select how many times you’d like it to loop.
The default setting will be Once, but you may loop it as many times as you like, up to and including Infinite. You may specify a custom number of repeats by selecting Other from the drop-down menu.

Step 8: Preview your GIF by pressing the play icon.
![]()
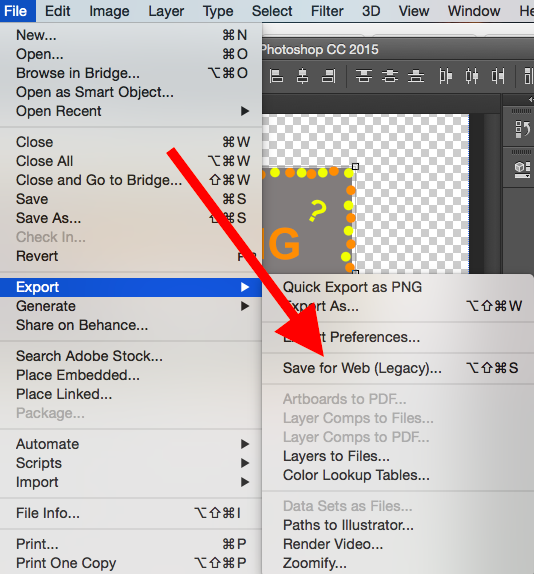
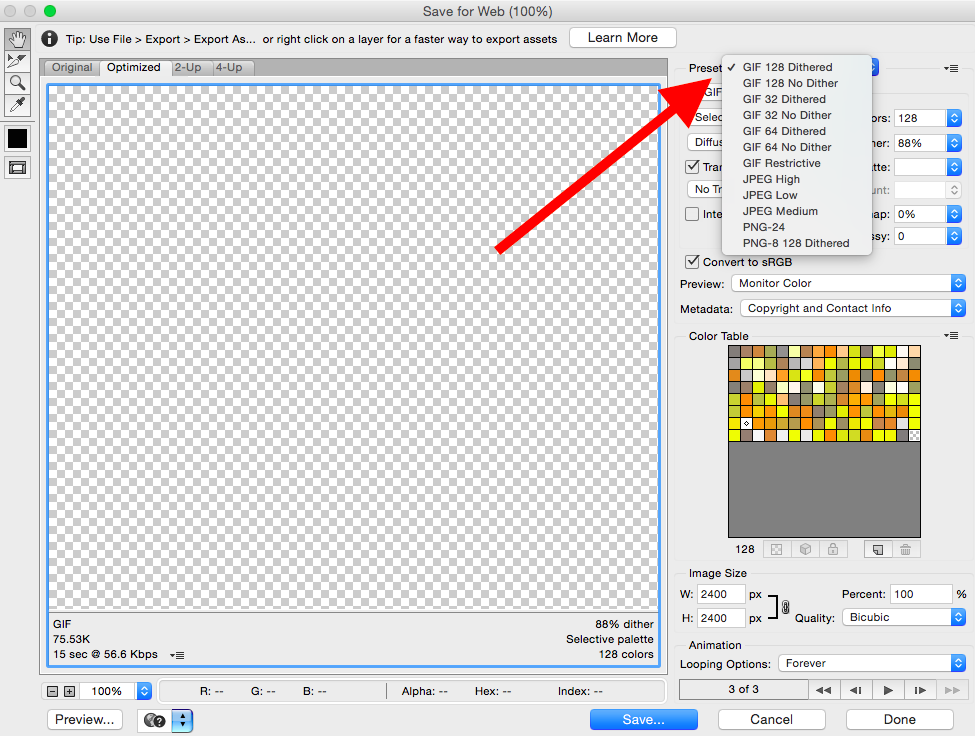
Step 9: Save and Export Your GIF
Are you happy with your GIF? Save it for online usage by heading to the top navigation bar and selecting File > Export > Save for Web from the drop-down menu (Legacy)…
Then, from the Preset dropdown menu, select the type of GIF file you’d like to save it as, and click Save. If you have a GIF that has gradients, you should use Dithered GIFs to avoid colour banding. If your image has a large number of solid colours, you may want to avoid using dither.
When comparing the GIF colours to the original JPEGs or PNGs, the number next to the GIF file specifies how large (and how precise) the GIF colours are. According to Adobe, increasing the degree of dithering results in the appearance of more colours and detail — but at the expense of increasing the file size.
To save the file to your computer, go to the bottom of the page and click Save. You’re now ready to submit this GIF to your website or use it in your marketing materials!
Video

Vampire Crawlers Coin Farming Guide

Forza Horizon 6 Performance: Why 60 FPS Is Still the Console Standard

Yoshi and the Mysterious Book (2026) – Full Completion Guide, Rewards & Secret Ending

How to Get Free Pets in Adopt Me: A Guide for Players

Roblox Username Generator – Create a Cool & Unique Username in Seconds
How to Get Free Pets in Adopt Me: A Guide for Players
Yoshi and the Mysterious Book (2026) – Full Completion Guide, Rewards & Secret Ending
Forza Horizon 6 Performance: Why 60 FPS Is Still the Console Standard


