Guide
How to Mount and Extract ISO Files on Windows

You can make use of the ISO file rather than purchasing a physical CD if you want the data from a disc (such as the disc used to install Windows), but you don’t want to spend money doing so. An ISO file is a “blueprint” of a disc, which means that it contains all of the data that you would find on the physical CD if you purchased it. The distribution of drivers, software, or operating systems to end-users is typically accomplished by manufacturers through the usage of ISO files.
You may mount ISO files with Microsoft Windows 10, which comes with a tool that allows you to do so built right in. This is in addition to the fact that it is possible to format an ISO file onto a CD. To put that into perspective, if you want to run the ISO, you won’t need to buy a disc to do so. In this post, we will demonstrate how to mount ISO images on Windows using PowerShell commands, in conjunction with a few utilities developed by third-party developers.
Read Also: How to Watch Paramount+ on a Windows, Mac, or Chromebook
How to Use File Explorer to Mount ISO Images
Mounting ISO files does not require the use of any additional software if you are running Windows 10 or Windows 11. Within File Explorer, you are able to accomplish whatever you require without the need for any other programmes, downloads, or extensions. How to do it:
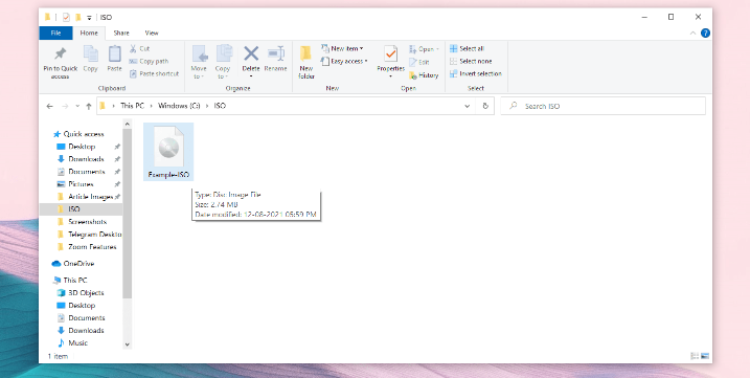
- Launch File Explorer and navigate to the directory where your ISO image is stored to access it.
- To mount the ISO file, double-click on its icon in the Finder.
- After it has been mounted, Windows will recognise it as a new drive and list it under the “This PC” heading. Windows now treats the ISO file as though it were a CD; therefore, you should use it the same way you would use a regular disc.
- When you are finished working with the ISO file, you may unmount it by right-clicking the drive, selecting the Eject option, and then removing the CD from the drive. After you have ejected the file, the Image will not be visible in the disc until you have mounted it again.
How to Mount ISO Images Using the Context Menu
Mounting ISO pictures in File Explorer is also possible by utilizing this procedure as an alternate option. To accomplish this, go as follows:
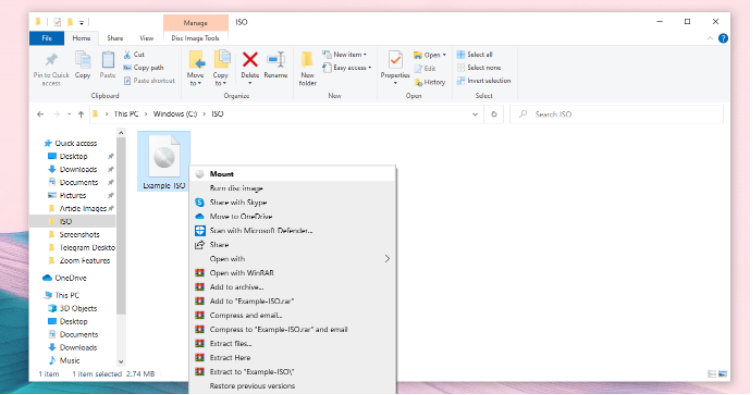
- Launch File Explorer and navigate to the directory where your ISO image is stored to access it.
- Mount is an option that you can choose from the context menu after right-clicking on the file.
- After it has been mounted, Windows will recognise it as a new drive and list it under the “This PC” heading.
- To unmount the ISO file, right-click the drive, and then select the Eject option from the context menu.
- After you are finished, the image will not be visible in the drive until you have remounted it.
How to Mount ISO Files From the Ribbon Menu
You can also use the menu shown on the ribbon to accomplish the same thing. The following actions need to be taken in order to mount an ISO file in File Explorer by using the ribbon menu:
- Launch File Explorer and navigate to the directory where your ISO image is stored to access it.
- Simply selecting the ISO file requires clicking on it.
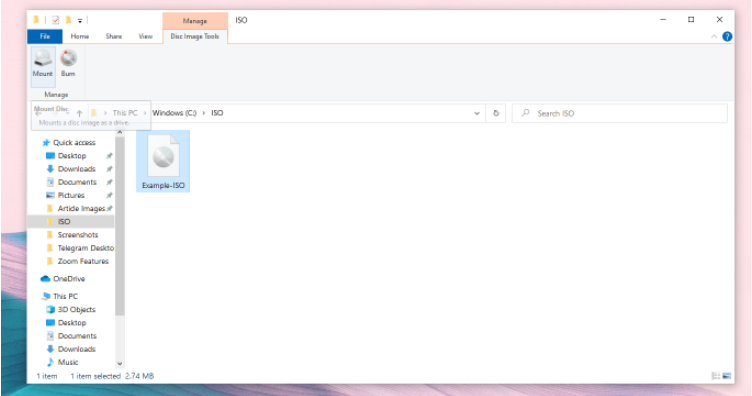
- To manage your files, choose the Manage option from the ribbon menu in File Explorer.
- To mount it, select that option from the drop-down menu.
- After it has been mounted, Windows will recognize it as a new drive and list it under the “This PC” heading.
- To unmount the ISO file, right-click the drive, and then select the Eject option from the context menu. After the process is finished, you won’t be able to view the Image in the drive unless you mount it again.
Mount ISO Files on Windows Effortlessly
When compared to earlier versions of Windows, mounting ISO files in Windows 10 or a later version is a comparatively simple process. This is due to the fact that Windows 10 includes a native tool within its File Explorer.
If you are operating Windows 10, you have the flexibility to mount ISO images using any of the ways described above. Despite the fact that the methods are distinct, the results will be the same.
Video

Vampire Crawlers Coin Farming Guide

Forza Horizon 6 Performance: Why 60 FPS Is Still the Console Standard

Yoshi and the Mysterious Book (2026) – Full Completion Guide, Rewards & Secret Ending

How to Get Free Pets in Adopt Me: A Guide for Players

Roblox Username Generator – Create a Cool & Unique Username in Seconds
How to Get Free Pets in Adopt Me: A Guide for Players
Yoshi and the Mysterious Book (2026) – Full Completion Guide, Rewards & Secret Ending
Forza Horizon 6 Performance: Why 60 FPS Is Still the Console Standard


