Gaming
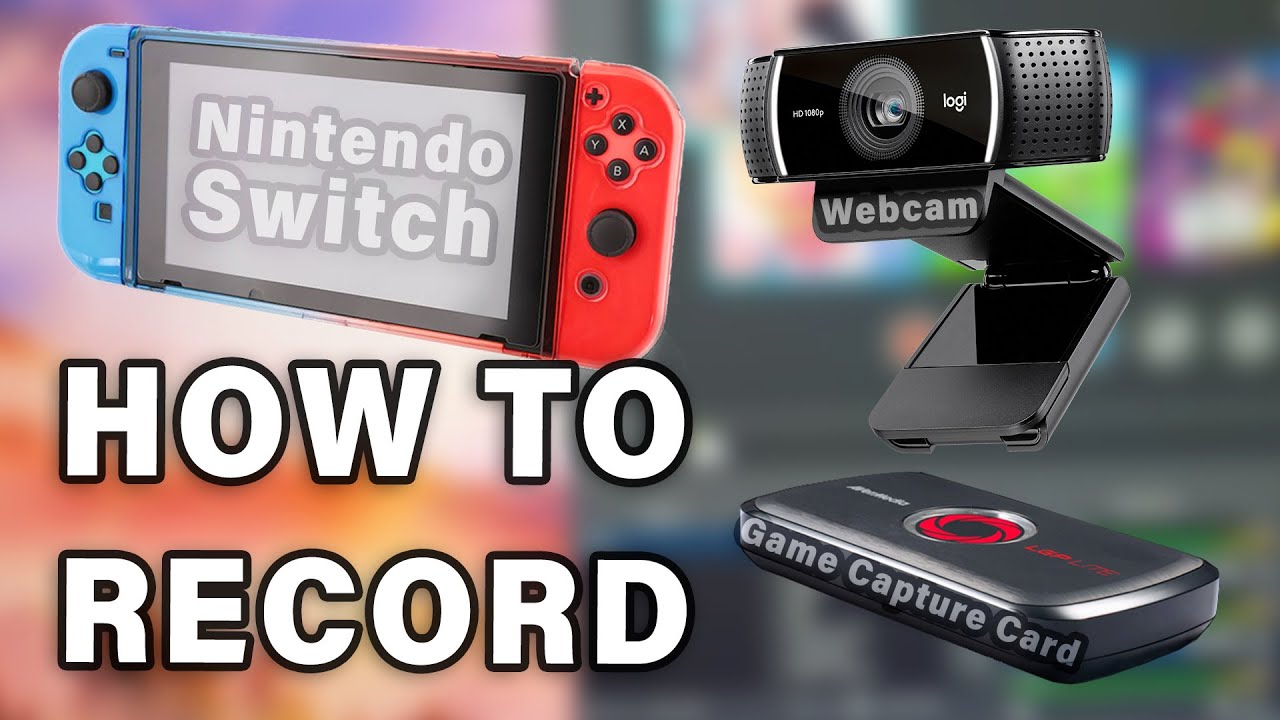
How to Record and Share Gameplay Clips on Nintendo Switch
The Nintendo Switch received a software update at the end of 2017 that brought it to version 4.0. This update brought with it the capability to record and share 30-second gameplay snippets of select titles on social media. Previously, users of the Nintendo Switch could only take snapshots and share them with the rest of the world. However, they now have the ability to highlight the best (and funniest) gameplay moments when playing Nintendo’s biggest titles. Only a select few of Nintendo’s first-party titles supported this feature at the time that the update was made available, but since then, the list has grown to include the vast majority of games available for the platform. The following is essential information regarding the Nintendo Switch’s video recording and uploading capabilities.
Read Also: How to Get Among Us on Nintendo Switch
How to Capture and Share Gameplay on Nintendo Switch
To begin, you will want to be familiar with the process of recording and sharing gameplay directly from your Nintendo Switch console.
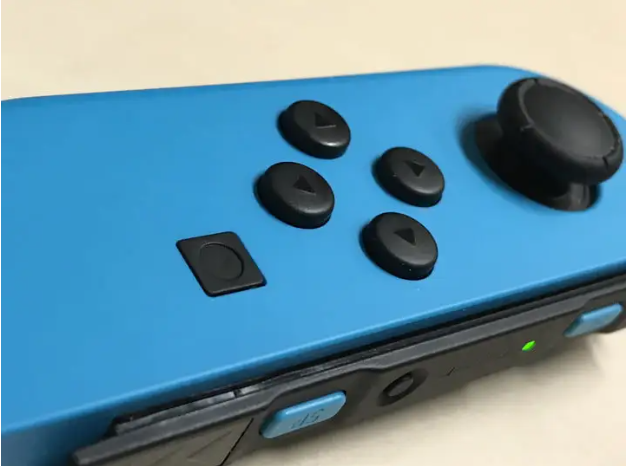
Step 1: When you are ready to record, press and hold the Switch’s Capture Button. This button is a square with an indented circle and can be found under the directional pad on the left Joy-Con or on the Switch Pro controller, opposite the home button. When you keep your finger on the button, an automatic recording of the previous 30 seconds will be created. You don’t have to keep your finger on the button for the full 30 seconds—just give it a good, solid press, and it should start working. A screenshot can be taken with a fast tap, whereas recording video requires a complete press.
Step 2: The game console will display a spinning icon to indicate that it is in the process of recording a clip, and it will also display the word “save” in the upper-left hand corner of the screen. When the process of recording a video is finished, a fresh notification appears alongside an icon that looks like a play button, indicating that the footage was successfully stored.
Step 3: The Nintendo Switch will automatically record the most recent thirty seconds of gameplay; however, if you just started a game and want to record a clip, it will record any length of time up to thirty seconds.
Step 4: After you have finished recording a clip, simply go to the home screen and select to your Album there.
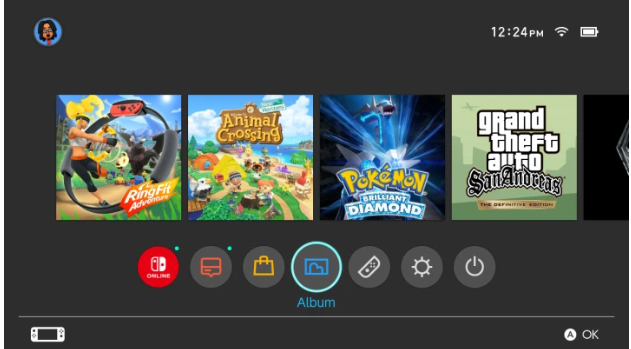
Step 5: You’ll see that your movies and screenshots have been grouped together automatically; nevertheless, you’ll be able to identify the clips by the “30s” notation that appears in the lower-right corner of the thumbnail. Pressing the Y button and selecting Videos Only from the dropdown menu will allow you to narrow the focus of the library to only show your videos.
Step 6: Simply opening the file will start the playback automatically.
Step 7: Keep in mind that not everything that occurs within the 30-second film is significant. While you are watching the clip, pressing A will shorten it if you wish it to be shorter. You will then be able to move the bar backwards through the clip, frame by frame, until you reach the beginning of the segment of the video that you do not wish to keep. This will now serve as the beginning of the video from this point on. Keep pressing A and repeating the previous step from the clip’s conclusion until you are satisfied with how the clip comes to a close. Don’t be concerned; even after you cut it down, the original clip will still be kept in its entirety.
Step 8: Utilizing the edit option will also allow you to take screenshots from within the video itself. You can take a screenshot by pressing A at the point in the video where you want it to appear, and then pressing the Save as Screenshot button. This is a good approach to retrospectively secure a screenshot that you may have missed within the last thirty seconds of the game’s play time.
Step 9: The ability to share your recordings with other people is one of the most exciting aspects of the video recording process. You will have no trouble uploading your films to social media platforms such as Facebook and Twitter. To accomplish this, simply navigate to the desired clip, choose option A, and then click the Post button. Once you’ve connected your Twitter and Facebook profiles to your account, you’ll be able to begin uploading and sharing your entertaining clips with the people who follow you on those services. You even have the option of typing in a commentary to accompany the clip.
How to Record with a Capture Card
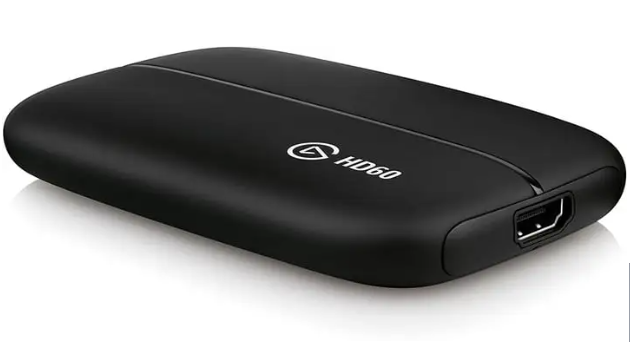
There are further choices accessible to you in the event that the built-in recording system of the Switch gives you trouble or you find a game that is incompatible with it. Utilizing a capture card is your best bet for successfully archiving and discussing your gameplay on Nintendo Switch. These specialized tools each include a third-party hardware system that, when combined with the computer you’re working on, can record footage of your screen. It also has the ability to circumvent time constraints and prevent the recording of gameplay. Users are free to record for as long as they like or as much as their hard drive memory will allow them to store. We are of the opinion that capture cards provide the highest possible quality when compared to any other means of recording gaming.
When compared to merely sharing content from the Switch itself, the procedure of using a capture card is far more difficult and time-consuming. Having said that, the inclusion of all of its supplementary features makes the effort spent on it worthwhile. The Elgato Game Capture HD60 S is our top pick, but there are many other options that are all very good.
Video

Roblox Username Generator – Create a Cool & Unique Username in Seconds

Grow a Garden Recipes in Roblox: Guide to Cook (Donuts, Sushi, Pie, Pizza & More!)

Job Opportunities in Dubai – 2026

Mr Bit at the SBC Awards Europe 2025: The Bulgarian Brand Setting New Standards in the European Gaming Industry

Dennis Rodman Net Worth 2026 – Everything You Need to Know

Bloxburg Neighborhood Codes 2026
Grow a Garden Recipes in Roblox: Guide to Cook (Donuts, Sushi, Pie, Pizza & More!)
Job Opportunities in Dubai – 2026
Dennis Rodman Net Worth 2026 – Everything You Need to Know


