Guide
How to Remove a Section Break in Word
Section breaks may be used to split your document into parts, and you can add formatting to individual blocks of text using the Microsoft Word formatting tool. For example, you may have different margin sizes in separate parts, different headers and footers in different sections, and so on. Section breaks are distinct from page breaks, which shift the material that follows a page break to the beginning of the following page after the page break.
To learn how to remove a section break in Microsoft Word on Windows and Mac Office applications, follow the steps outlined in the following paragraphs. When you remove a section break, the content before and after the break is combined into a single section that inherits the formatting of the part that was previously deleted.
Find out how to remove section breaks from a Word document in this tutorial.
Read Also: How to Show the Ruler in Word
How to Remove Section and Page Breaks in Word on Windows 10
To begin, open the Word document that contains the section and/or page breaks that you wish to delete and click on the Edit button. Then, after the document is open, you’ll need to figure out where exactly the section or page break is located in the document itself. To do so, choose the “Show/Hide” icon from the “Paragraph” group of the “Home” tab’s “Paragraph” group and click it.
![]()
You’ll be able to view the breaks now that they’ve been enabled. After that, pick the section or page break by clicking and dragging your cursor over it. When you click on the break, it will be highlighted in grey.
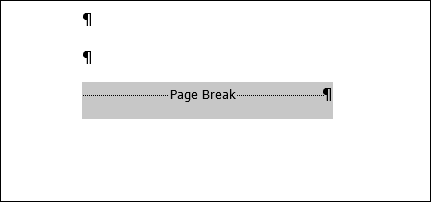
Once it has been selected, use the Backspace key. The section or page break will be deleted at this point.
How to Remove Section and Page Breaks in Word on Mac
Open the Word document on your Mac that has the section and/or page breaks that you’d like to remove from it. You’ll need to be able to pinpoint the exact placement of the breaks, so choose the “Show/Hide” icon from the “Home” tab’s ribbon to display or hide the breaks.
![]()
There will now be a noticeable section and page split between each paragraph. To pick the break that you want to erase, move your cursor over it and drag it to the right. The breaks that have been selected are marked in blue.
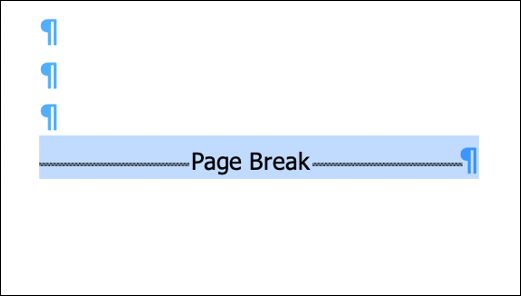
Following that, just hit the Delete key on your keyboard. The specified break will be eliminated at this point.
The process of deleting section and page breaks in Microsoft Word is as simple as that. The proper use of these breaks is a critical component in properly formatting Word documents. Once you’ve mastered the fundamentals of Microsoft Word, you’ll be a pro in no time at all.
Video
FAQs
Why can’t I delete section break in Word?
By default, page breaks between sections are not visible. Turn on Show/Hide if you wish to quickly remove a section break from a document. To remove a break, first select the Home tab, then Show/Hide in the Paragraph group, and then click Delete.
How do you remove a page break that won’t delete?
Start by opening your Word document. Navigate to Home > Show/Hide to display any non-printable hidden markings in the document, such as page breaks, spaces, and non-breaking spaces, by clicking the Show/Hide button. Double-click on a page break to select it, and then hit Delete to erase it.

Vampire Crawlers Coin Farming Guide

Forza Horizon 6 Performance: Why 60 FPS Is Still the Console Standard

Yoshi and the Mysterious Book (2026) – Full Completion Guide, Rewards & Secret Ending

How to Get Free Pets in Adopt Me: A Guide for Players

Roblox Username Generator – Create a Cool & Unique Username in Seconds
How to Get Free Pets in Adopt Me: A Guide for Players

Grow a Garden Recipes in Roblox: Guide to Cook (Donuts, Sushi, Pie, Pizza & More!)
Roblox Username Generator – Create a Cool & Unique Username in Seconds
Yoshi and the Mysterious Book (2026) – Full Completion Guide, Rewards & Secret Ending


