Guide
How to Remove Watermark in Photoshop

We wish to establish our perspective at the outset of this material…. Rather than teaching you how to steal photographs of others by removing watermarks, the purpose of sharing this technique for removing watermarks in Photoshop is to inform you on how to reuse images that have already been watermarked and that you own.
It is possible that you will want to utilize the same shot again for other purposes rather than scheduling a new photo shoot. However, you have used Photoshop to add watermarks to the photographs you have created. Alternatively, you might employ the vanishing watermark technique, which makes use of the amazing Photoshop toolset.
Read Also How to Resize a Layer in Photoshop
Step by Step Tutorial – How to Remove Watermark in Photoshop
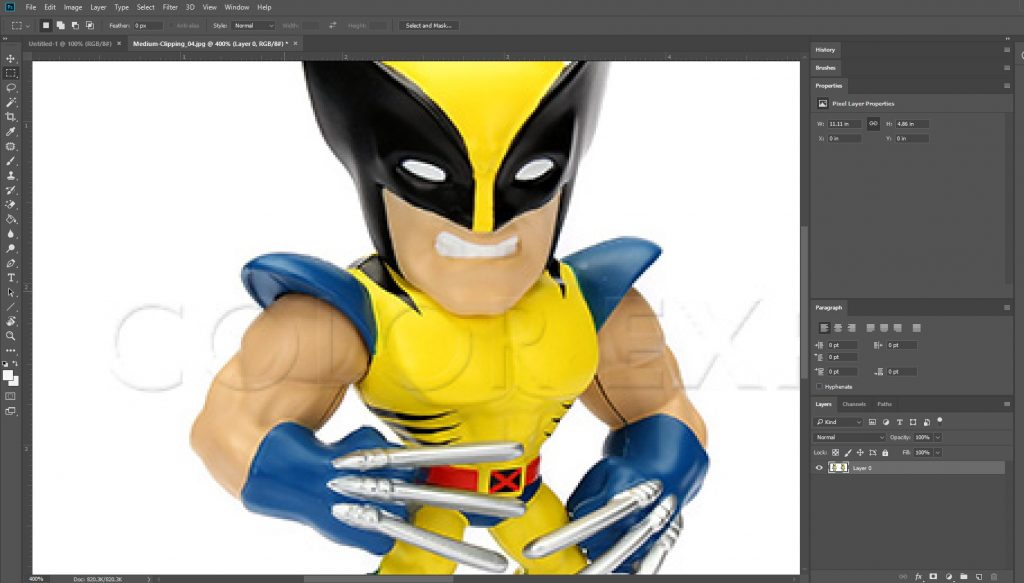
Do you want to know how to remove a watermark from a photo in Photoshop? To make it easier for you to grasp how to remove a watermark from a photo in Photoshop, we will attempt to demonstrate a real-time work flow step by step. It is our intention to direct the experiment in Photoshop CC in order to obtain the finest possible Photoshopping output.
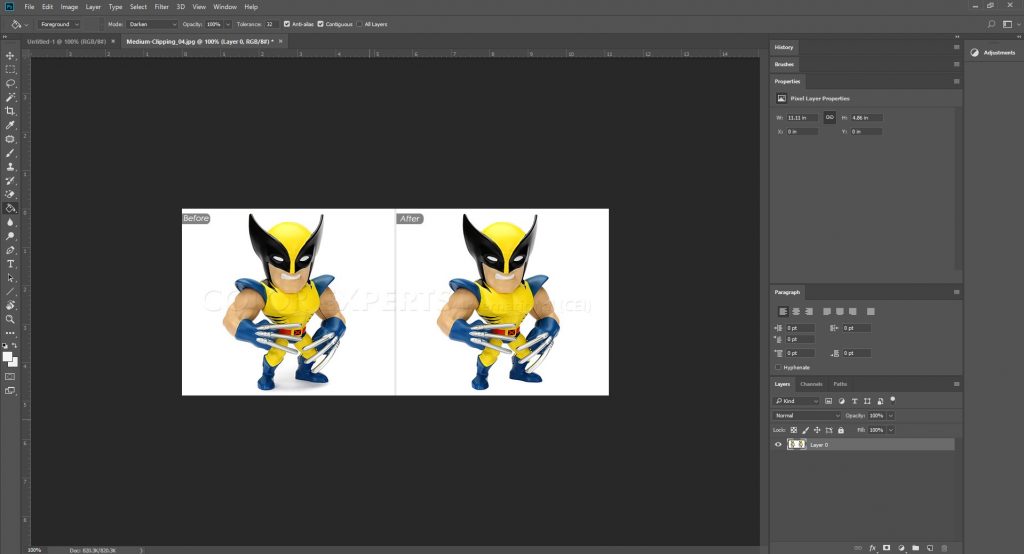
1. To remove a watermark from an image, open it in Photoshop and click on the Remove Watermark button. Take a look at the image below. We will also be removing the before-and-after marks as well as the watermark from the image.
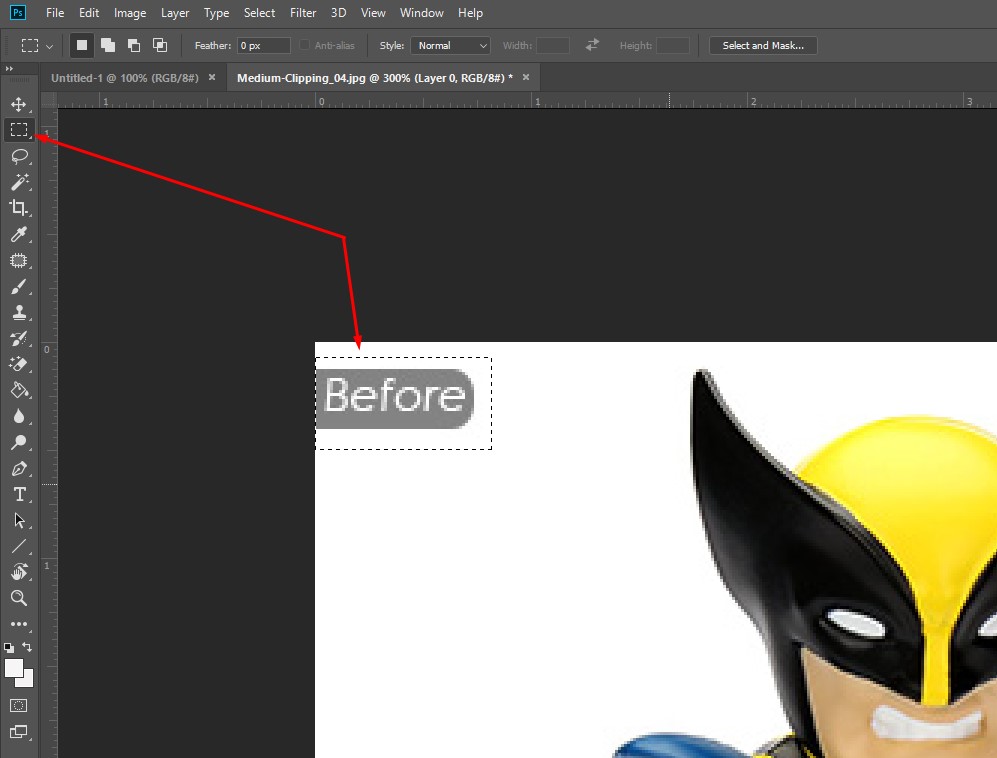
2. To erase the before-and-after marks, use a selection tool on your initial try to eliminate them. In this case, we’ll use the Rectangular marquee tool to pick the markings that were there before.
3. Select the Fill option by pressing the right mouse button on the selection and then clicking on it. You can accomplish this by selecting Edit from the top bar and then selecting the Fill option from the dropdown menu.
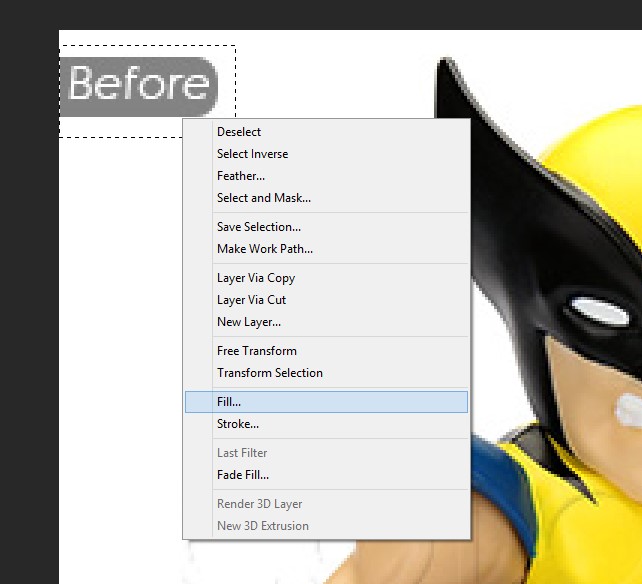
4. After you select the Fill option, you will be presented with another dialogue box. Select the Content-Aware checkbox and then press the OK button. Now you can see the magic.

So, what exactly happened here? The Content-Aware option is the sibling of the Clone Stamp tool, and it allows us to manually take a sample and fill the region we want to erase or hide with the colour we want to hide. The same procedure is taking place here on its own accord automatically. Content-Aware is sampling the same hue from its surroundings and using it to fill the space. As a result, we get a clean area or whatever result we were hoping for.
After that, we’ll remove the watermark by following the same procedure as with the previous step.
5. Enlarge the image to the point where it becomes distorted.
6. Use the Lasso tool instead of the Rectangular marquee tool in this section since the edges of the watermarks are not as straight as they were in the case of the before-and-after marks that we erased previously.
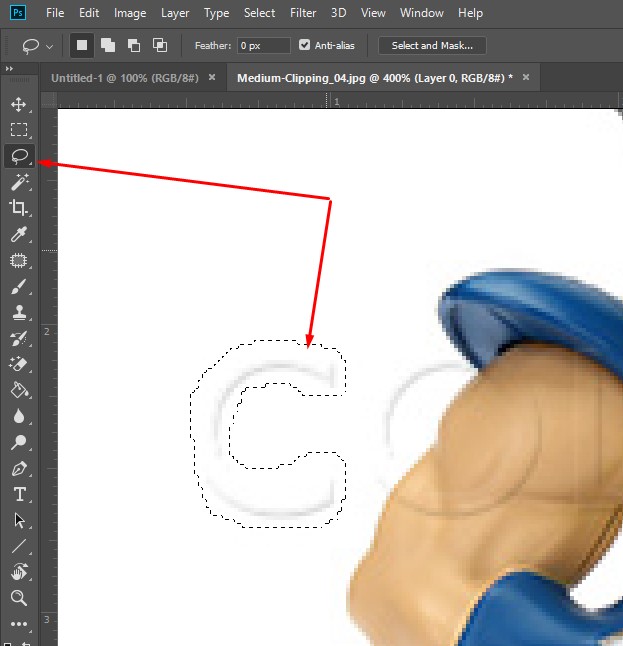
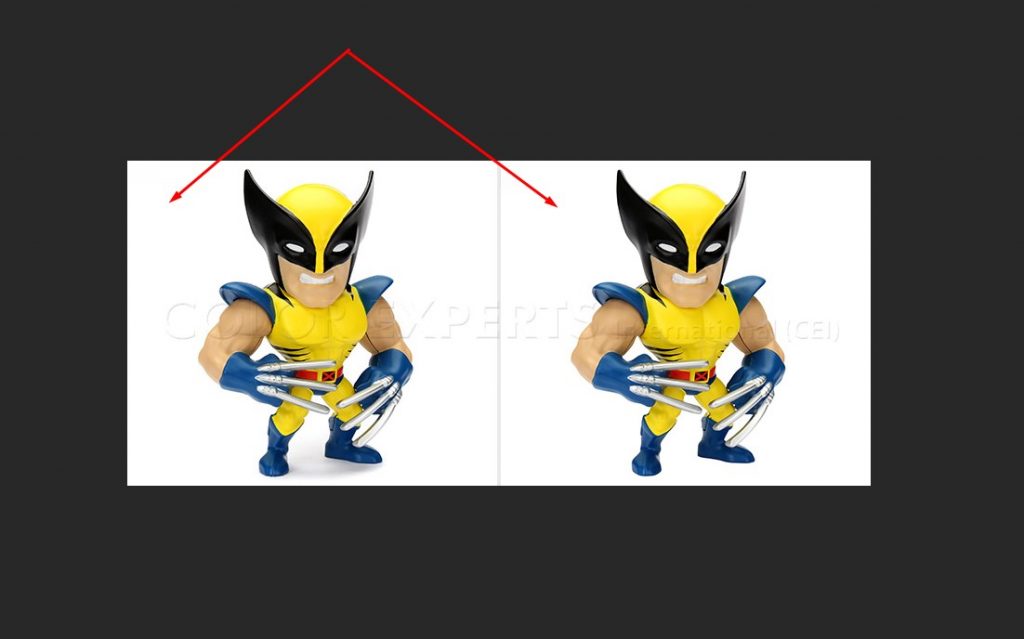
7. Finally, using the Lasso tool, select each area of the watermark one at a time, and then use the Content-Aware function to color-fill the selected region with a colour that matches the targeted region. Working carefully and meticulously will allow you to attain the best possible results as quickly as feasible. Please take a look at the image below, which depicts the outcome of our efforts to successfully remove the watermark.

Video

Vampire Crawlers Coin Farming Guide

Forza Horizon 6 Performance: Why 60 FPS Is Still the Console Standard

Yoshi and the Mysterious Book (2026) – Full Completion Guide, Rewards & Secret Ending

How to Get Free Pets in Adopt Me: A Guide for Players

Roblox Username Generator – Create a Cool & Unique Username in Seconds
How to Get Free Pets in Adopt Me: A Guide for Players
Yoshi and the Mysterious Book (2026) – Full Completion Guide, Rewards & Secret Ending
Vampire Crawlers Coin Farming Guide


