Guide
How to Set Up a VPN server on Windows 10

A virtual private network (VPN) is one of the most frequent means of accessing files and resources (such as applications, intranet websites, and printers) from a remote location and over the internet. It works by establishing an encrypted connection between the remote location and the resource. Typically, businesses utilize virtual private networks (VPNs) to extend their private networks, allowing employees to access resources across a public network as if they were physically connected to the company’s network.
Microsoft Windows 10, like previous versions of the operating system, includes a “Incoming Connection” feature that allows you to set up a virtual private network (VPN) server to connect remotely to your home network in order to access your computer’s files and peripherals, as well as other computers on the network. In this tutorial, you will learn how to set up a VPN server on Windows 10 without the need for any additional software on either the Home or Pro editions of the operating system.
Read Also: How to Get into BIOS in Windows 10
How to Set up a VPN server on Windows 10
Once you have configured DDNS to utilize a domain name rather than a complex IP address and routed port 1723, you are ready to proceed with setting up a VPN server on your computer or device.
To set up a virtual private network (VPN) server on Windows 10, follow these steps:
1. Windows 10’s Control Panel may be accessed through the Start menu.
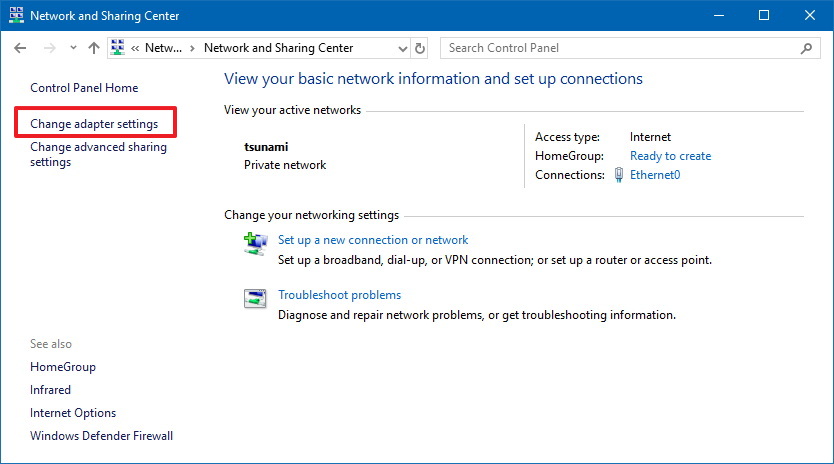
2. To access the Network and Sharing Center, choose it from the drop-down menu.
3. Change adapter settings may be accessed using the left-hand navigation pane.
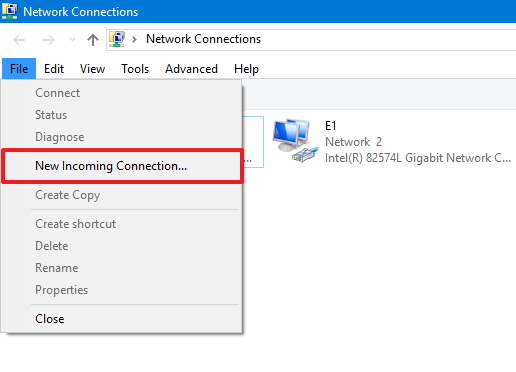
4. When you are in “Network Connections,” use the Alt key on your keyboard to bring up the File menu, and then pick the option for “New Incoming Connection.”
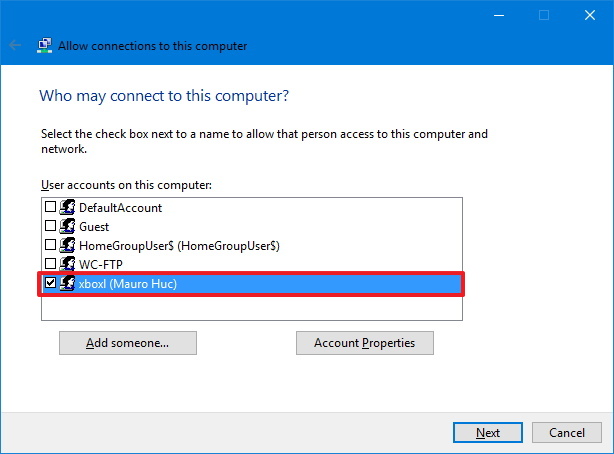
5. Select the users who will have VPN access to your computer from the drop-down menu and click the Next button.
Bright flower
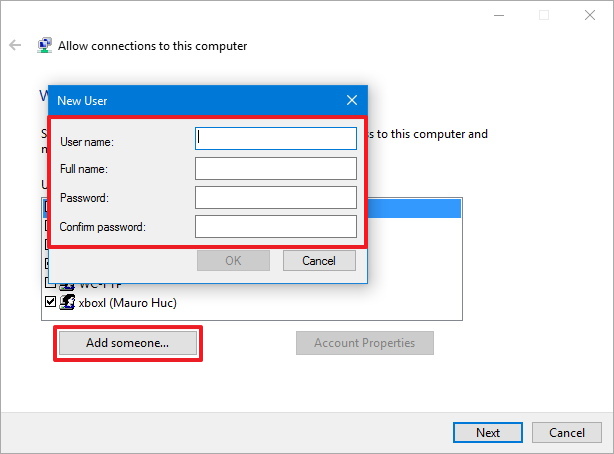
Alternatively, you may click the Add someone option to add a new VPN user to your existing network:
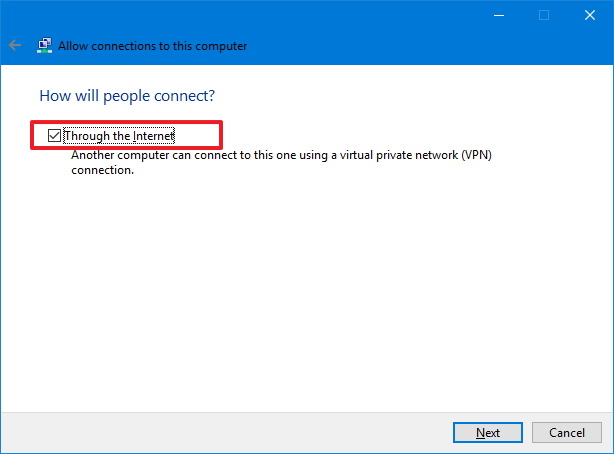
6. Select the Through the Internet option from the drop-down menu.
7. To proceed, use the Next button.
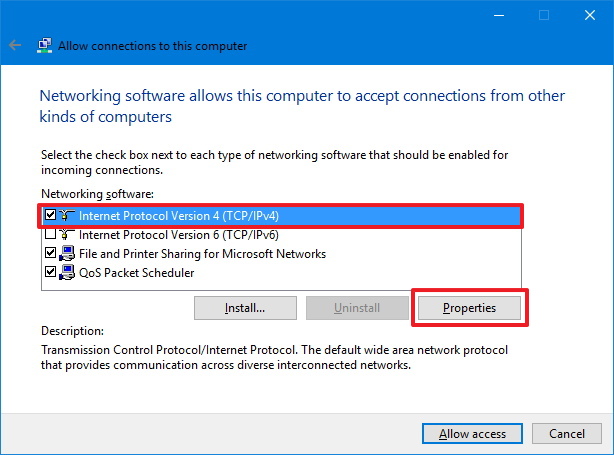
8. Choose the Internet Protocol Version 4 (TCP/IPv4) option from the drop-down menu.
9. Select the Properties option from the drop-down menu.
Bright flower
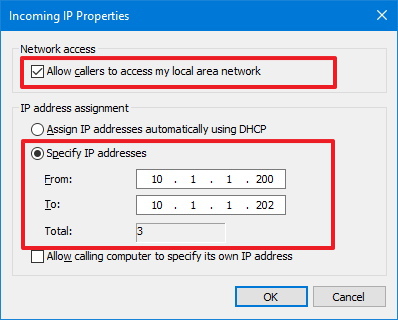
10. Check the Allow callers to connect to my local area network box on the caller ID screen.
11. Under the “IP address assignment” section, select the Specify IP addresses option and enter the maximum number of customers that are permitted to connect to the VPN over the connection.
Bright flower
12. To proceed, press the OK button.
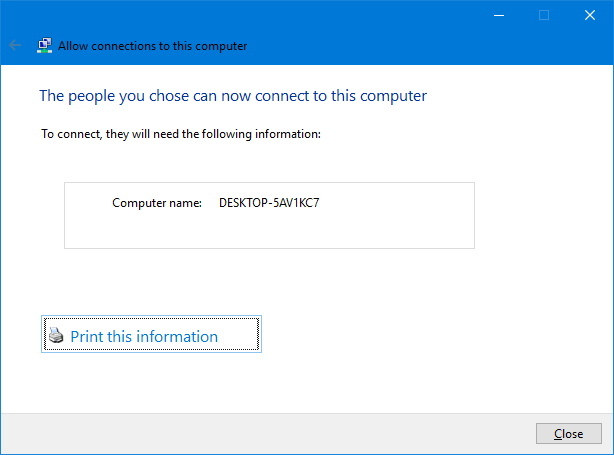
13. To provide access, click the Allow access button.
14. To close the window, use the Close button.
Bright flower
15. Once you have completed the procedures, the VPN server will be built; however, it will not function until the firewall has been configured to accept connections.
How to Allow VPN connections through firewall
While enabling the Incoming Connection feature on Windows 10 should automatically open the relevant Windows Firewall ports, you should double-check that the firewall is properly setup before moving further with the configuration.
The following procedures should be followed in order to enable VPN connections over the firewall on Windows 10:
1. Start up Windows 10 by clicking on the Start button.
2. Allow a programme to run across Windows Firewall in the search bar and select the first result to launch the experience.
3. Change the settings by clicking on the Change settings button.
4. Scroll down and check that Routing and Remote Access are permitted on both Private and Public networks.
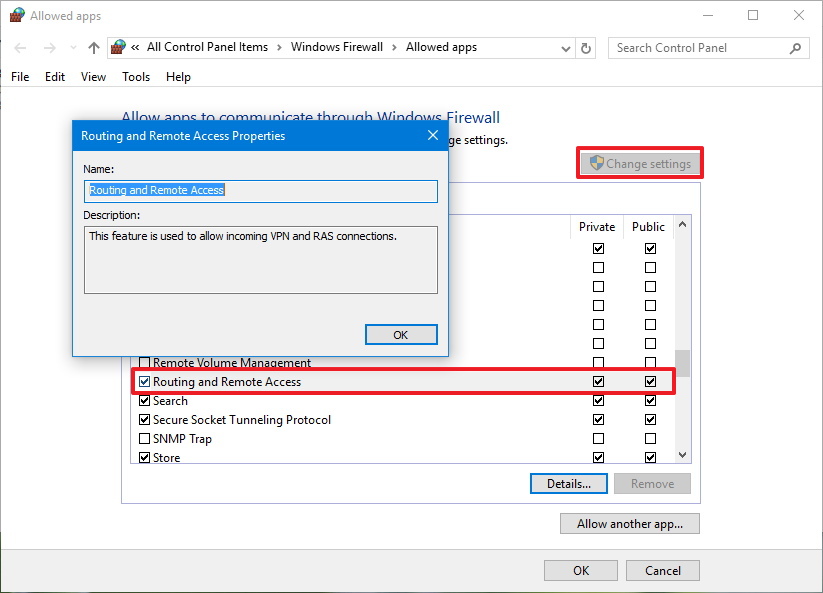
5. To proceed, press the OK button.
After you have completed the instructions, the Windows 10 VPN server will be able to accept connections from other devices that are connected remotely.
Video

Vampire Crawlers Coin Farming Guide

Forza Horizon 6 Performance: Why 60 FPS Is Still the Console Standard

Yoshi and the Mysterious Book (2026) – Full Completion Guide, Rewards & Secret Ending

How to Get Free Pets in Adopt Me: A Guide for Players

Roblox Username Generator – Create a Cool & Unique Username in Seconds
How to Get Free Pets in Adopt Me: A Guide for Players
Yoshi and the Mysterious Book (2026) – Full Completion Guide, Rewards & Secret Ending
Forza Horizon 6 Performance: Why 60 FPS Is Still the Console Standard


