Guide
How To Connect Canon Printer To Laptop
In case you’re seeking for answers on how to connect Canon printers to laptops, we’ve got you covered with our recommendations. By the time you have finished reading the blog, you will know exactly what has to be done, whether it is wireless or wired.
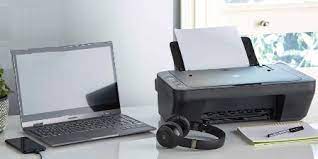
In the event that you want a printer for business work or a presentation for high school, knowing how to connect a Canon printer to a laptop through a USB connection will allow you to complete your tasks swiftly and efficiently. Once the connection has been created, you will be able to print your documents, spreadsheets, presentations, or anything else that you need to print.
Read Also: How To Find hp Laptop Serial Number
How To Install Canon Printer To Laptop?
Despite the fact that Canon produces a wide range of printers, like the Canon Pixma mx490, Canon g3000, Canon mx922, Canon mx472, Canon LBP 2900, and others, the installation process to connect a printer to a laptop is quite identical across the board. Those interested in gaining an understanding of how to connect a Canon printer to a laptop should refer to the procedures listed below.
So let’s have a look at the procedure for installing a Canon printer on a laptop.
Step 1: Starting with the printer turned off and connected through a USB cable, go to the next step. Connect one end of the USB cable to a USB port on the printer and the other end to a USB port on the computer using the included USB cable.
Step 2: Insert the installation CD for the Canon printer into the optical drive of your laptop or computer.
Step 3: Third, select “Cancel” from the New Hardware Wizard’s next question when it appears.
Step 4: After the CD has completed loading, follow the on-screen instructions to complete the installation. To access the CD’s content if it is not immediately launched by the CD, start the procedure by clicking “Start”, going to Computer, and double-clicking on the CD/DVD icon to open the CD’s content. Then double-click on “Setup.exe” to begin the installation process. Allow for the installation of the drivers.
Step 5: To complete, only turn on your printer when you see the Printer Connection screen. Continue to follow the directions.
Step 6: When the wizard is finished, click on the ‘Exit’ button.
The procedure shown above demonstrates how to connect a Canon printer to a laptop by installing the necessary device drivers. However, if you do not have an installation CD for whatever reason, you may download the drivers from the Canon website’s official page.
How To Connect Canon Printer To Laptop With USB Cable?
Now let’s connect a Canon printer to the laptop using a USB connection in order to establish communication between the two devices.
Step 1: Turning off the Canon printer is the first step.
Step 2: Connect the USB cable to the printer and the other end to the laptop, as shown in step one of this procedure.
Step 3: Activate the printer in the third step.
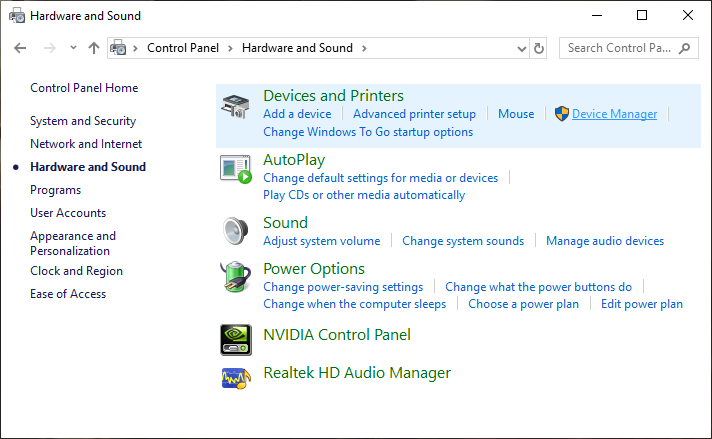
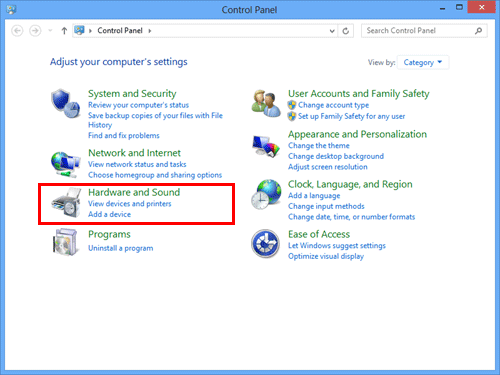
Step 4: Next, click on the Windows ‘Start’ button and select ‘Control Panel’ from the drop-down menu. Select ‘Hardware and Sound’ > ‘Devices and Printers’ > ‘Add a Printer’ > ‘Local Printer’ from the drop-down menu. For the needed connection, select the printer port from the drop-down menu.
Step 5: In the driver window, locate the ‘Canon’ printer option and choose the appropriate model. For example, if you are seeking for information on how to connect a Canon Pixma MX490 to a laptop, you would type the name into the search box.
Step 6: After giving the printer a name, click on the ‘Next’ button.
Step 7: Select ‘Next’ when you have decided whether or not you wish to share the printer with other devices.
Step 8: Determine whether or not you want to make your printer the default printer. Select ‘Next’ from the drop-down menu.
And now it’s finished!
How To Connect Canon Printer To Laptop Wirelessly ? (Using Wi-Fi)
When you have a model that has the same feature as the one you want to set up, you can use WPS or Wi-Fi protected setup.
Remember that the access point must have a physical WPS push button in order to function properly. In addition, the network must be protected by the WPA security protocol.
Step 1: Step one is to turn on the printer. Press and hold the Wi-Fi button on the printer’s top until the lamp flashes once and then release the button.
Step 2: The blue light next to the WiFi button starts flashing as well. After that, go to the access point and push the WPS button within two minutes after completing the procedure.
As soon as a connection is established between the laptop and the printer, the flashing of the Wi-Fi bulbs and the power will be turned off. This demonstrates how to connect a Canon printer to a laptop over a wireless network connection.
Video

Vampire Crawlers Coin Farming Guide

Forza Horizon 6 Performance: Why 60 FPS Is Still the Console Standard

Yoshi and the Mysterious Book (2026) – Full Completion Guide, Rewards & Secret Ending

How to Get Free Pets in Adopt Me: A Guide for Players

Roblox Username Generator – Create a Cool & Unique Username in Seconds
How to Get Free Pets in Adopt Me: A Guide for Players
Yoshi and the Mysterious Book (2026) – Full Completion Guide, Rewards & Secret Ending
Vampire Crawlers Coin Farming Guide


