Guide
How to Create Polls in Zoom Meetings

Using polls to collect feedback from participants during your Zoom meetings is an excellent method of gathering information. Using Zoom, you can design polls with many choices or single answers and even observe the results in real time. Learn how to create polls for Zoom meetings by following the steps below.
It’s important to note that there are a handful of conditions before we can begin building polls for Zoom sessions. First and foremost, you (the host) must be a licensed user. To begin with, you can only use your Personal Meeting ID to generate polls for scheduled meetings or instant meetings when you are present (PMI).
Please only use your PMI for personal meetings, such as gatherings with friends and family members, due to security concerns. Thank you for your cooperation.
Read Also: How to Update Zoom
How to Enable Polling for Zoom Meetings
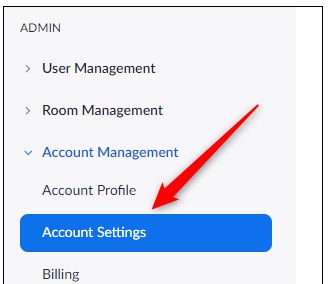
Before you can create a poll, you must first enable the polling feature in your account. Sign in to Zoom using your online browser and then select “Account Settings” from the “Account Management” section of the “Admin” group on the left-hand pane of the screen.
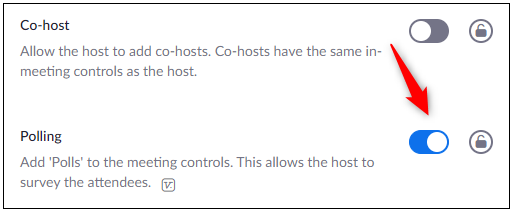
You will now be in the “Meeting” section of the menu. Continue to scroll down until you reach the “Polling” option, which is approximately halfway down the screen. Toggle the slider to the right to make polling a default setting.
It’s time to start creating your poll now that Polling has been enabled.
How to Create a Poll
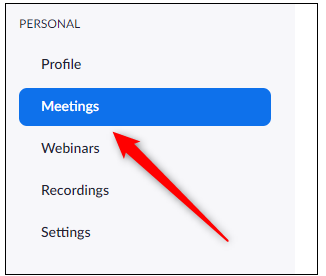
In the left-hand pane of the Zoom web portal, click on the “Meetings” tab to begin a meeting.
You can now either schedule a new Zoom meeting or choose an existing meeting from your meeting list that has already been planned. We’ll go ahead and set the time and date for our scheduled meeting.
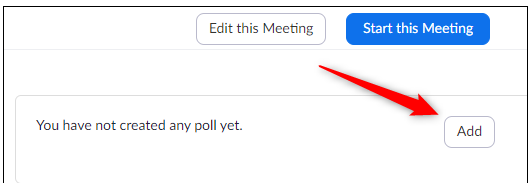
You’ll notice a box with text saying that you haven’t made a poll at the bottom of the page if you scroll down to the bottom of the page. “Add” should be selected.
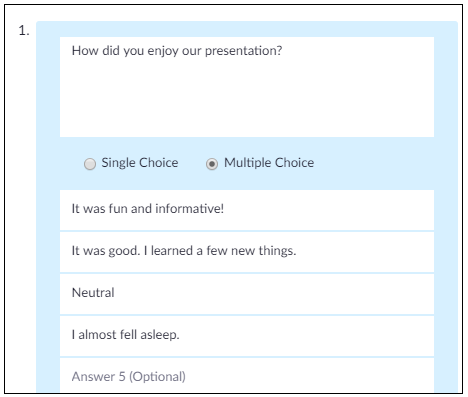
When you click “Add A Poll,” the “Add A Poll” window appears. The first step is to give your poll a name and pick whether or not the responses will be kept anonymous or public. When you look at the results, you’ll just notice that a “Guest” answered the question, rather than the real user who submitted the question.
After that, type your question (within 255 characters), choose whether you want a single or multiple-choice answer, and then type the options that are available. Each question can have a maximum of ten possible responses.
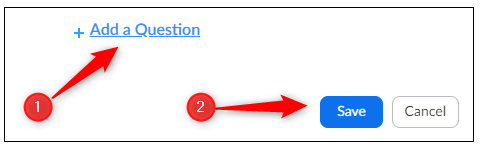
Adding additional questions to the poll is as simple as selecting “Add A Question” at the bottom of the window and following the steps outlined above. Then click on “Save” after you’re finished.
As soon as you’ve completed your poll, you may share it with everyone participating in the Zoom meeting.
How to Start Your Poll During the Zoom Meeting
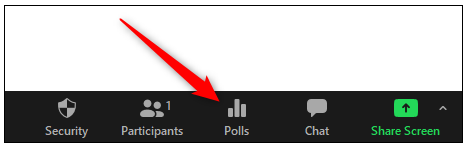
Once the Zoom meeting has begun and you’re ready to run the poll, go to the bottom of the meeting window and select “Polls” from the drop-down menu.
The “Polls” window will display on the screen. Select “Launch Polling” after you have reviewed the questions and responses.
During the polling process, you will be able to observe the results in real time. Following the conclusion of voting, select “End Polling.”
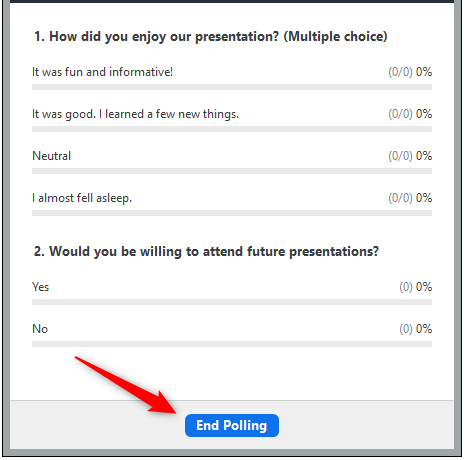
The results of the poll will now be shown. You have the option of either sharing the poll’s findings with the participants or relaunching the survey.
If you want to go back and look at the results later, you can do so by selecting the meeting from the “Previous Meetings” tab in the web portal, selecting “Poll Report” from the drop-down menu next to the “Report type” option, and generating a report from there. After that, you can see the outcomes of previous meetings.
Video

Vampire Crawlers Coin Farming Guide

Forza Horizon 6 Performance: Why 60 FPS Is Still the Console Standard

Yoshi and the Mysterious Book (2026) – Full Completion Guide, Rewards & Secret Ending

How to Get Free Pets in Adopt Me: A Guide for Players

Roblox Username Generator – Create a Cool & Unique Username in Seconds
How to Get Free Pets in Adopt Me: A Guide for Players
Yoshi and the Mysterious Book (2026) – Full Completion Guide, Rewards & Secret Ending
Vampire Crawlers Coin Farming Guide


