Guide
How to Host on Twitch

Did you know that you may host a Twitch channel for another individual on your own personal channel if they let it? The implication of this is that you will be able to effectively broadcast their stream on your channel for a specified amount of time. This is a fantastic method to support other Twitch users in growing their followings, as well as providing visitors to your channel with something to watch while you’re not available to stream.
Hosting on Twitch is less difficult than it appears. You only need to type a command into the chat room of your channel, or set up an auto host list, to do this. Learn how to complete either task using the desktop website on your Mac or PC by following the steps below.
Read Also: How to Save a VOD from Twitch
How to Host on Twitch
When it comes to hosting channels on Twitch, there are two options available: manually and automatically. Manually hosting a website is as follows:
1. To access your Twitch profile image, log into your account and click on it in the upper-right corner of the screen.
2. Select “Channel” from the drop-down menu that appears.
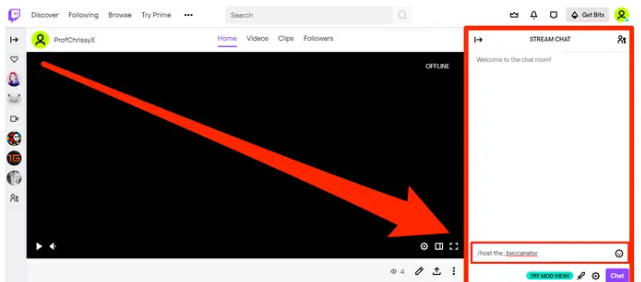
3. Once you’ve logged into your Twitch channel, you’ll see a chat section on the right-hand side of the screen. To send a message, choose the area that reads “Send a message.”
4. Type the command “/host USERNAME” without the quotation marks — except that instead of USERNAME, type the username of the channel you wish to host instead. Consider my sister’s account, the beccanator. If I wanted to host her channel, then I would type: the beccanator.
/host the beccanator (the beccanator is a fictitious character)
Send your message when you’ve made sure you’ve written the command correctly.
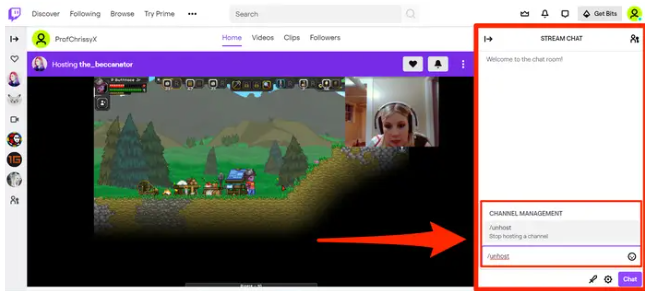
5. Alternatively, you may write “/unhost” into the chat window without the quotation marks to terminate your hosting of another Twitch user’s channel.
You should keep in mind that you are only allowed to issue three host instructions each hour. You’ll have to wait until the hour has passed before you can add any more host commands if you start hosting a channel, then unhost that channel and start hosting another channel inside the same hour.
Also available is the option of creating a “automatic host list,” which will allow your channel to automatically begin hosting others anytime you aren’t online. To accomplish this, follow these steps:
1. Start by re-launching Twitch and logging in, followed by a click on your profile image in the top-right corner of the screen.
2. Select “Settings” from the drop-down menu that appears.
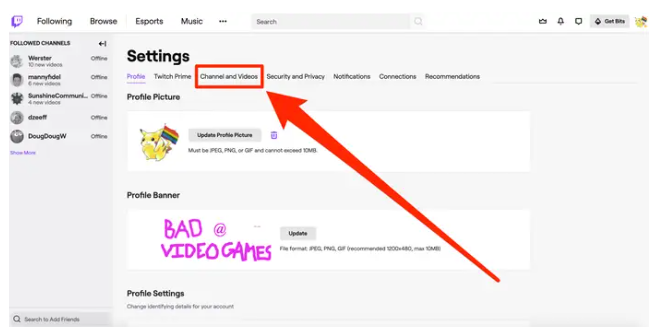
3. Select the “Channels and Videos” option from the drop-down menu at the top of your settings page.
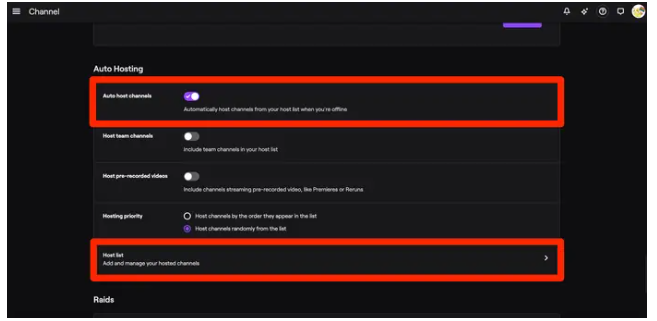
4. Continue to scroll down the website until you reach the part titled “Auto Hosting.” To do this, click the “Auto host channels” option to the right until it flips over.
5. After you’ve enabled auto hosting, go down to the bottom of the page and select “Host list.”
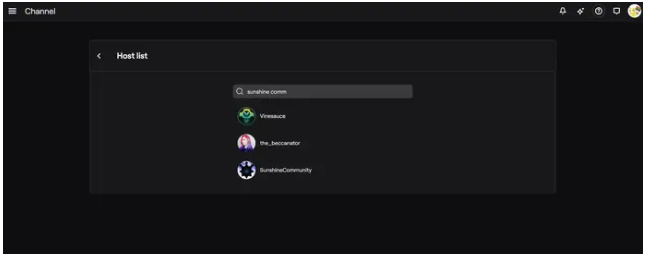
6. The following step will take you to a website where you may add channels to your auto host list. When you find the channels you want, search for them and then click “Add” when they show on the screen. There is no limit to the number of channels that can be added to this list.
Video

Vampire Crawlers Coin Farming Guide

Forza Horizon 6 Performance: Why 60 FPS Is Still the Console Standard

Yoshi and the Mysterious Book (2026) – Full Completion Guide, Rewards & Secret Ending

How to Get Free Pets in Adopt Me: A Guide for Players

Roblox Username Generator – Create a Cool & Unique Username in Seconds
How to Get Free Pets in Adopt Me: A Guide for Players
Yoshi and the Mysterious Book (2026) – Full Completion Guide, Rewards & Secret Ending
Vampire Crawlers Coin Farming Guide


