Guide
How to Save a VOD from Twitch

If you do not have a Partner account, your previous broadcast will be kept for 14 days. Amazon Prime subscribers and Amazon Partners will be able to access their data for a period of 60 days. Make sure that Past Broadcasts are archived in order to preserve these video on demand (VOD) files available for future use. In order to save them permanently, you’ll need to highlight them.
Read Also: How To Make Clips In Twitch
Saving Past Broadcasts
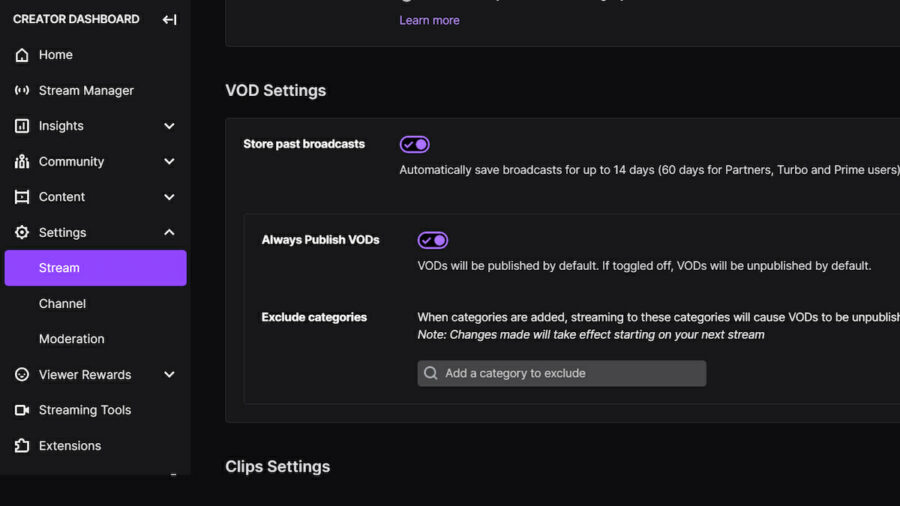
You will be able to store previous broadcasts if you go to your Creator Dashboard, click on Settings, and then select Stream. Visitors to your Twitch Channel will be able to see VODs under the Past Broadcasts section when they visit your channel. The Always Publish VODs option governs whether or not Past Broadcasts are visible immediately after a stream, or whether or not they must be manually authorized before they can be made available to others. The default setting is always publish. Prior to being archived indefinitely, previously recorded Broadcasts will need to be turned into Highlights in order to be preserved.
How To Make A Stream Into A Highlight
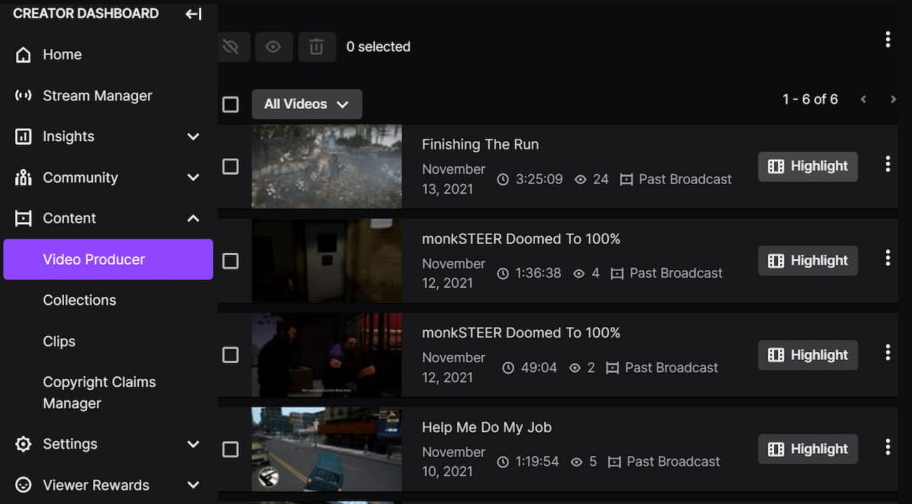
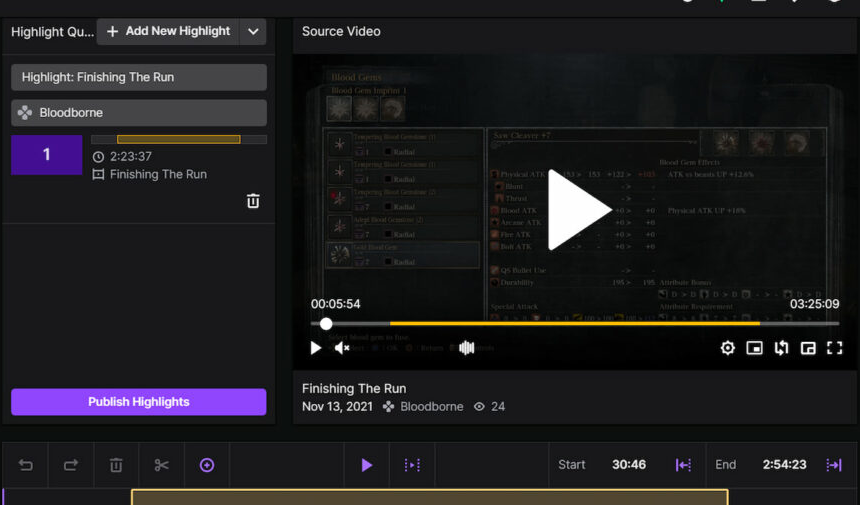
Before you can access all of your past broadcasts and highlights, you must first navigate to Content and then Video Producer on the Creator Dashboard. By selecting Highlight, you will be taken to an editor where you may abbreviate the previous stream before posting the VOD in its final form forever. Whenever you are watching your channel, you can see highlights on the Videos page, below Past Broadcasts in a section titled Recent Highlights and Uploads, or by using the Filter option while in the Video tab and selecting Highlights. Collections may be created in order to provide a more orderly method for categorizing items.
How To Make Collections
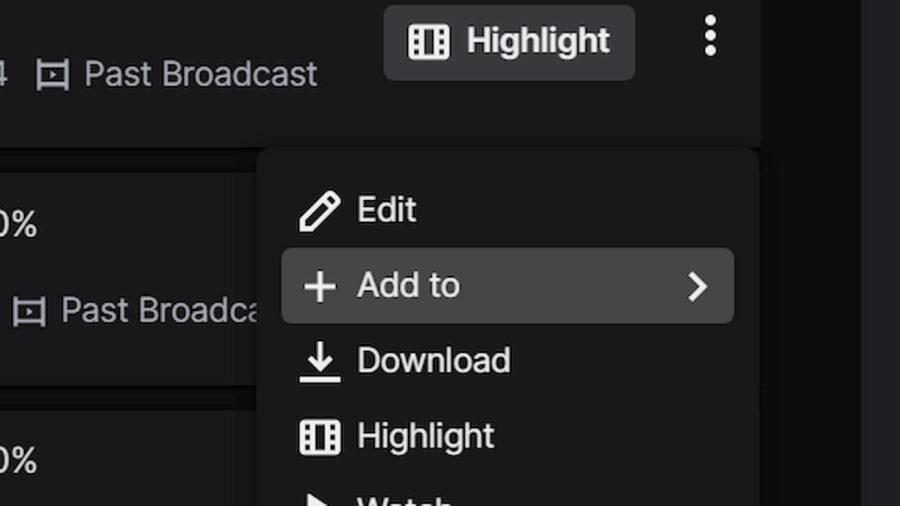
While only the highlights of any VOD collection will be permanently kept, any VOD that has been saved in a Collection will still expire after 14 days for Affiliates and other broadcasters, or 60 days for Partners or Amazon Prime Members. Go to the Creator Dashboard, then Content, and finally the Video Producer in order to save a VOD or Highlight to a Collection. By clicking on the three dots next to the selected VOD, you will be able to see more alternatives for that VOD. By selecting Add To, you will be presented with the opportunity to create new collections or to include the VOD in an existing collection. This allows viewers to go to a certain playlist of video on demand (VOD) titles that may be sorted by specific play throughs, months, or any other way you like.
Video
FAQs
Does Twitch save VODs automatically?
For Twitch Partners, Turbo, and Prime subscribers, your VODs will be stored for a period of 60 days after the end of the stream. To verify if VODs are enabled on your channel, you may access your Creator Dashboard by clicking on your profile image in the upper right corner of the Twitch homepage’s main page.
Why does Twitch not save my streams?
Modify your storing preferences.
Go to the Creator Dashboard by clicking here. Look for the Home button in the top-left corner of the page when you arrive. Select Stream from the drop-down menu under Settings. Scroll down until you reach the VOD Settings area, where you may enable the option to save previously broadcasts.

Vampire Crawlers Coin Farming Guide

Forza Horizon 6 Performance: Why 60 FPS Is Still the Console Standard

Yoshi and the Mysterious Book (2026) – Full Completion Guide, Rewards & Secret Ending

How to Get Free Pets in Adopt Me: A Guide for Players

Roblox Username Generator – Create a Cool & Unique Username in Seconds
How to Get Free Pets in Adopt Me: A Guide for Players
Yoshi and the Mysterious Book (2026) – Full Completion Guide, Rewards & Secret Ending
Vampire Crawlers Coin Farming Guide


